Manual Steps in RapidDeploy
How to create manual steps in RapidDeploy
Pipeline steps can be inserted between project jobs in the deployment pipeline. You can insert as many pipeline steps as you need between the project jobs.
The pieline steps you see will depend on the installed plugins. Here we consider the main ‘out-of-the-box’ pipeline steps.
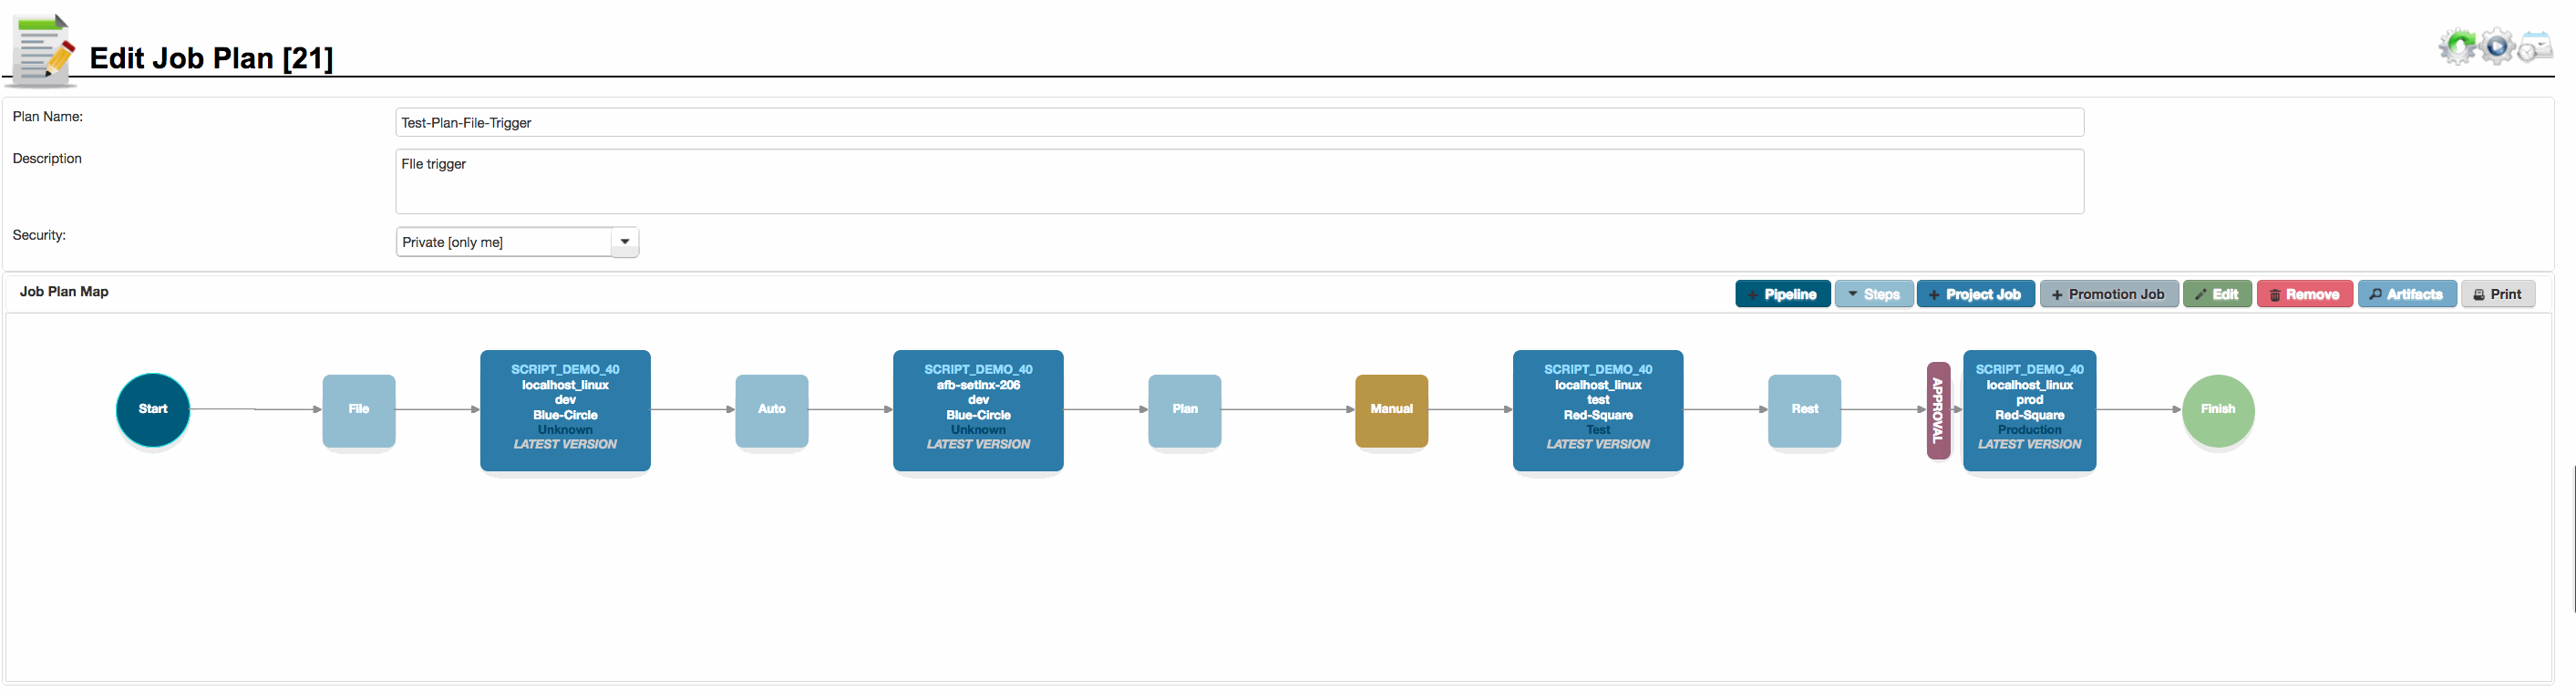
Job Plan Map Canvas
The Job Plan map canvas, showing both automatic and manual steps in a pipeline.
1. In the Job Plan
1.1 The Pipeline Manual Step
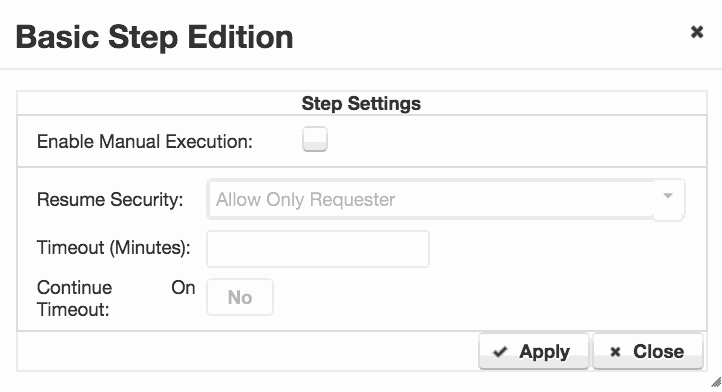
You can configure a pipeline step to be manual, by selecting ‘Steps’ -> ‘Add New Step’ from the Pipeline task bar. Available steps depends on installed plugins. Choose the manual step type from the drop-down list.
The dialog is shown to the right. Click on ‘Enable Manual Execution‘ to turn this step into a manual step.
You can choose from the drop list of options who can resume the job, which can either be the requester, or the requester and a member of the group chosen from the droplist.
You can allow the manual step to remain active forever (until resumed) or timeout after a certain time and either continue to the next job, or end the pipeline.
Please note that the manual step is not the same as an approval gate (see later)
Click to enlarge
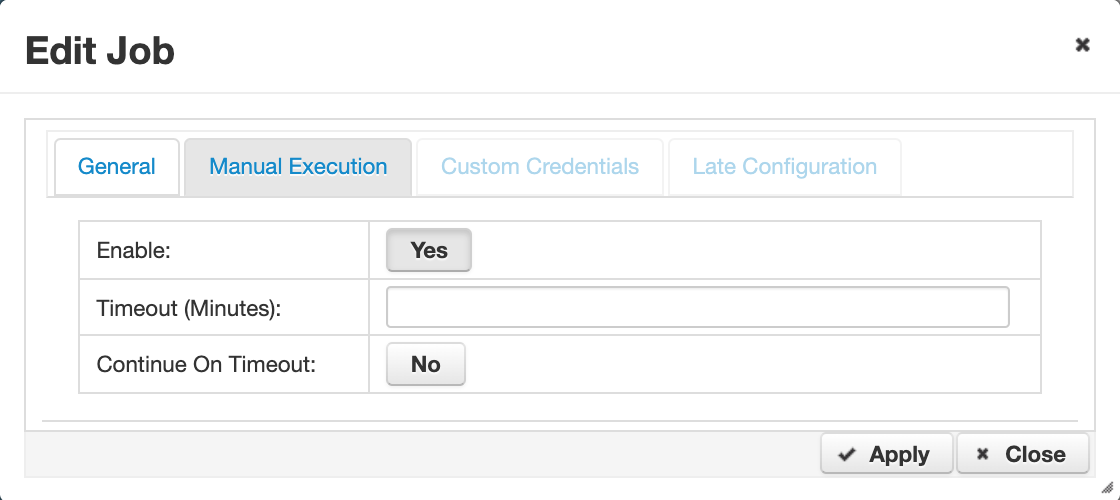
1.2 The Project Job Manual Step
From the job plan canvas, select and double click the project job where you want to add a manual step before the job runs. Then select the ‘Manual Execution’ tab. Click the ‘Enable’ field ‘No’ button, which toggles to ‘Yes’ to enable a manual step on this job. Fill in the other values. The ‘Timeout (minutes)’ field specifies the time to wait before either automatically continuing or aborting. Leave the field blank to wait forever for manual intervention.
When the manual step is activated during the running job plan, an email will be sent to the person who requested the job.
Click to enlarge
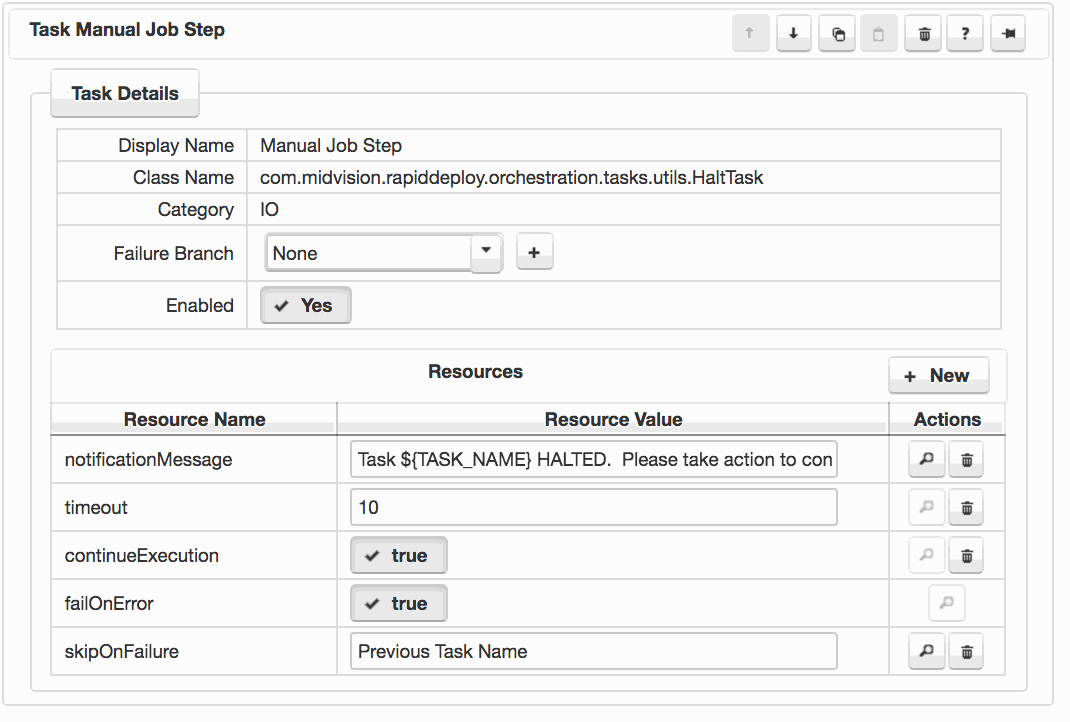
2. Project Orchestration Model Manual Step
On the ‘Project’ -> ‘Orchestration’ tab, a new task can be added by highlighting the task immediately before the required manual step, and clicking ‘Add Task‘.
You can add a ‘Manual Job Step‘ anywhere in your Project Orchestration Model.
You can find this task under ‘IO‘ Category when selecting from the task palette.
When the Orchestration execution on the target encounters the manual step task, an email is sent to registered recipients with the notificationMessage. The job is halted on the target until the timeout time is reached, or the deployment is resumed from the RapidDeploy running jobs panel.
If the timeout is reached, the job either contiues or fails, depending on the continueExecution setting.
3. Resuming a Manual Step
You can resume the task flow in the ‘Running Jobs‘ panel by selecting the ‘Play‘ button next to the halted job.
You can see an example of this for a Project Orchestration Model Manual Step in the picture .
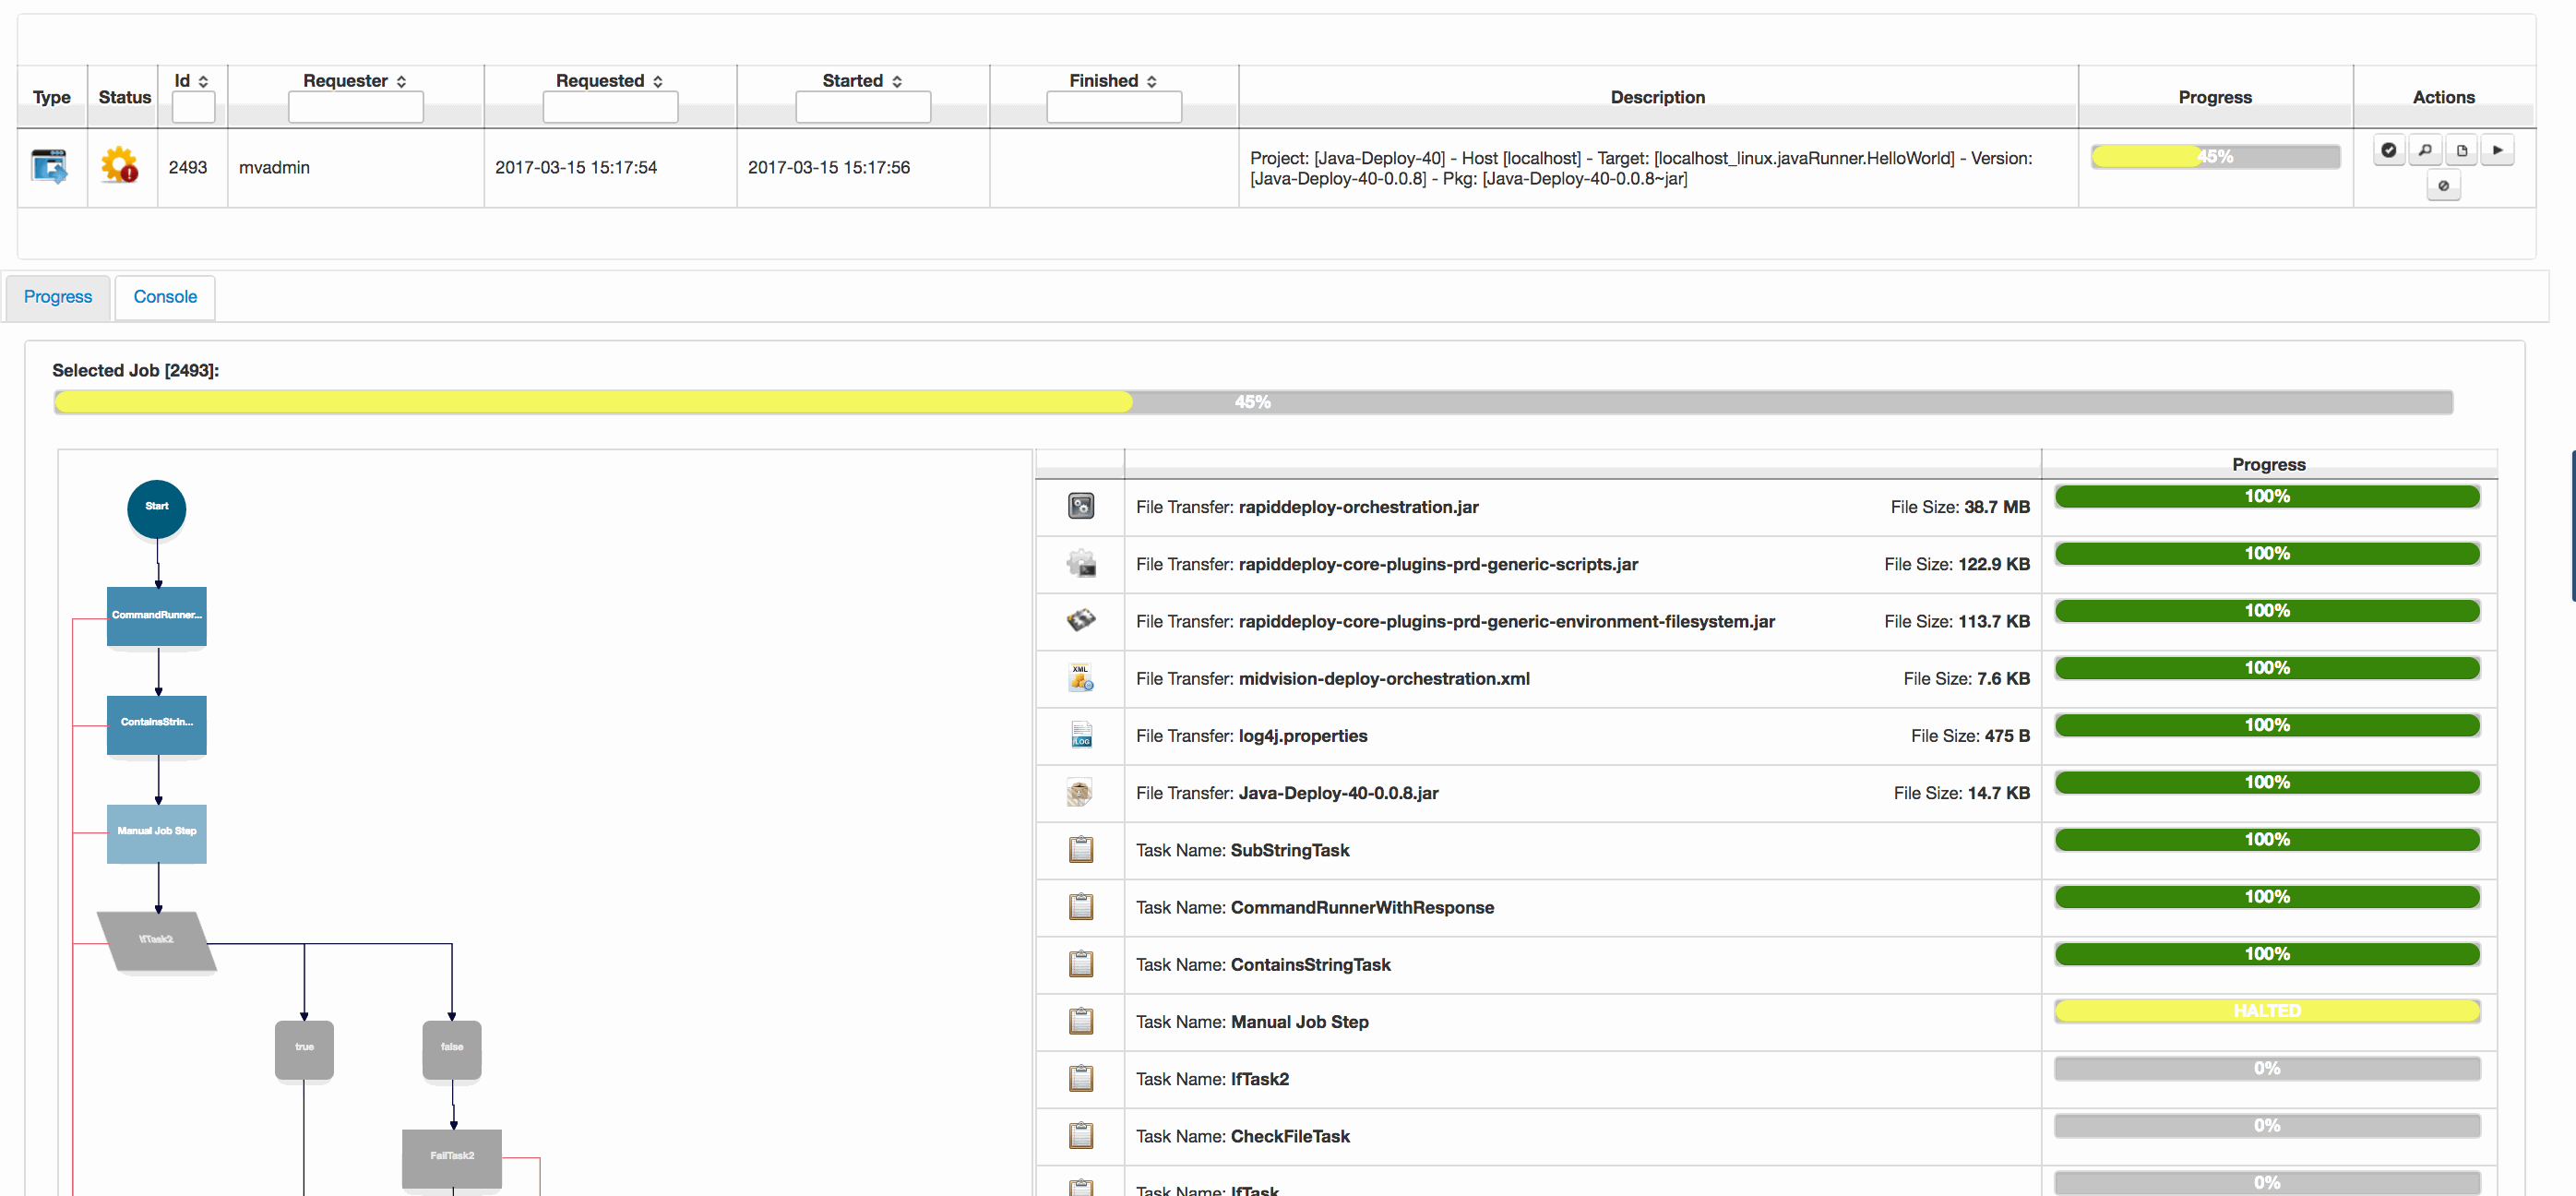
Click to enlarge
4. Approval Steps
RapidDeploy comes preconfigured with four environment types, Unknown, Development, Test and Production. All targets belong to an Environment Type.
Further environment types can be created by a user with the correct permissions.
User groups can be associated with environment types. For example the ‘Prod Approver’ group could be associated with the ‘Production‘ environment type.
When a group is associated with an environment type, at least one user from each such group must approve a job, before it can be authorized for deployment into any target belonging to that environment type.
A red ‘Approval’ gate is shown in the job plan.
In the image to the right, you can see an in progress job plan waiting for an approval.
Whilst not strictly a manual step, it does result in a halted execution waiting for manual execution

Click to enlarge