Resource Libraries
External resources
Resources are any files or folders that RapidDeploy needs to access that exist outside the RapidDeploy folder structure, either locally on the filesystem or remotely on another server in the intranet or internet.
Typically they are artefacts that form part of deployment payloads, such as binary files, application components, source code, executables, installers, sets of configuration data, server or cloud definitions. Resources can be consumed by any project by selecting the resource on the ‘general’ tab or by server infrastructure from a drop-down list on the ‘Transport’ or ‘Cloud’ tabs.
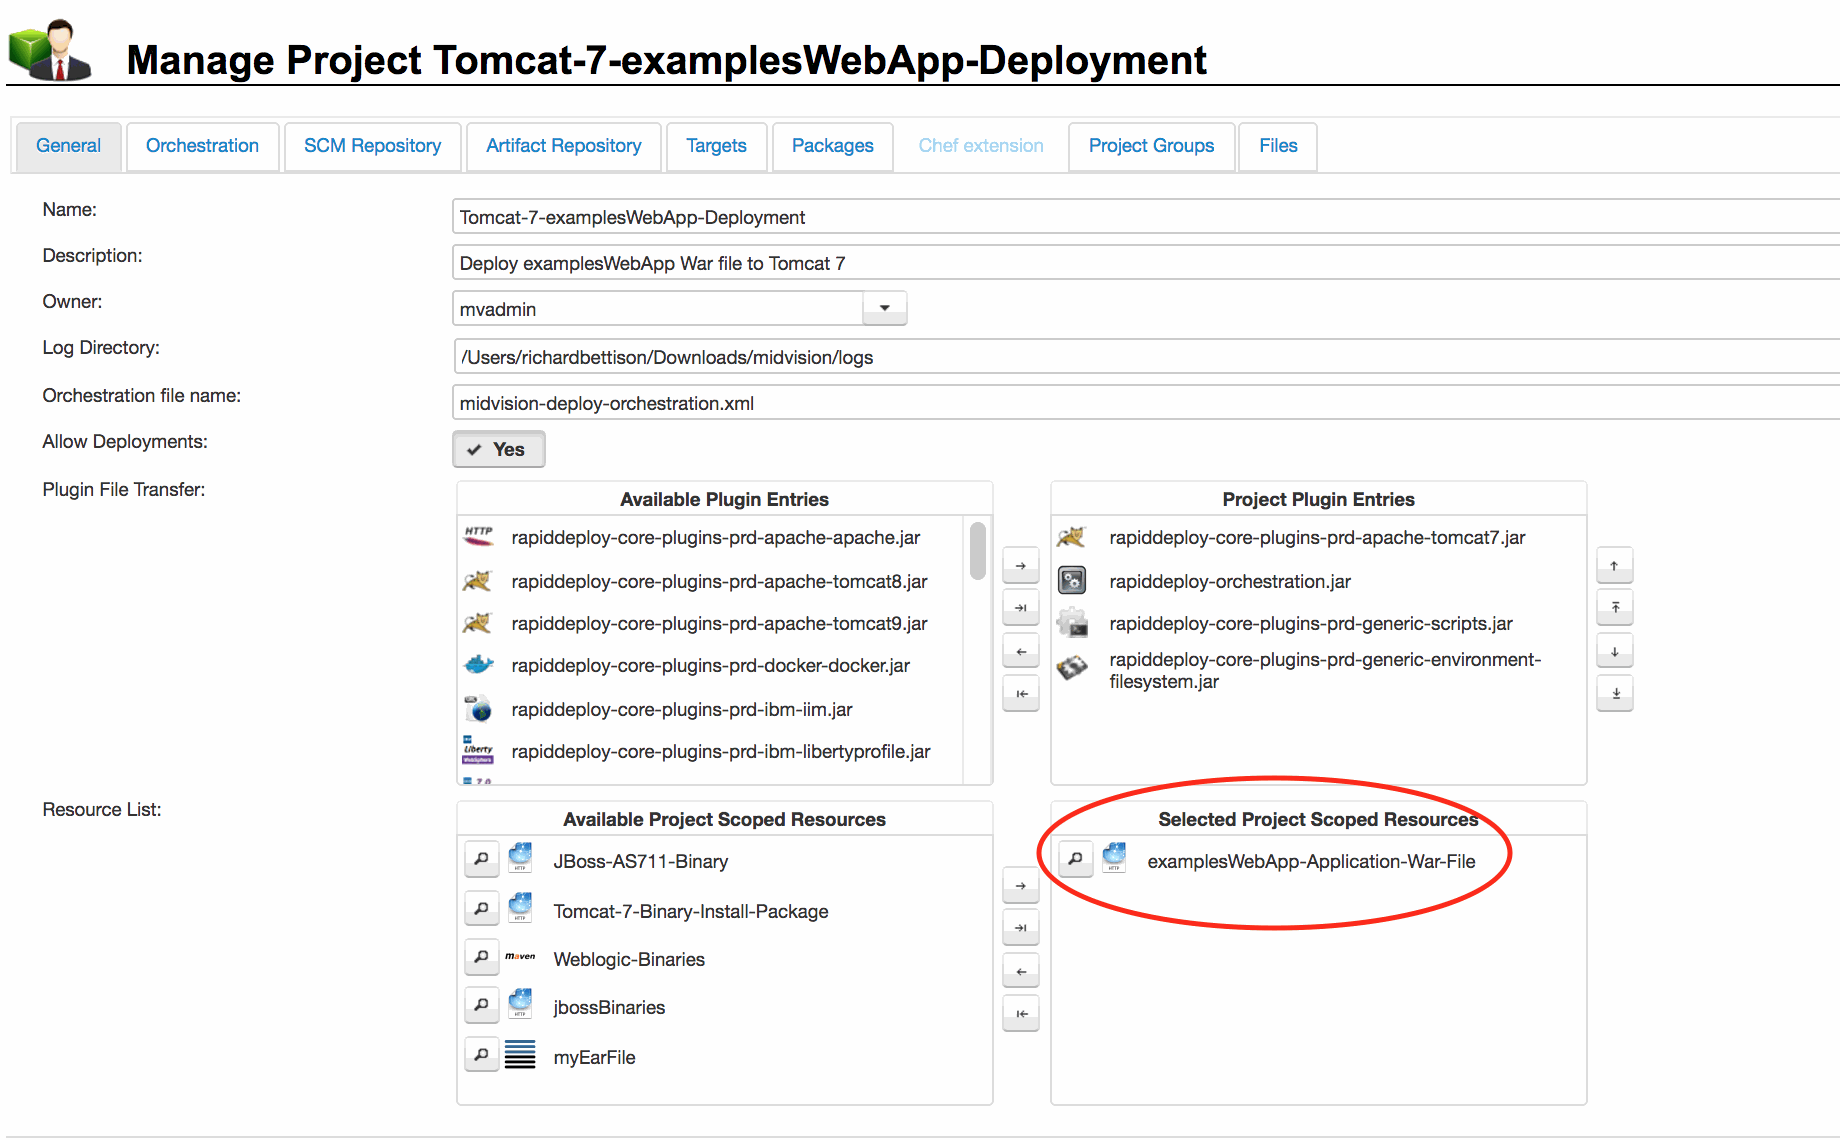
Project General Tab with External Resources Highlighted
The Project General Tab is shown, with the selected examplesWebApp resource shown.
1. Resource Overview
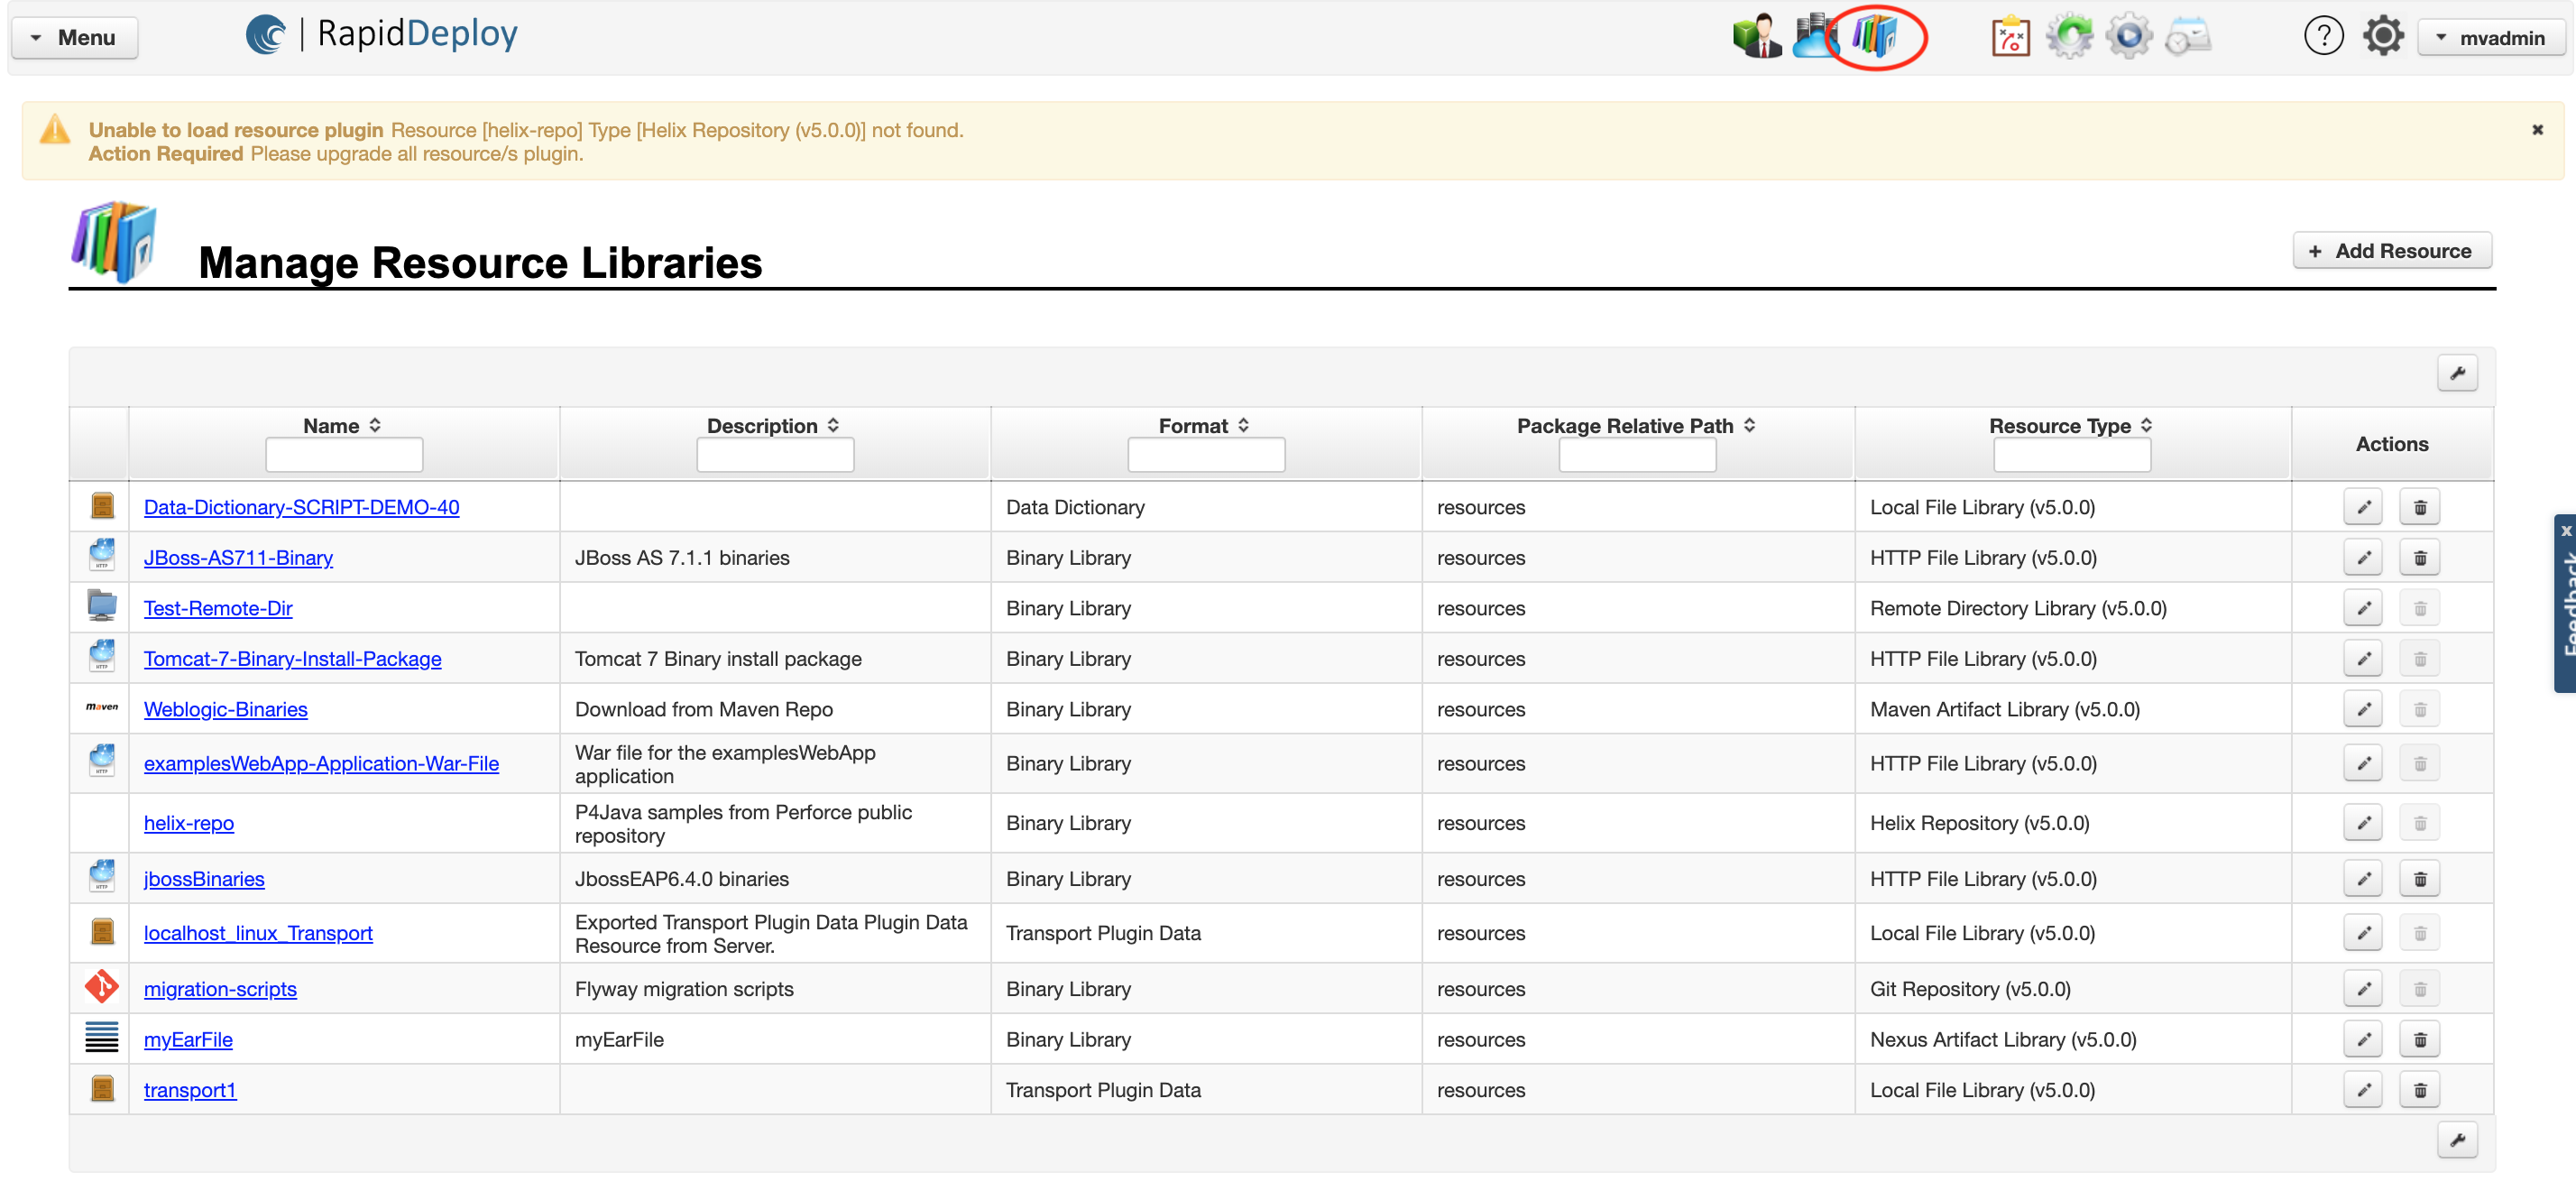
Resources are configured on the ‘Manage Resource Libraries’ panel. You can access the resources pages by accessing the ‘Libraries’ icon from any page (see image).
To configure a resource, you will need to define how to access it and, if a configuration resource format resource, the configuration of the resource.
Click to enlarge
1.1 Accessing external resources
A resource is accessed by use of one of the resource plugins. The fields required to configure access to the resource will depend on the resource plugin selected. You can access remote resources from a variety of external sources, such as:
- Via scp from a remote file system folder or set of files
- Via a path to a local folder or file
- From an artifact or SCM repository such as Maven, Git, SVN, Nexus etc.
- Via an http request
The available access methods will depend on which plugins you have installed.
Click to enlarge
1.2 Binary resource libraries
Mostly, resources are components stored externally to RapidDeploy that are included in deployment packages and deployed to target infrastructure as part of a deployment job, for example sets of scripts, sets of configuration for target servers, database files or configuration, binary and application files such as executables, zip files, jar, war or ear files etc. You configure these with the default Binary file format (Fig. 1).
When using the Binary format, you will see a ‘Download On Target’ button, which defaults to “no” (Fig. 2).
This defines whether the resource is copied into the project deployment package at package creation time or at deployment time on the target server.
Leaving as “no” therefore means that the resource becomes part of the deployment package as created in RapidDeploy and stored on the RapidDeploy server. when this deployment package is deployed to a target, the resource is present in the zip file copied onto the target.
Setting this value to “yes” means that the resource is never copied to the RapidDeploy server and is not in the deployment package. Instead the package contains a pointer (with encrypted credentials if necessary), describing how to get the resource from the remote repository. In this case the resource is copied from the remote repository directly onto the target server where the deployment is taking place. For this scenario to work, the target server where you are deploying to must also be able to see the remote resource repository.
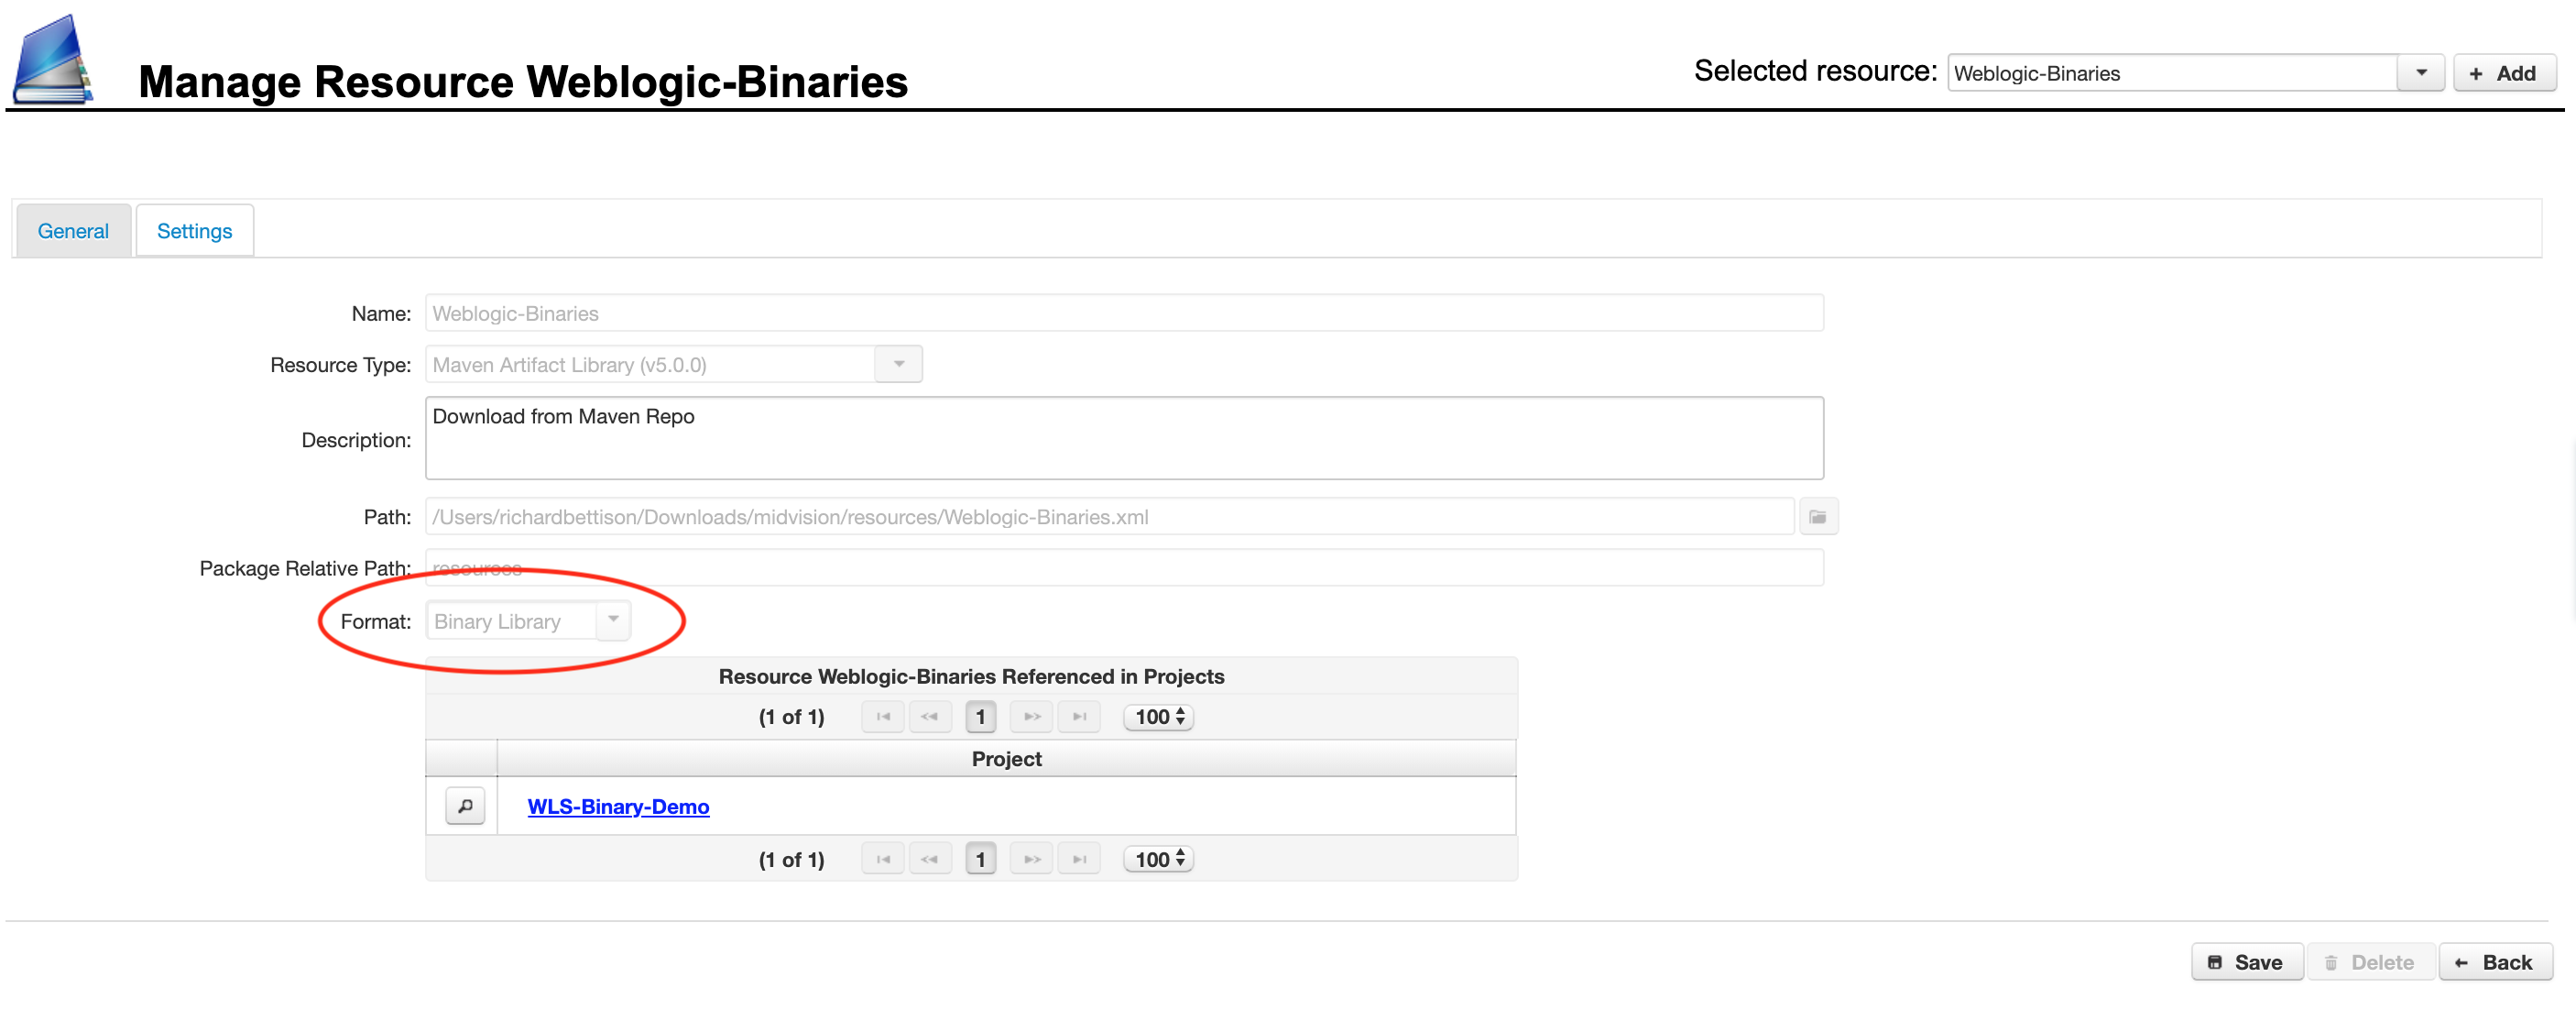
Fig. 1: Click to enlarge

Fig. 2: Click to enlarge
1.3 Configuration resource libraries (Data Dictionary)
It is also possible to configure resources that are used by RapidDeploy itself to enable easier configuration of the tool.
You can configure sets of Data Dictionary key/value pairs which projects can select to set default configuration values, that can be overridden by the project or targets, as shown in Fig. 3 & 4.
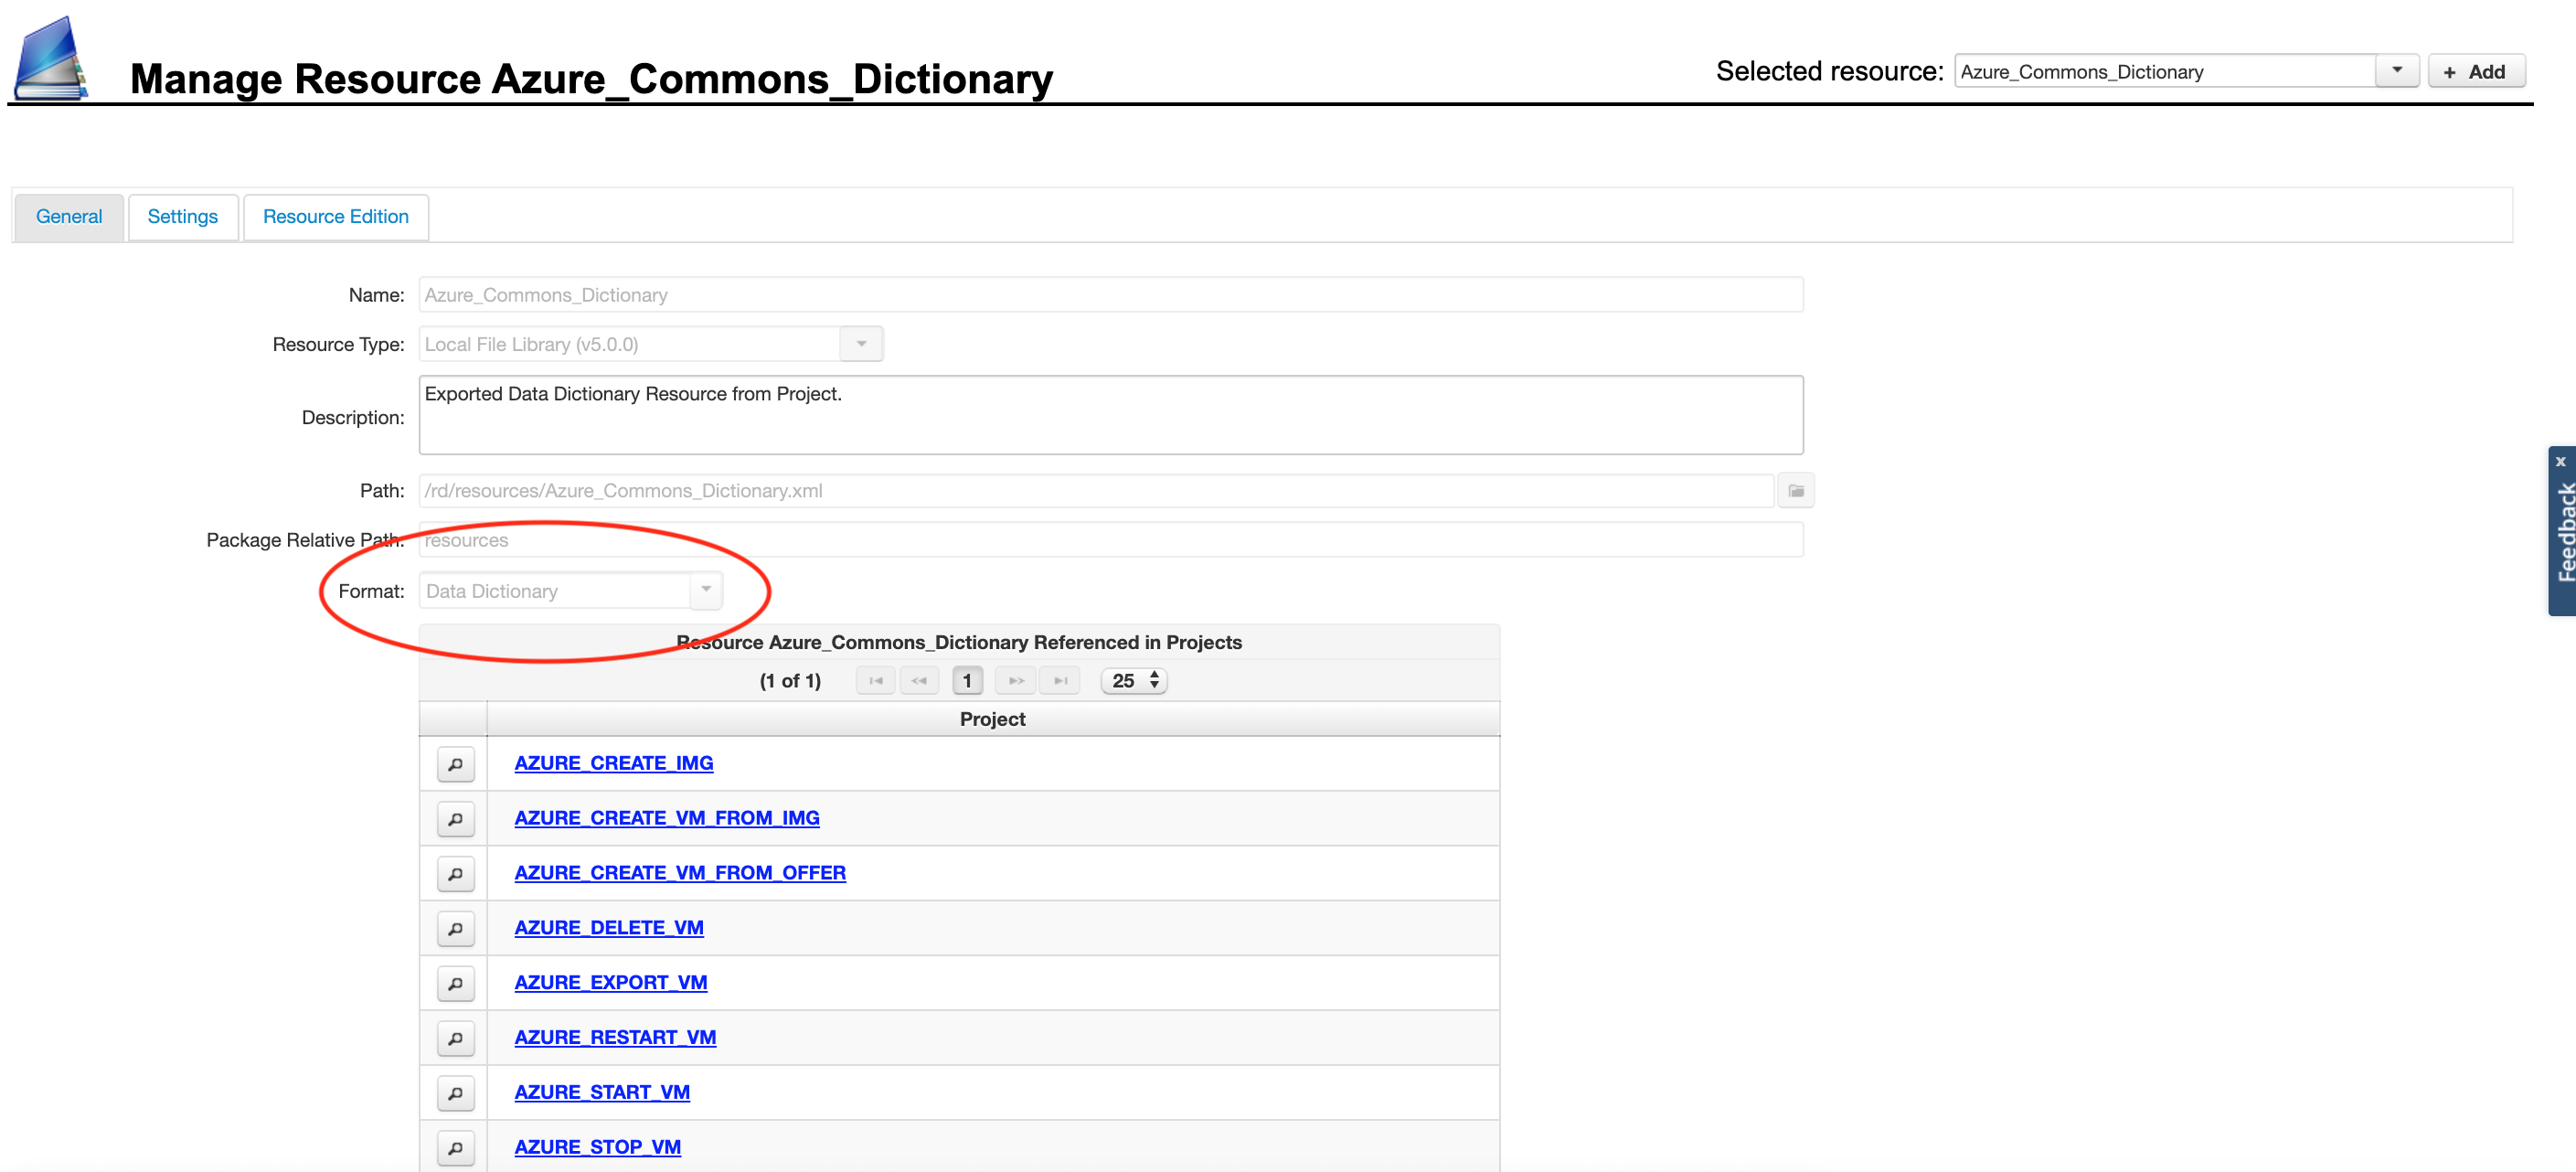
Fig. 3: Click to enlarge
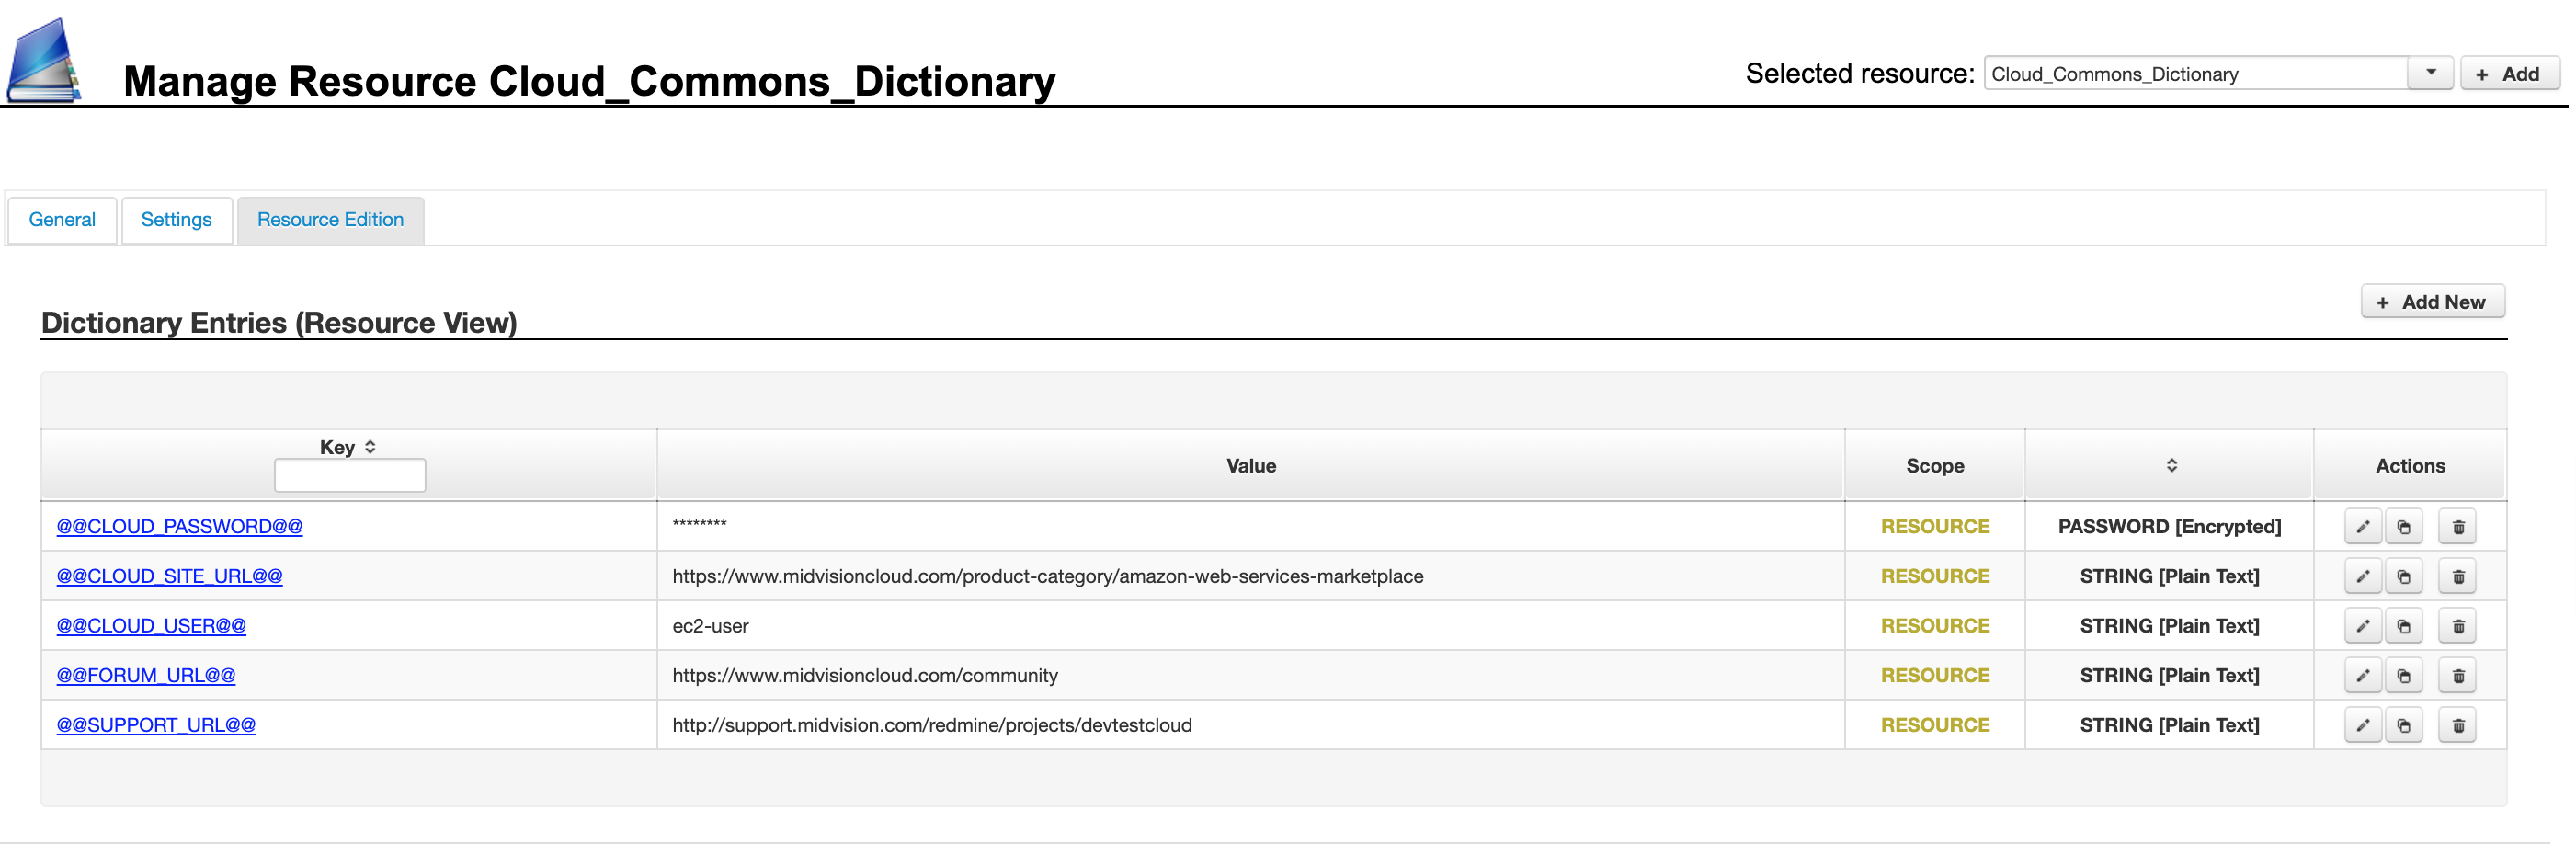
Fig. 4: Click to enlarge
1.4 Configuration resource libraries (Cloud & Transport)
You can also configure server connection definitions (Transport Plugin Data) or cloud provider connection information (Cloud Provider Plugin Data) which can be selected on the server definitions panels. This allows sets of servers to share configuration, which can be managed centrally on the resources panels instead of configuring each server separately as shown in Fig. 5.
You can still configure server and cloud connection information on the server panels directly, but if required you can promote this configuration to become a resource usable by other servers as shown in Fig. 6.
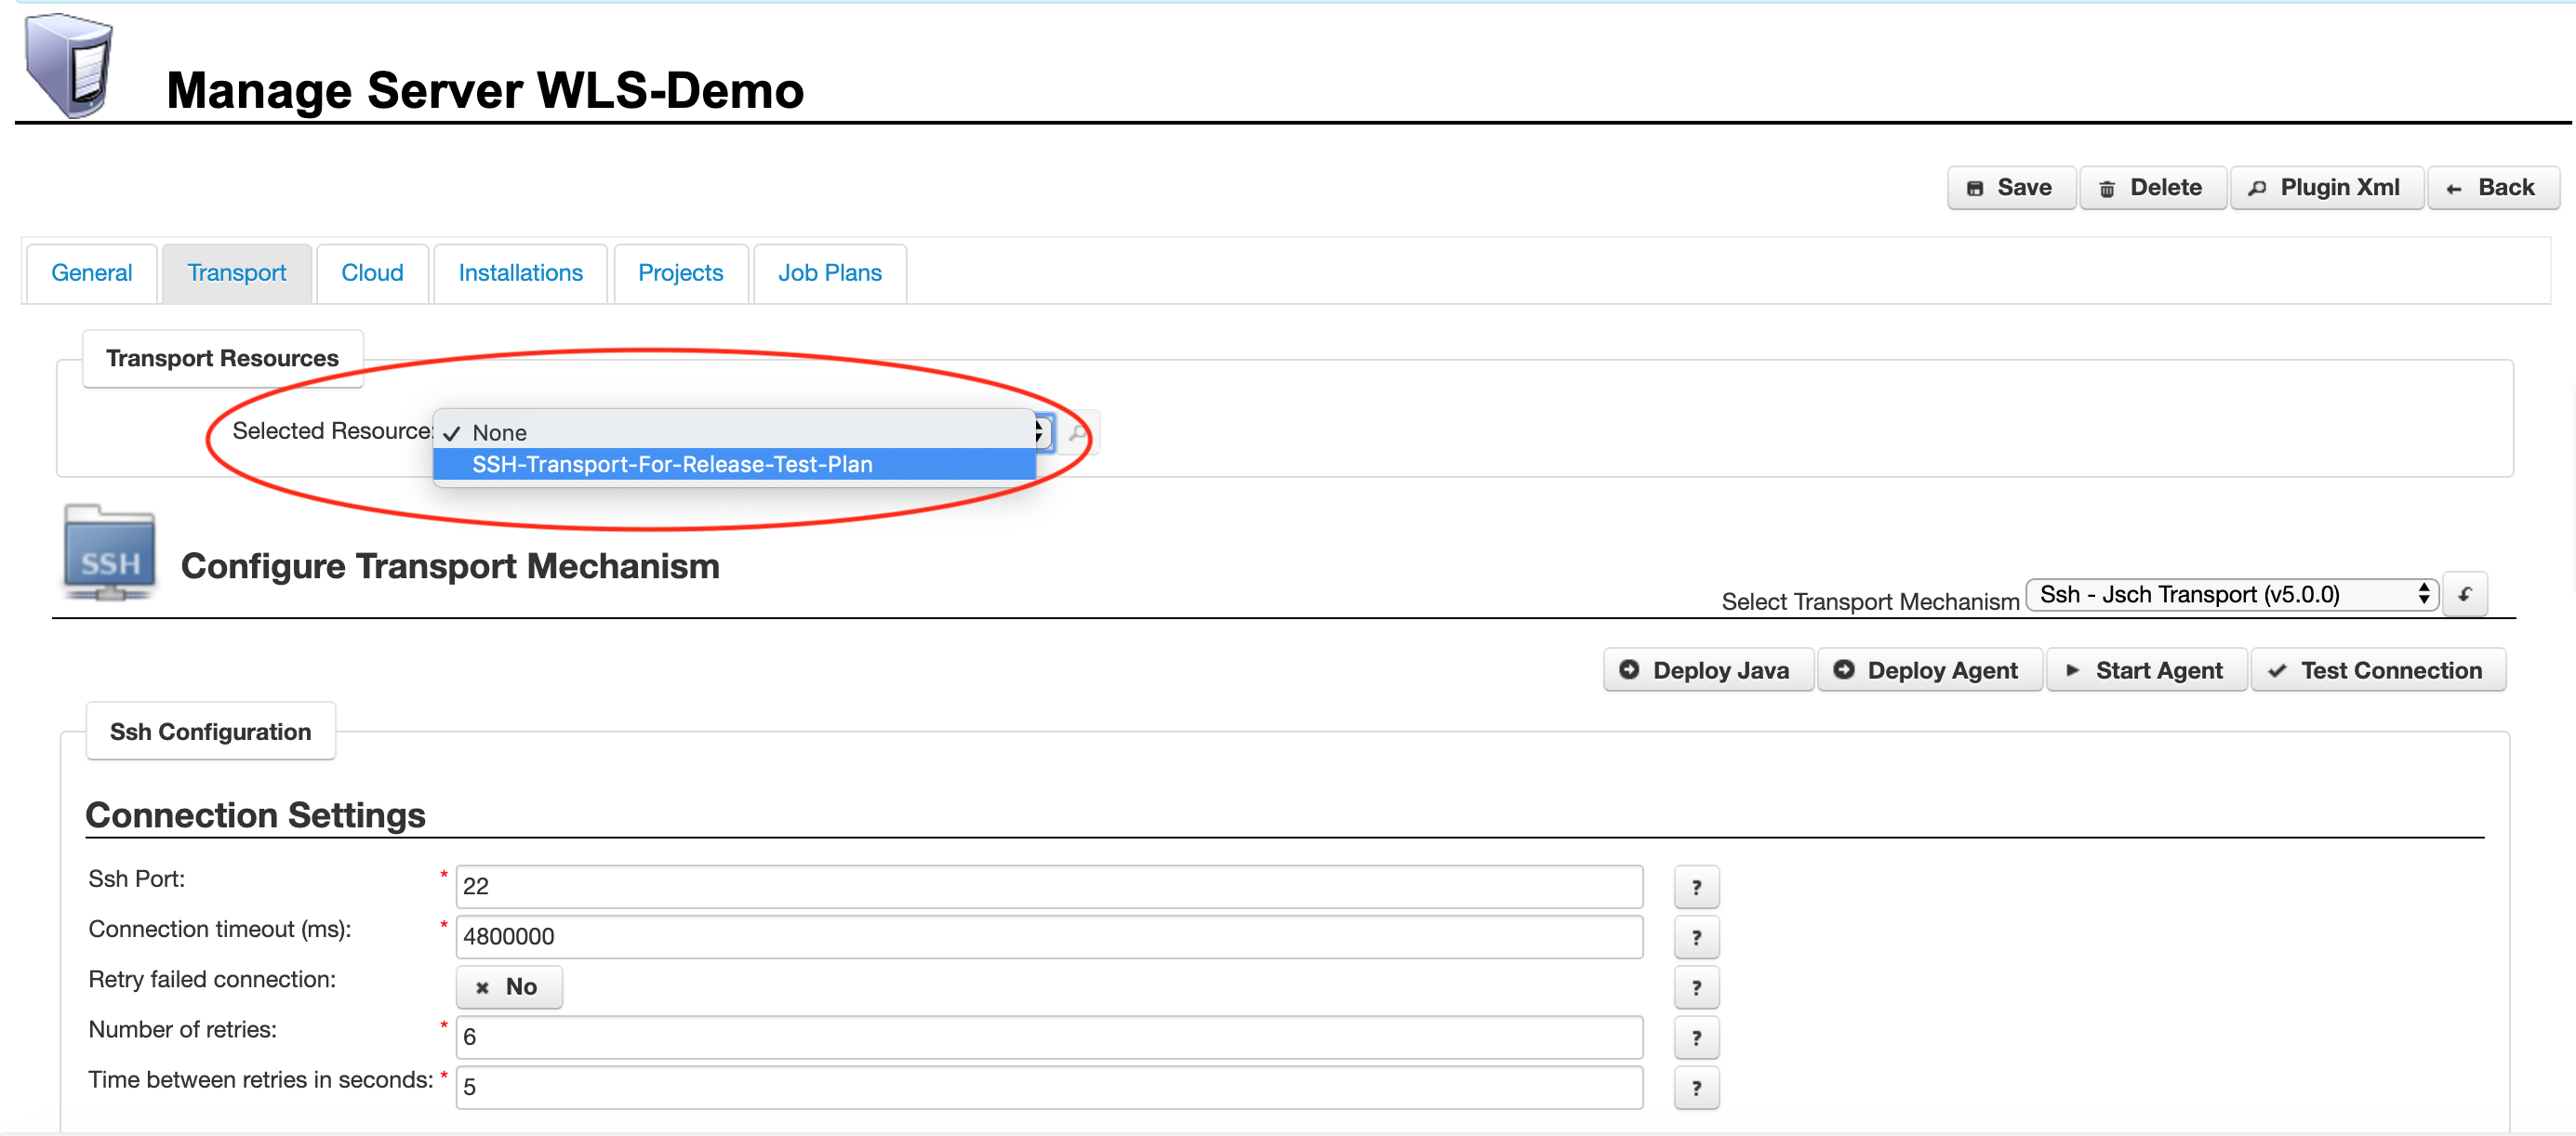
Fig. 5: Selecting a preset transport definition from the list of available transport resources. Click to enlarge
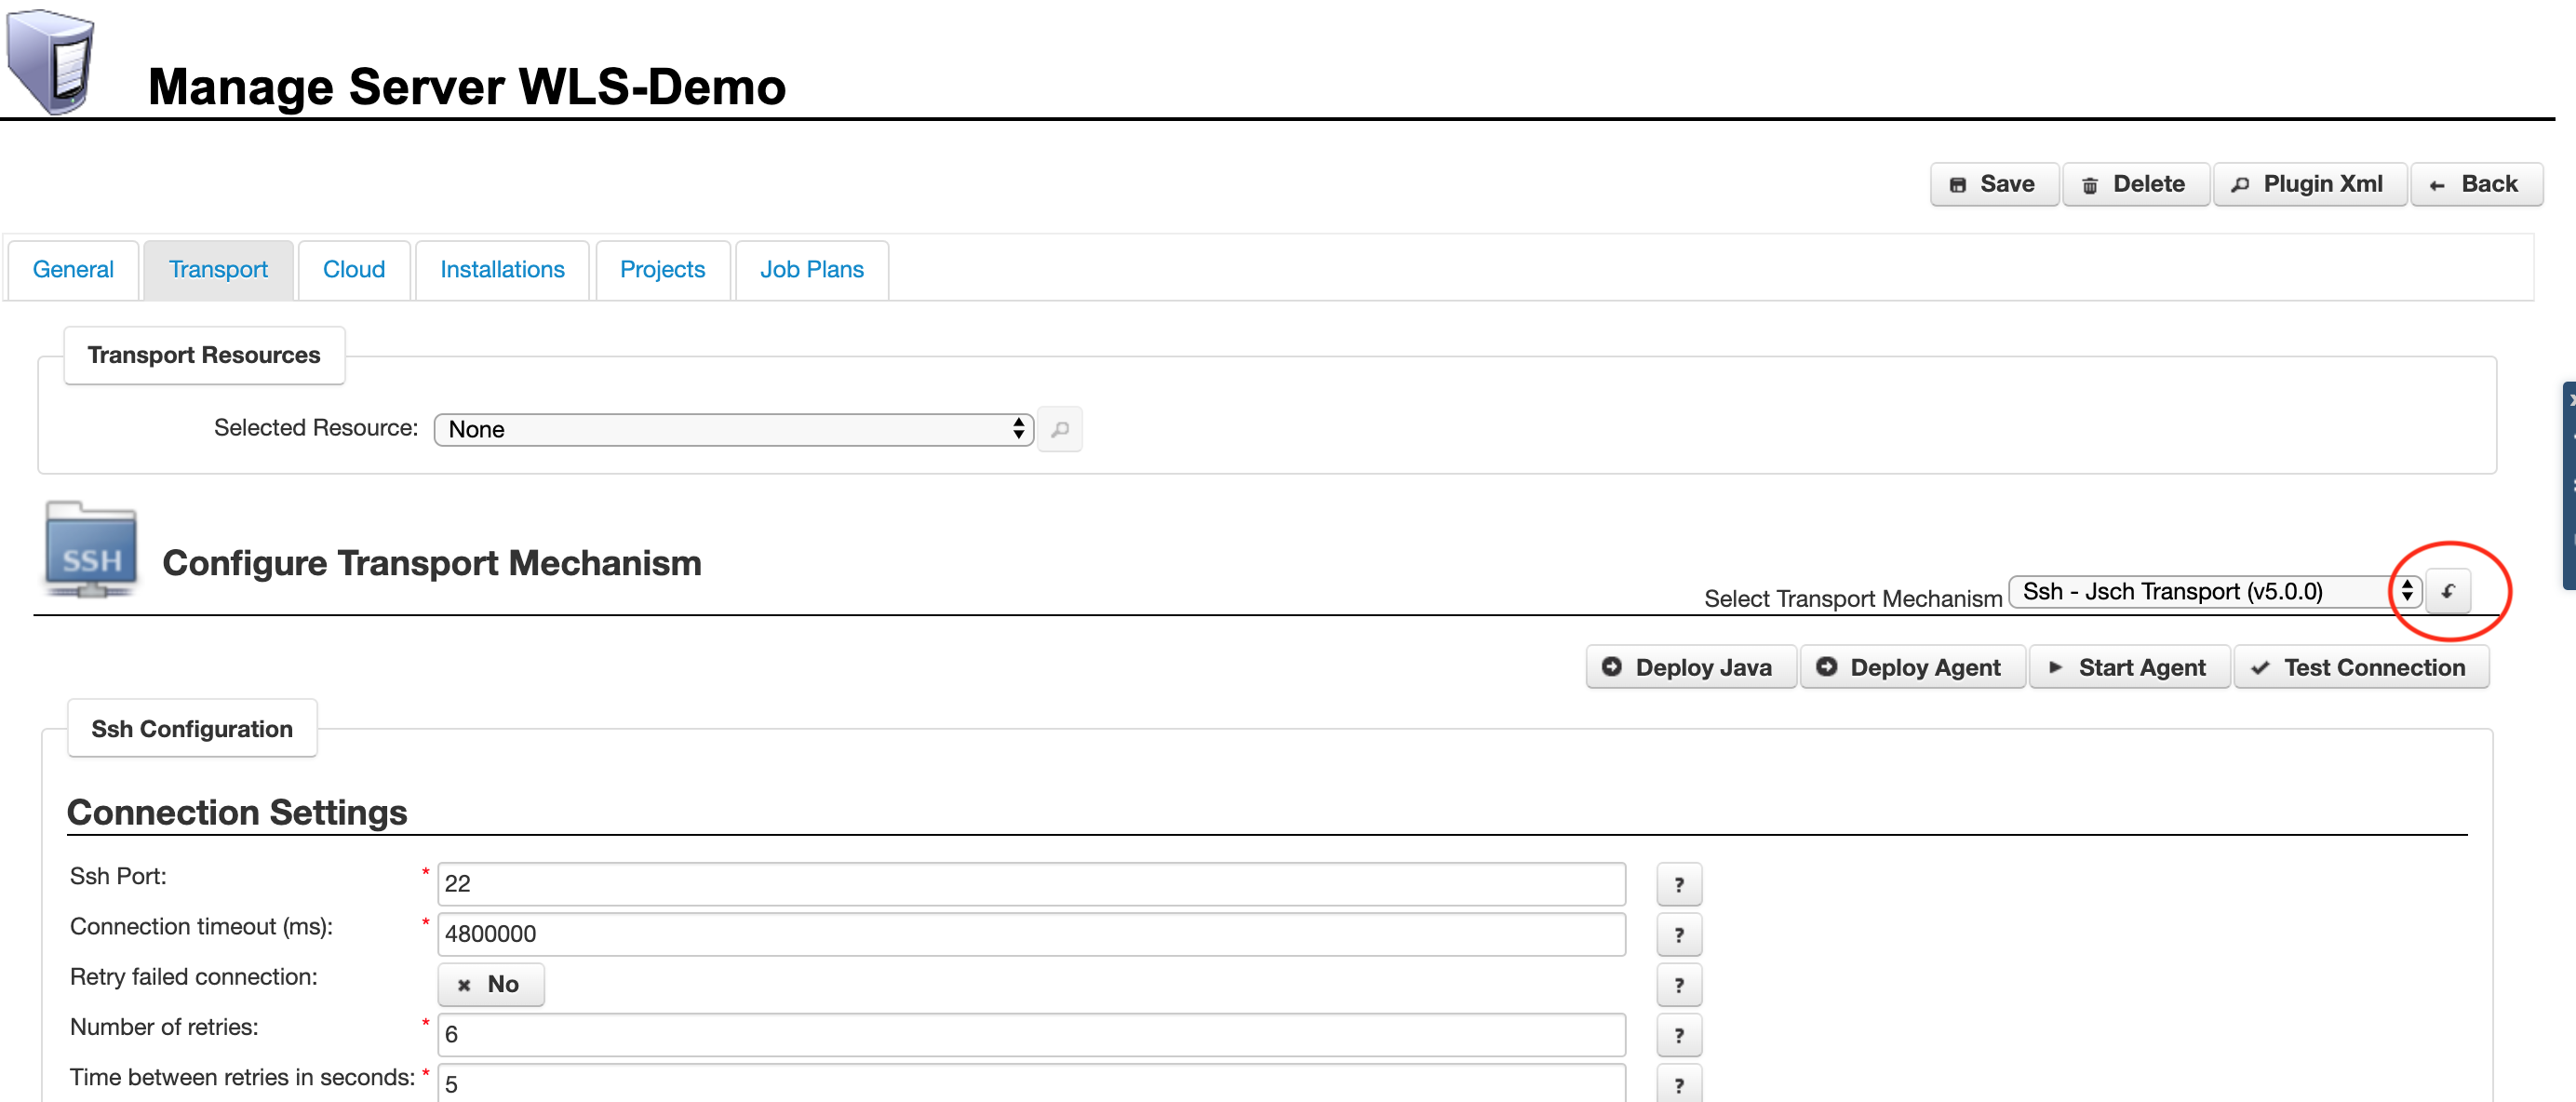
Fig. 6: Promoting a server transport definition to a shareable transport definition resource. Click to enlarge
2. Add a Resource
To add a resource, click the ‘Add Resource’ button on the main ‘Manage Resource Libraries’ panel.
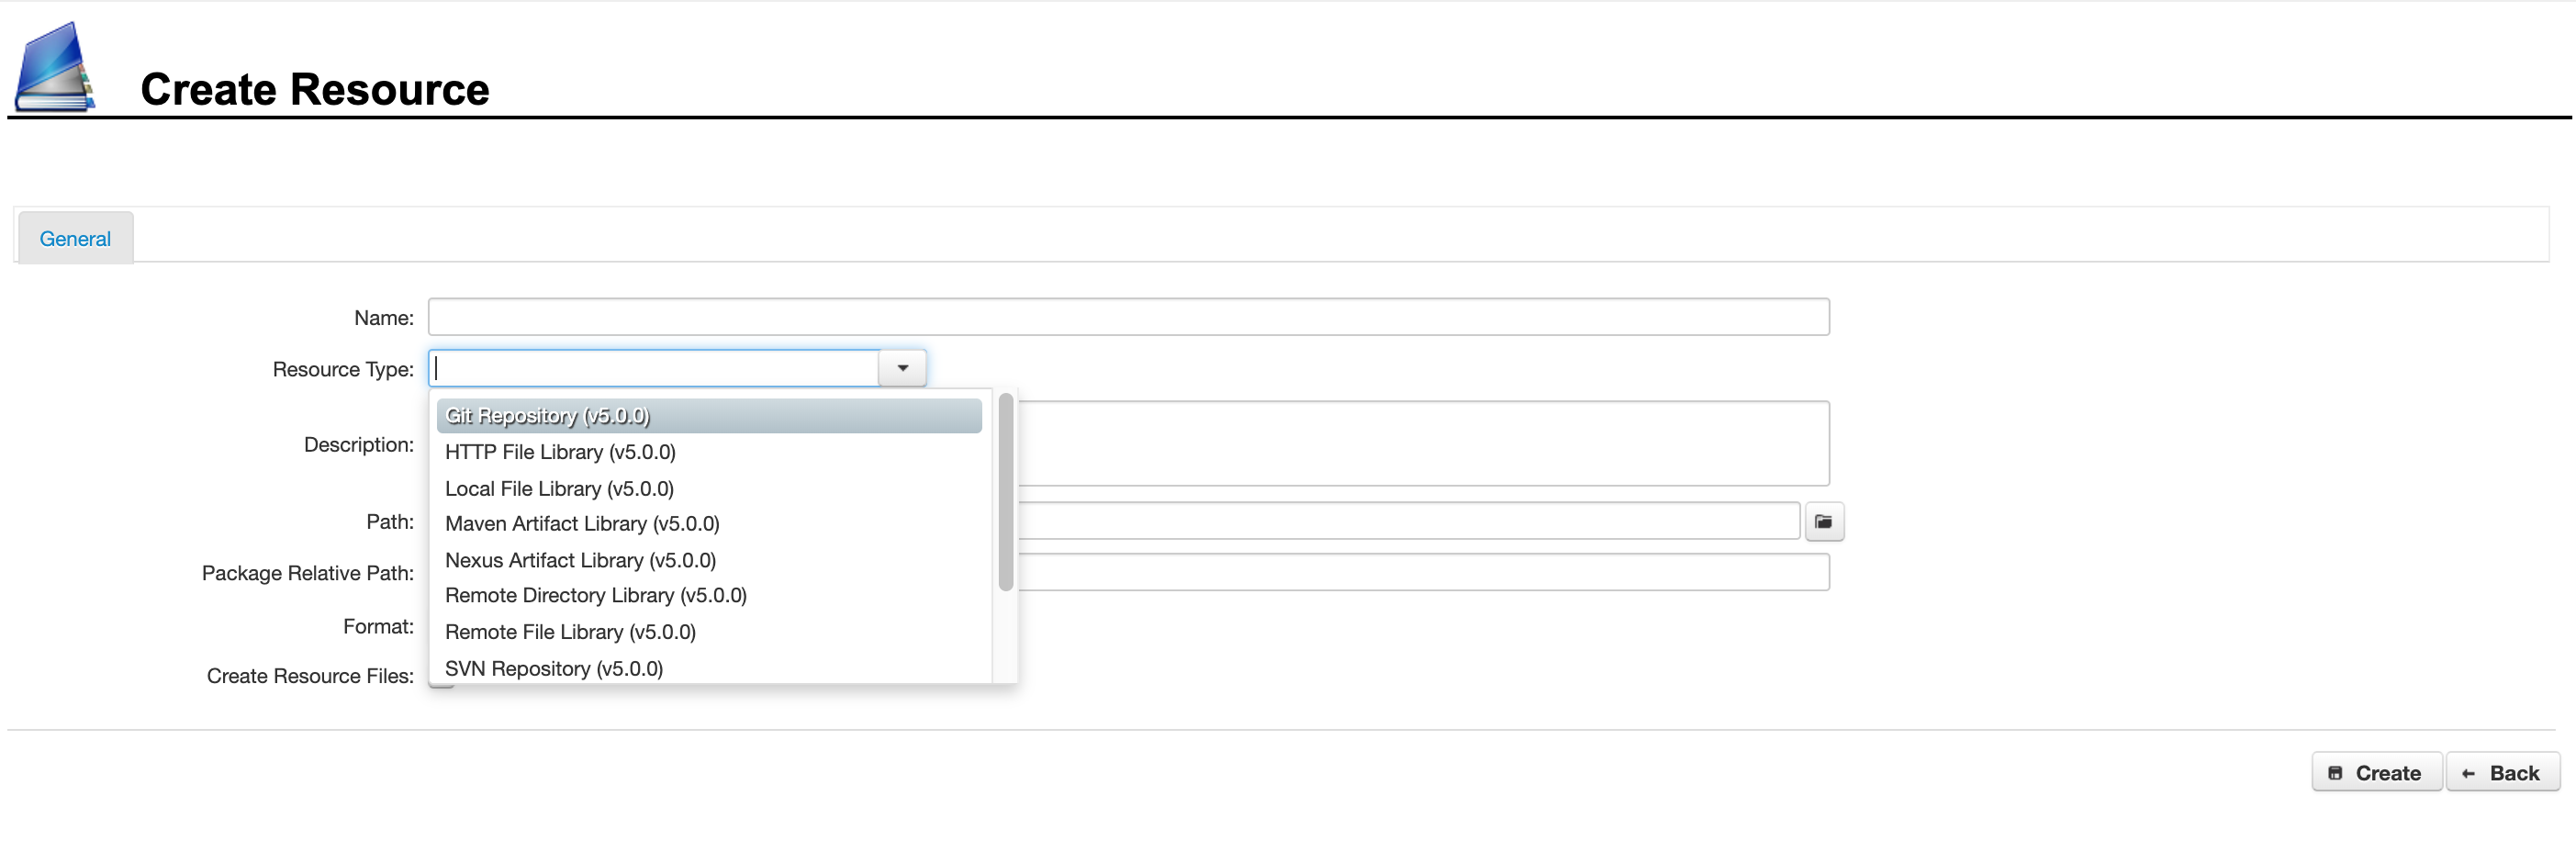
You will see the ‘Create Resource’ panel (see Fig. 7).
You need to give the resource a Name, which is used to uniquely identify this resource in the list of resources available on the projects or servers panels. Therefore make sure the name is sufficiently descriptive.
The ‘Resource Type’ drop down list lets you select the plugin to use to source this resource, for example “Git Repository, “HTTP file Library” or “Remote Directory Library”. Choose the type of plugin you want to use depending on where your resource is located.
You can add any additional details in the Description panel.
The ‘Path’ tells RapidDeploy where to store these resources on the filesystem and ‘Package relative Path’ the relative path under the root directory of any project that consumes this resource, where the resource will be stored. These can normally be left as the defaults.
The ‘Format’ drop down list lets you choose the type of library this will be, as follows:
- Binary – For deployable artefacts to be deployed by a deployment model (project) such as binary files, zip, jar, ear files, scripts, database updates, sets of deployable files.
- Data Dictionary – For sets of Data Dictionary name/value pairs that can be shared between projects.
- Transport Plugin Data – a connection definition (server port, credentials such as ssh key, passphrase etc) that can be shared by multiple servers.
- Cloud Provider Plugin Data – cloud configuration that can be shared between and used by multiple servers.
Once you have set the required values, click ‘Create’. The resource is created and now you can further configure it.
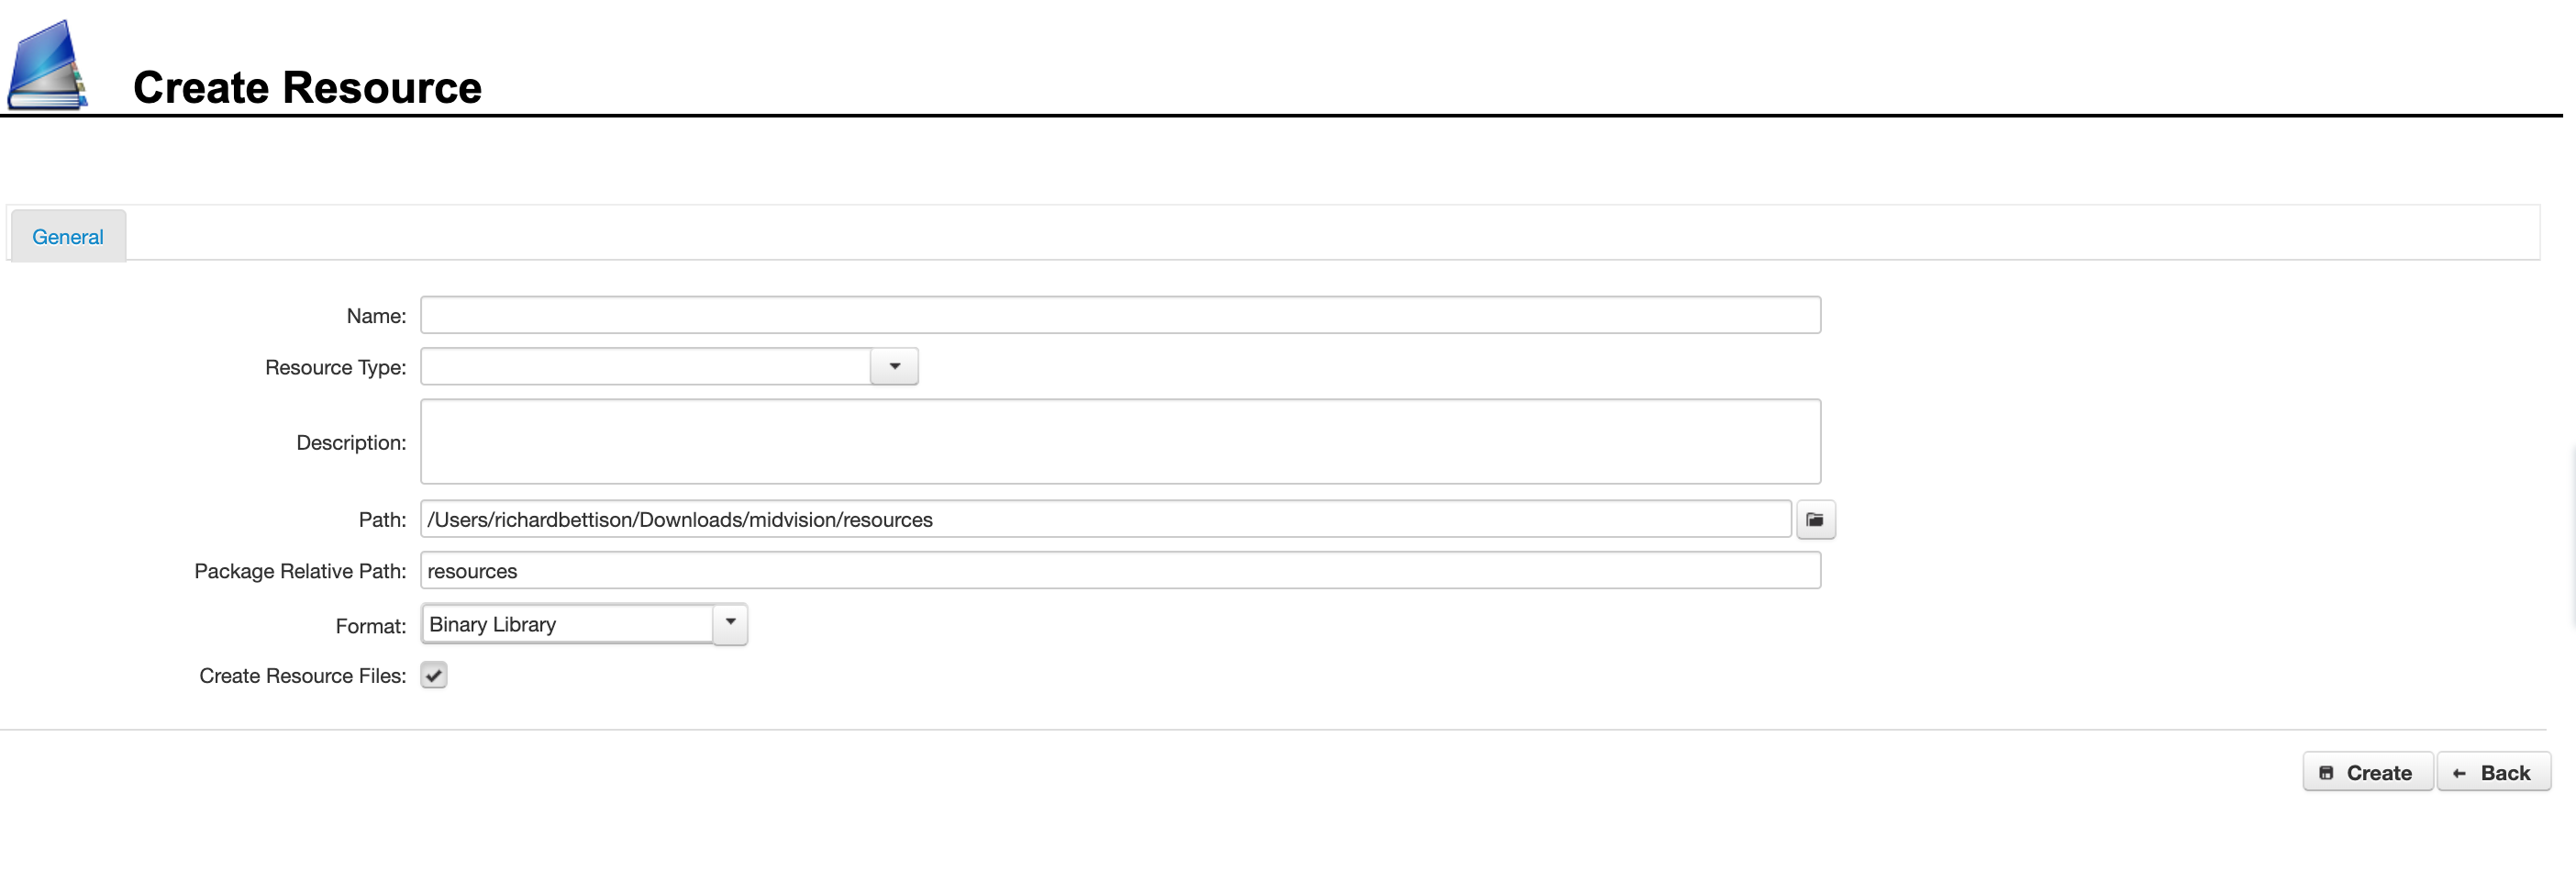
Fig. 7: Click to enlarge
3. Configure a Resource
To configure a resource, click the ‘Edit Resource’ button in the ‘Actions’ column on the main ‘Manage Resource Libraries’ panel opposite the resource you want to edit (see Fig. 8).
You will be taken to the ‘Create Resource’ panel (see Fig 9).
Depending on the type of resource, you will see either two or three tabs.
The ‘General’ tab is the one you configured to create the image.
The ‘Settings’ tab has the configuration settings of the ‘Resource Type’ plugin you used (see Fig. 10). This will be the configuration of how we access the local or remote resource, and the fields are plugin dependent. In this example we are using the local file library plugin, so it is the local file library path (the path to the file containing the ssh transport configuration) that is shown.
The optional ‘Resource’ tab has the configuration settings of the resource where the resource is one of the special resources:
- Data Dictionary – Data Dictionary name/value pairs.
- Transport Plugin Data – a connection definition (server port, credentials such as ssh key, passphrase etc). The fields will depend on the transport plugin selected.
- Cloud Provider Plugin Data – cloud configuration. The fields will depend on the cloud plugin selected.
In the example in FIg. 11 the resource is an ssh transport connection.
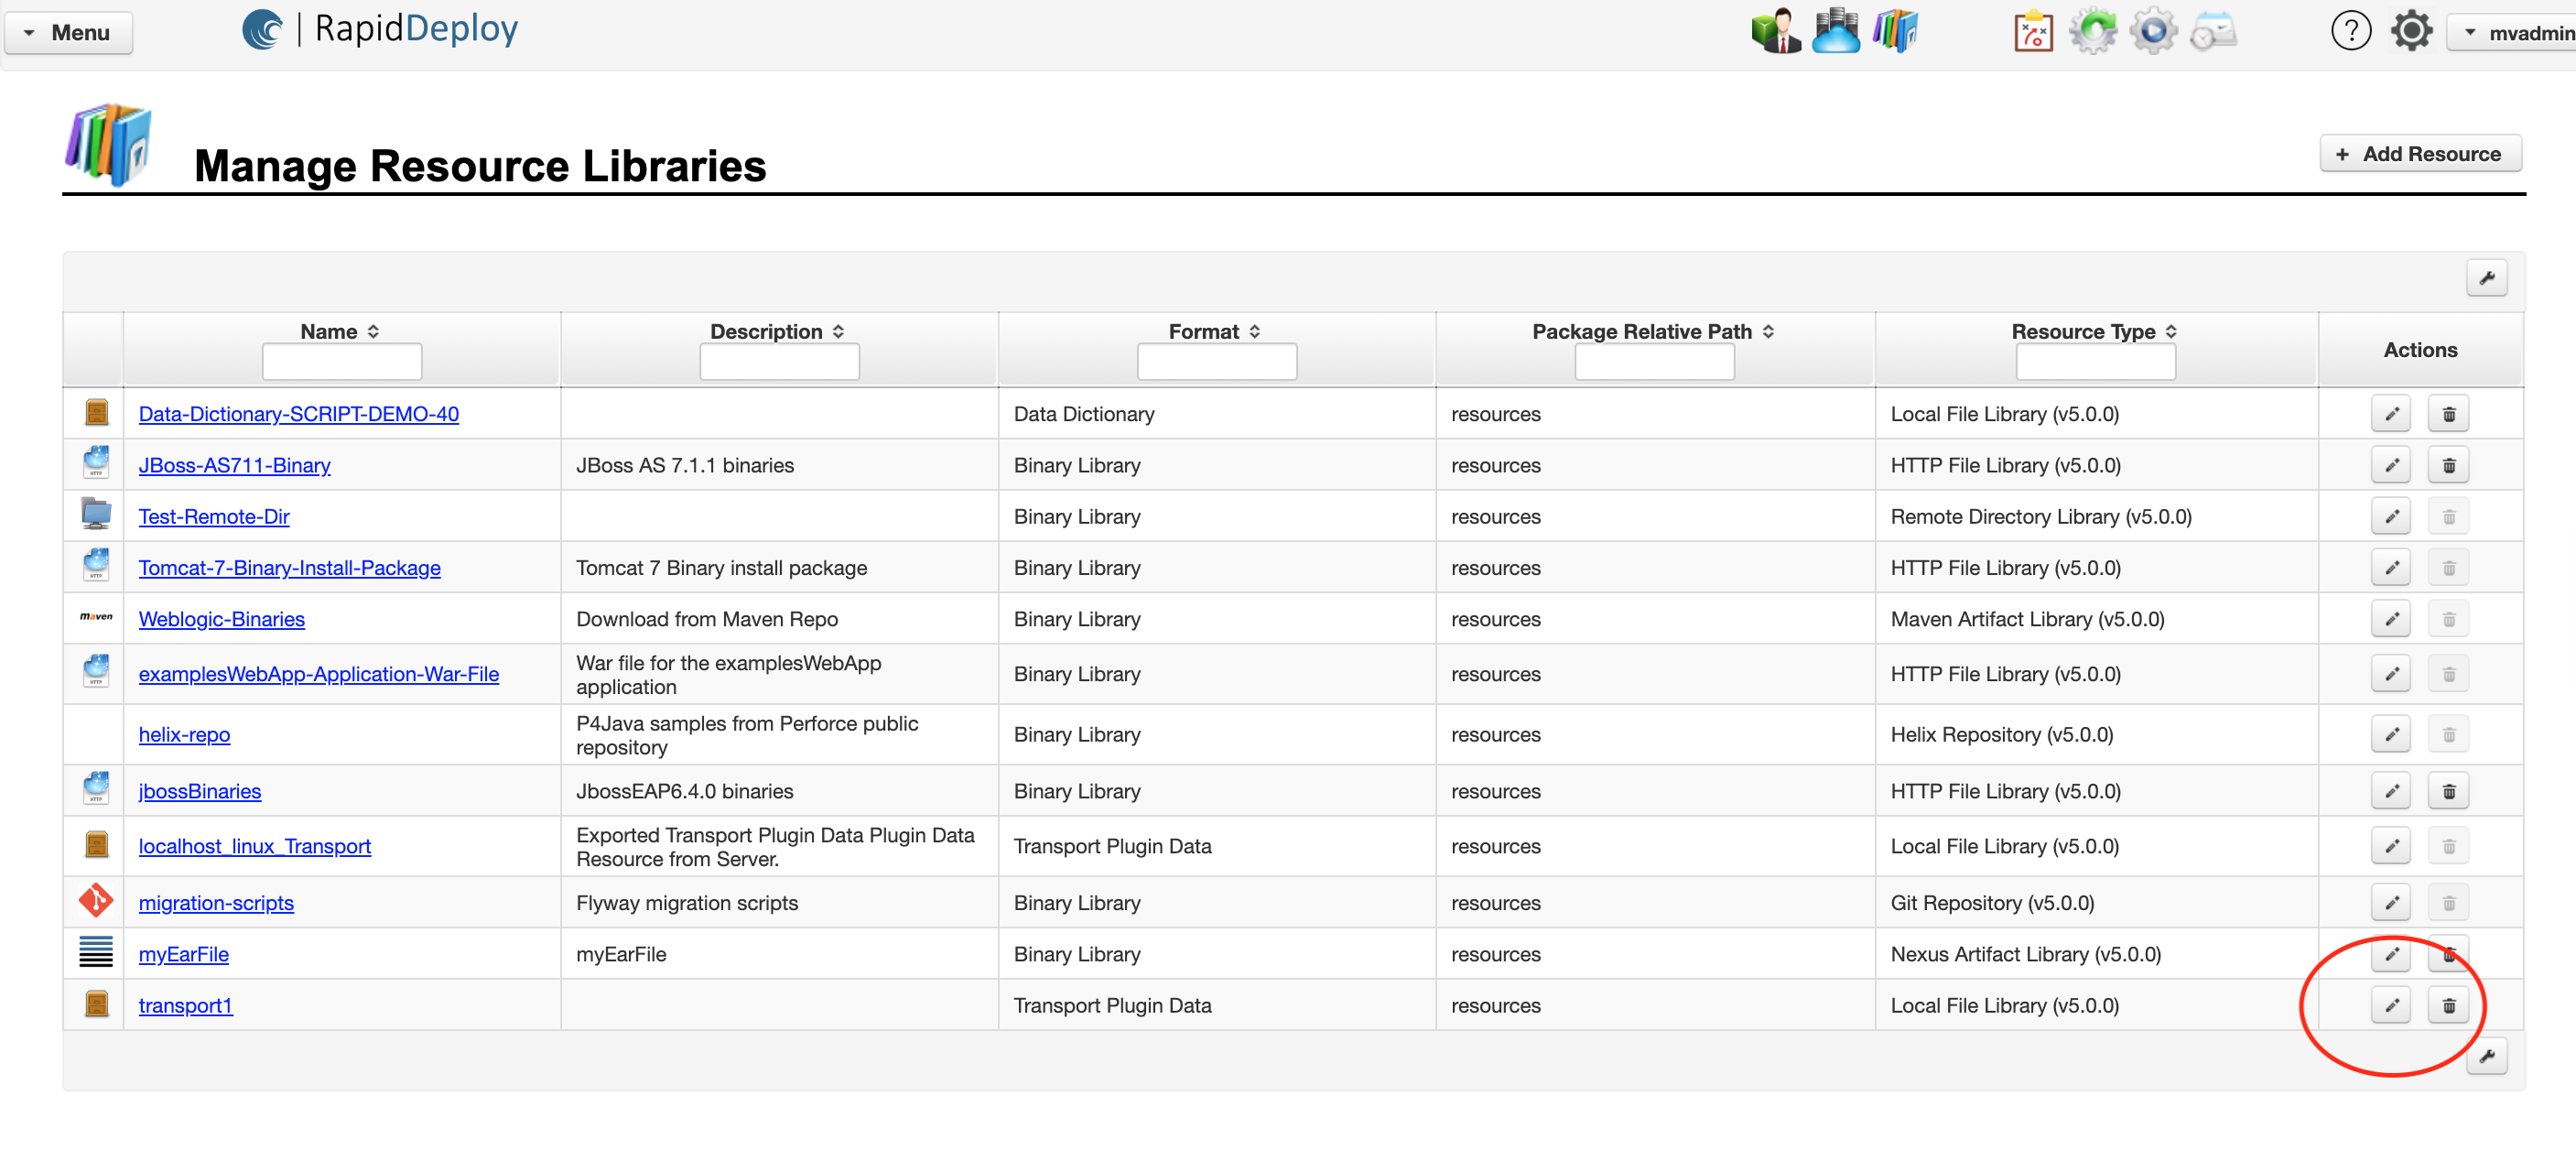
Fig 8. Click to enlarge
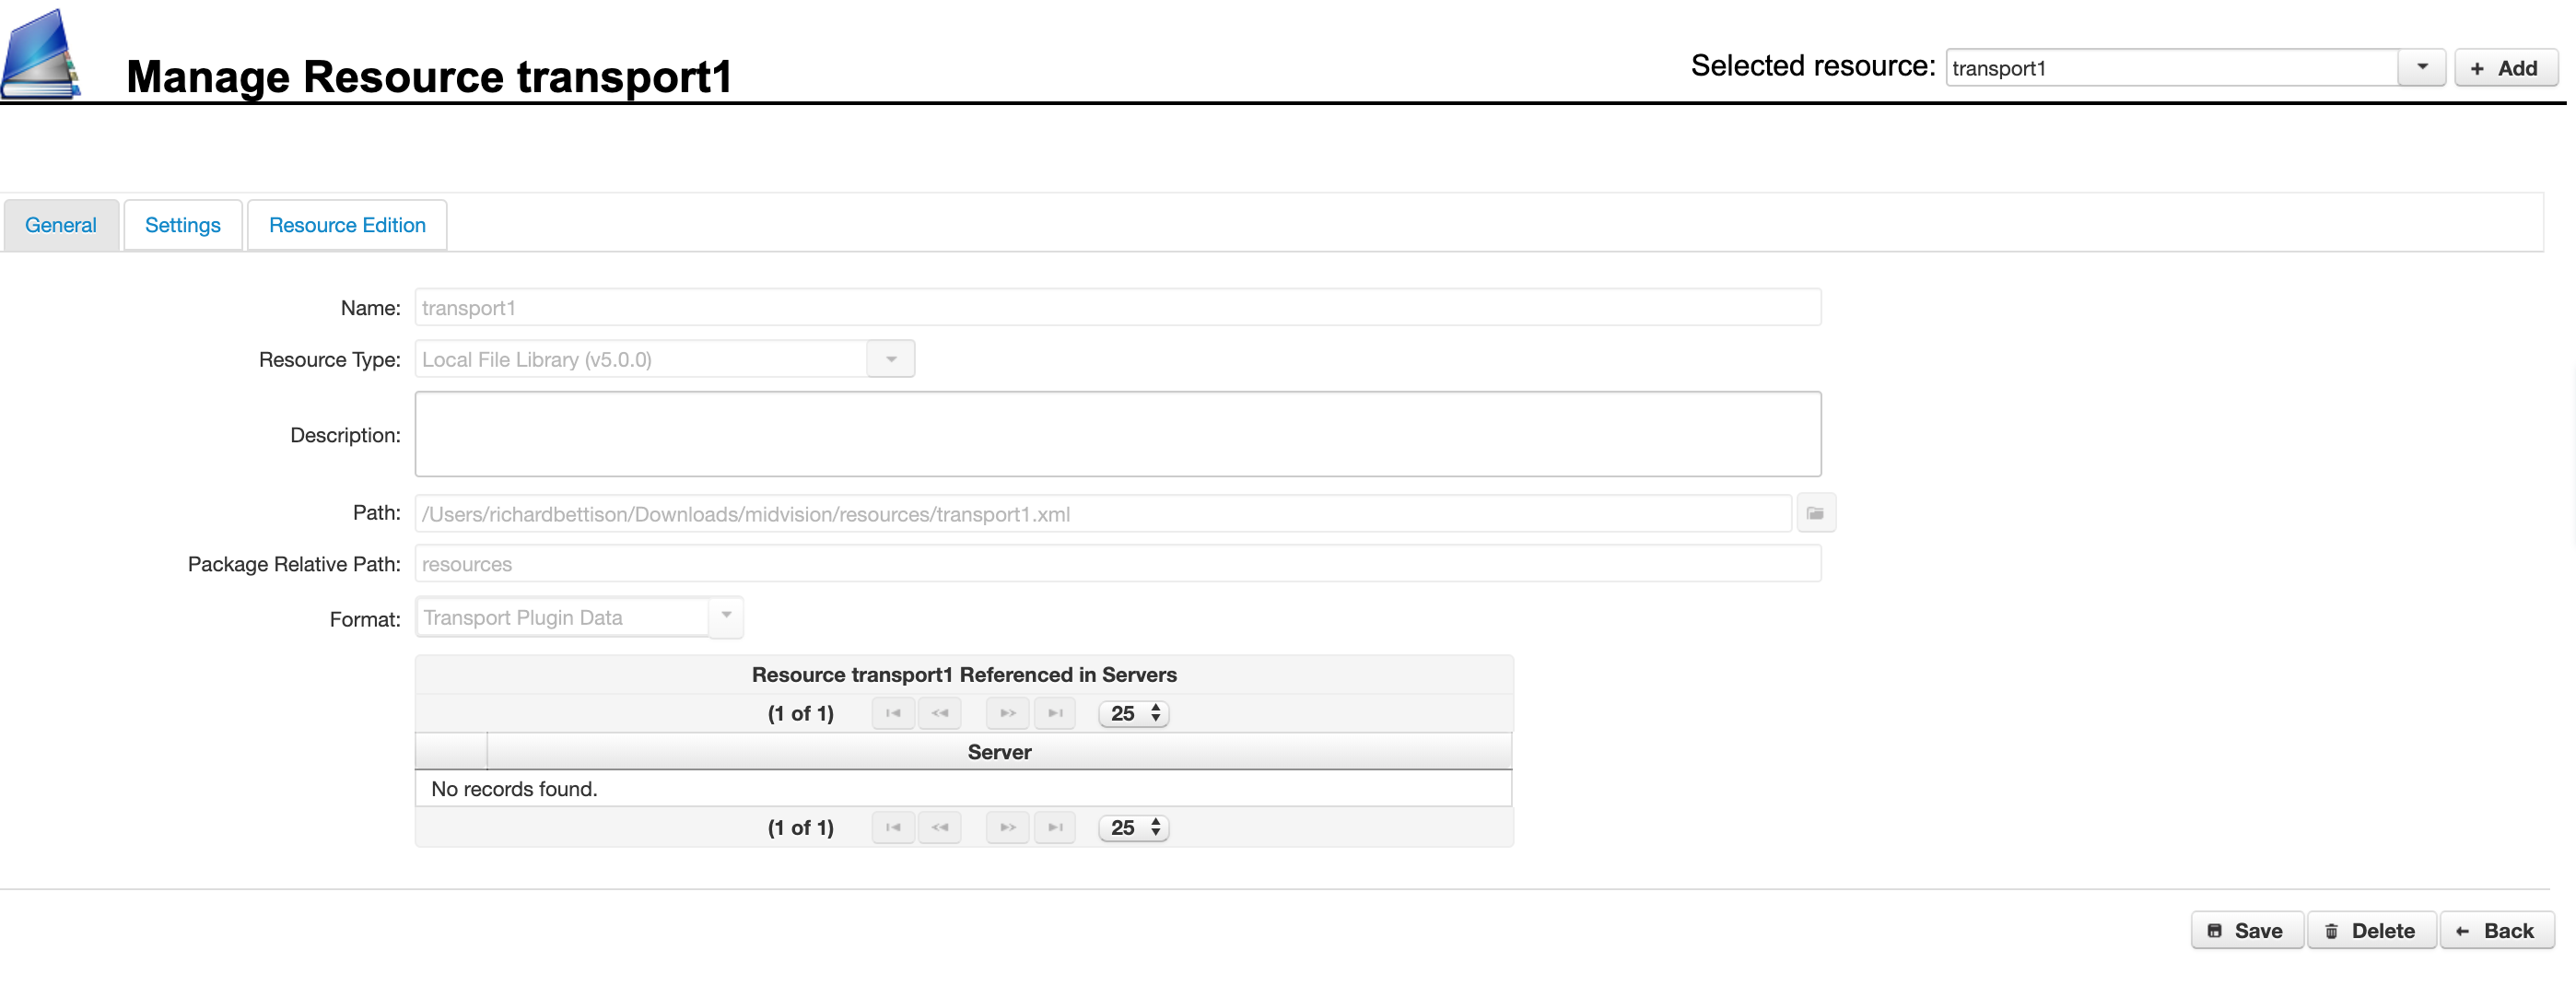
Fig. 9. Click to enlarge
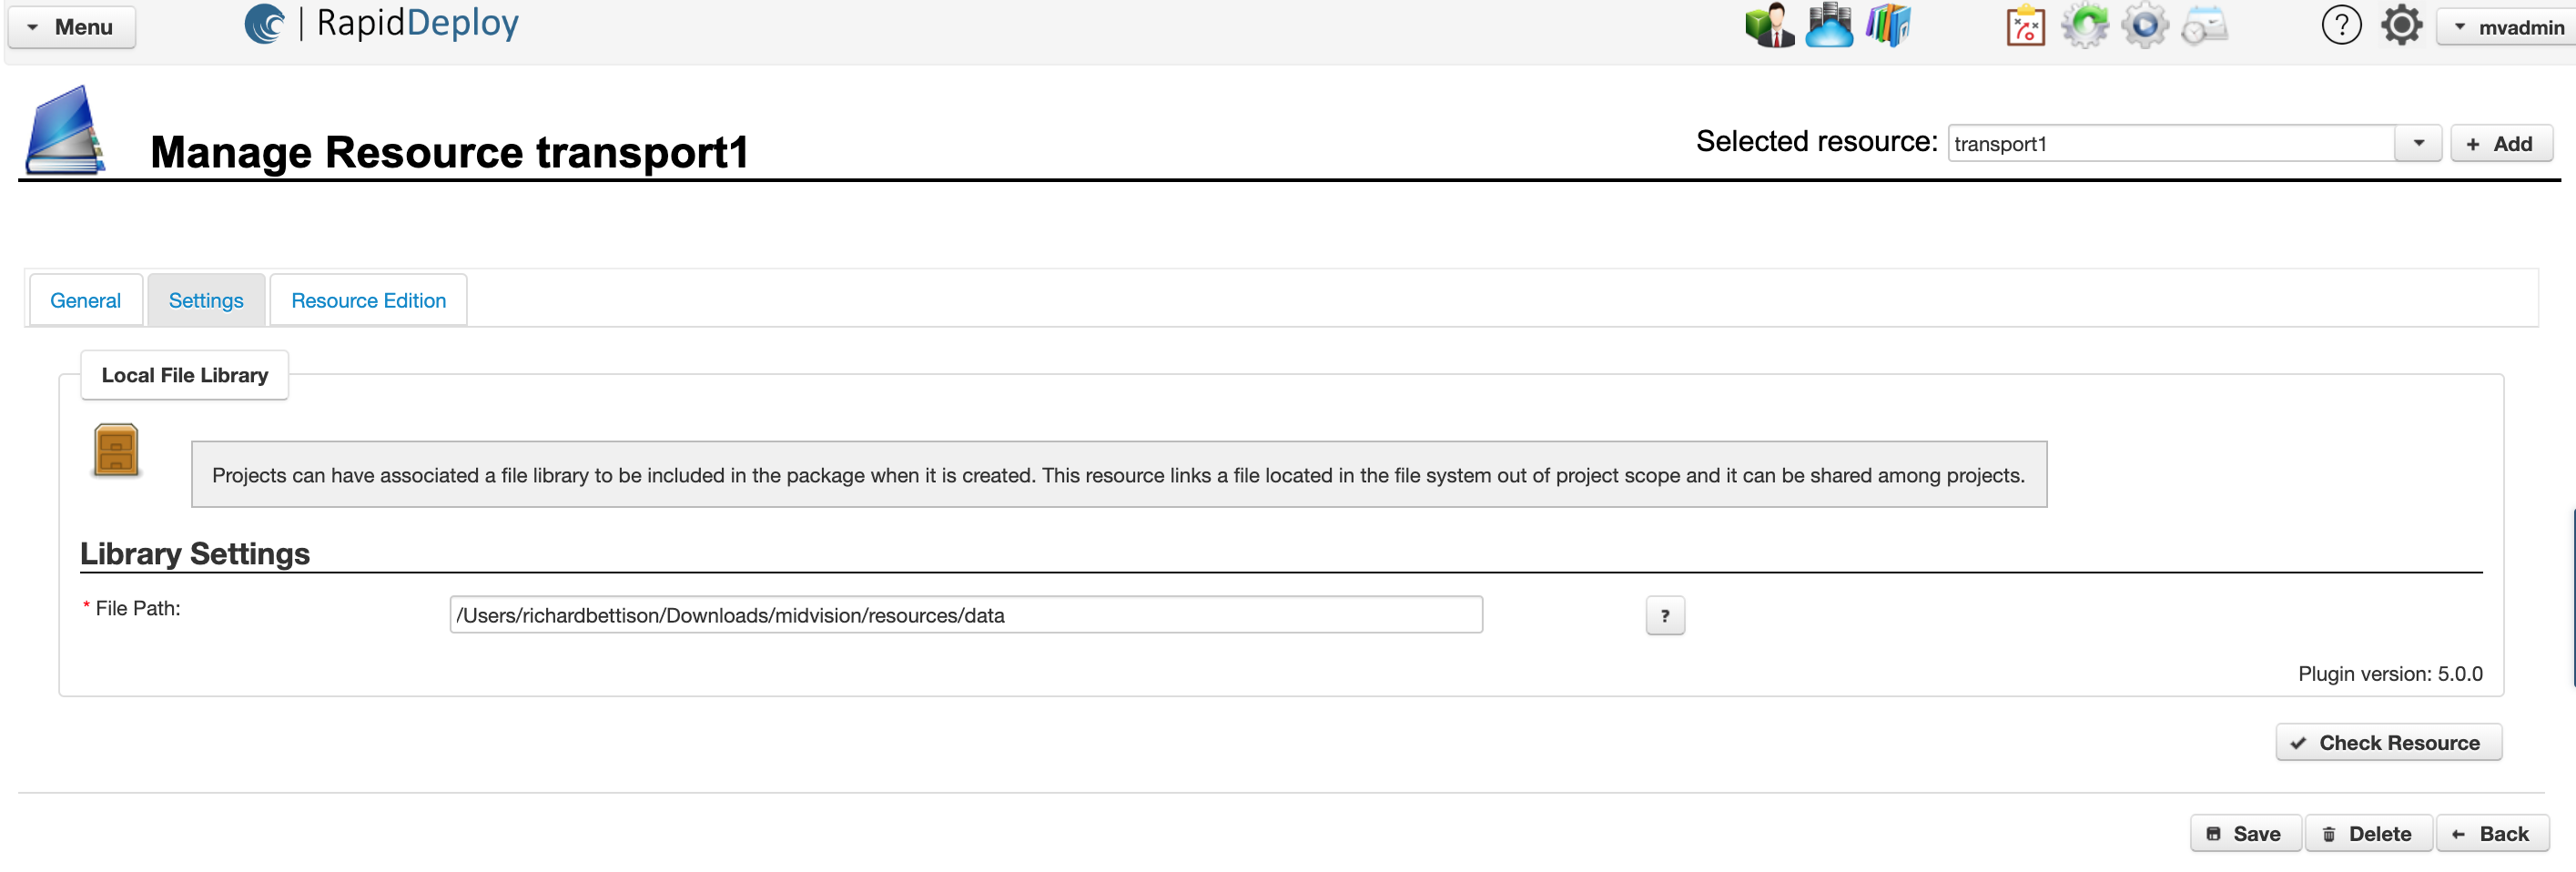
Fig. 10. Click to enlarge
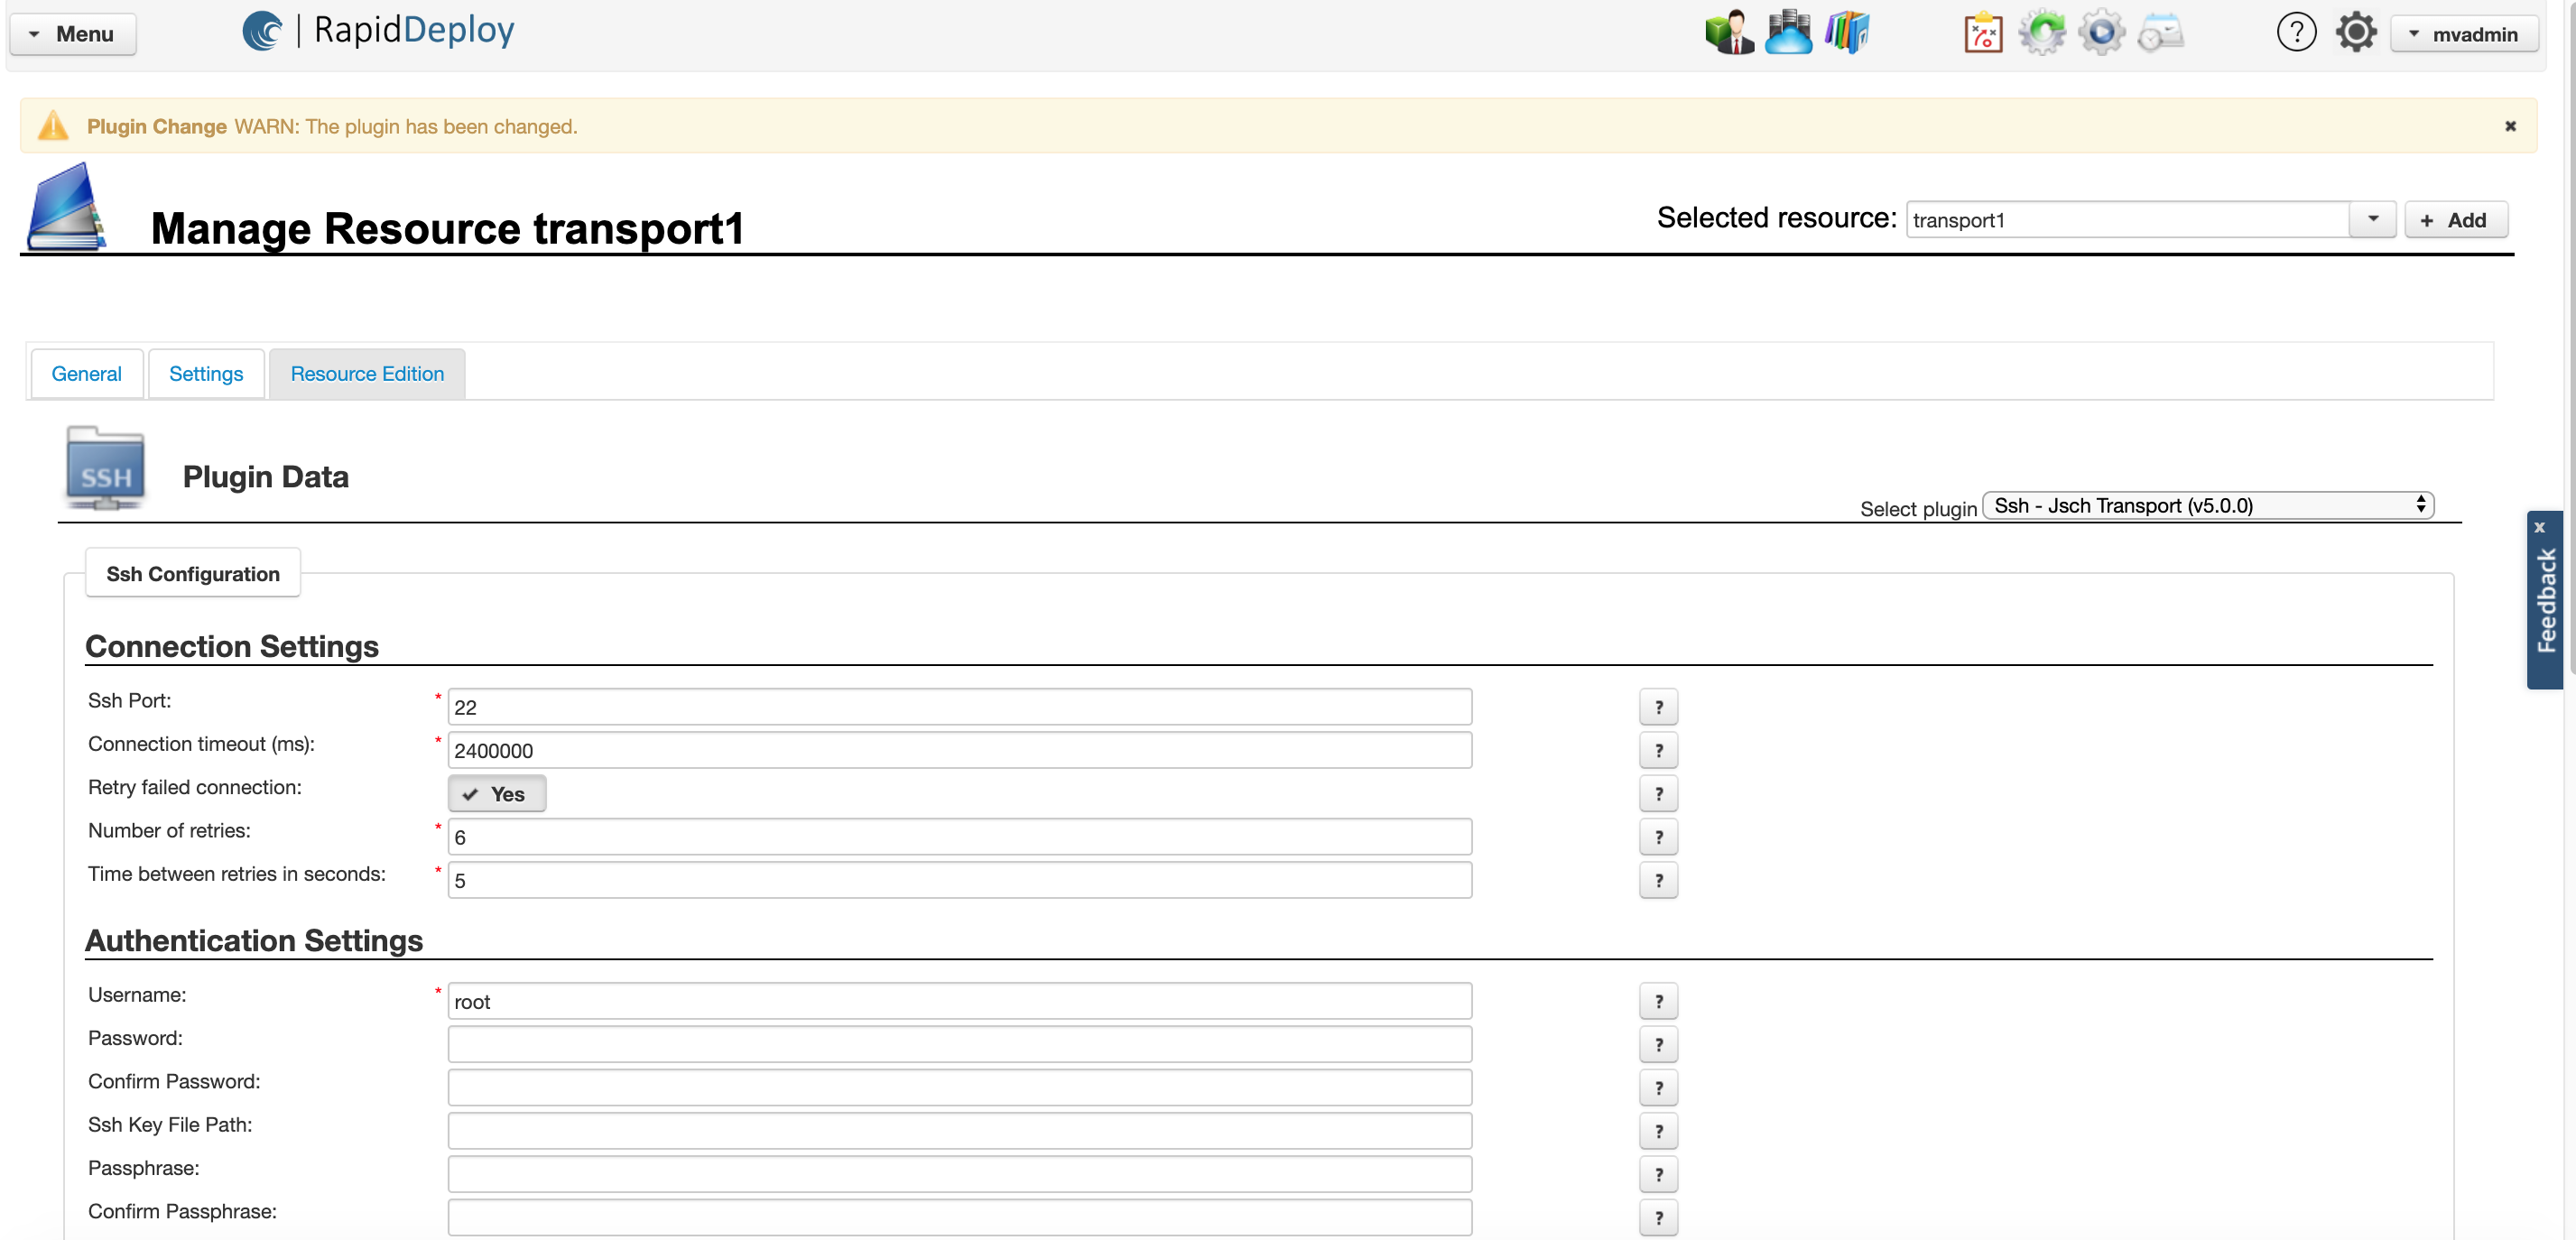
Fig. 11. Click to enlarge
4. Associating resources with your project
4.1 Binary resource libraries
You can select external resources to associate with the project (and therefore include in the deployment packages) on the ‘[Project]’ -> ‘General’ tab from the ‘Library Resources’ panel (shown opposite in Fig. 12). Once the selection has been made, any subsequent packages will include the resource, or a reference the the resource if ‘Download on target’ is true.
4.2 Data Dictionary resource libraries
You can select any Data Dictionary resources from the ‘[Project]’ -> ‘Orchestration’ tab on the ‘Data Dictionary’ sub tab from the ‘Dictionary Resources‘ list panel as shown Fig. 13.
If you select data dictionary resource(s) from the resource library, these will become the default values at the project, target and job scopes, but may be overridden at the project, target or job scopes.
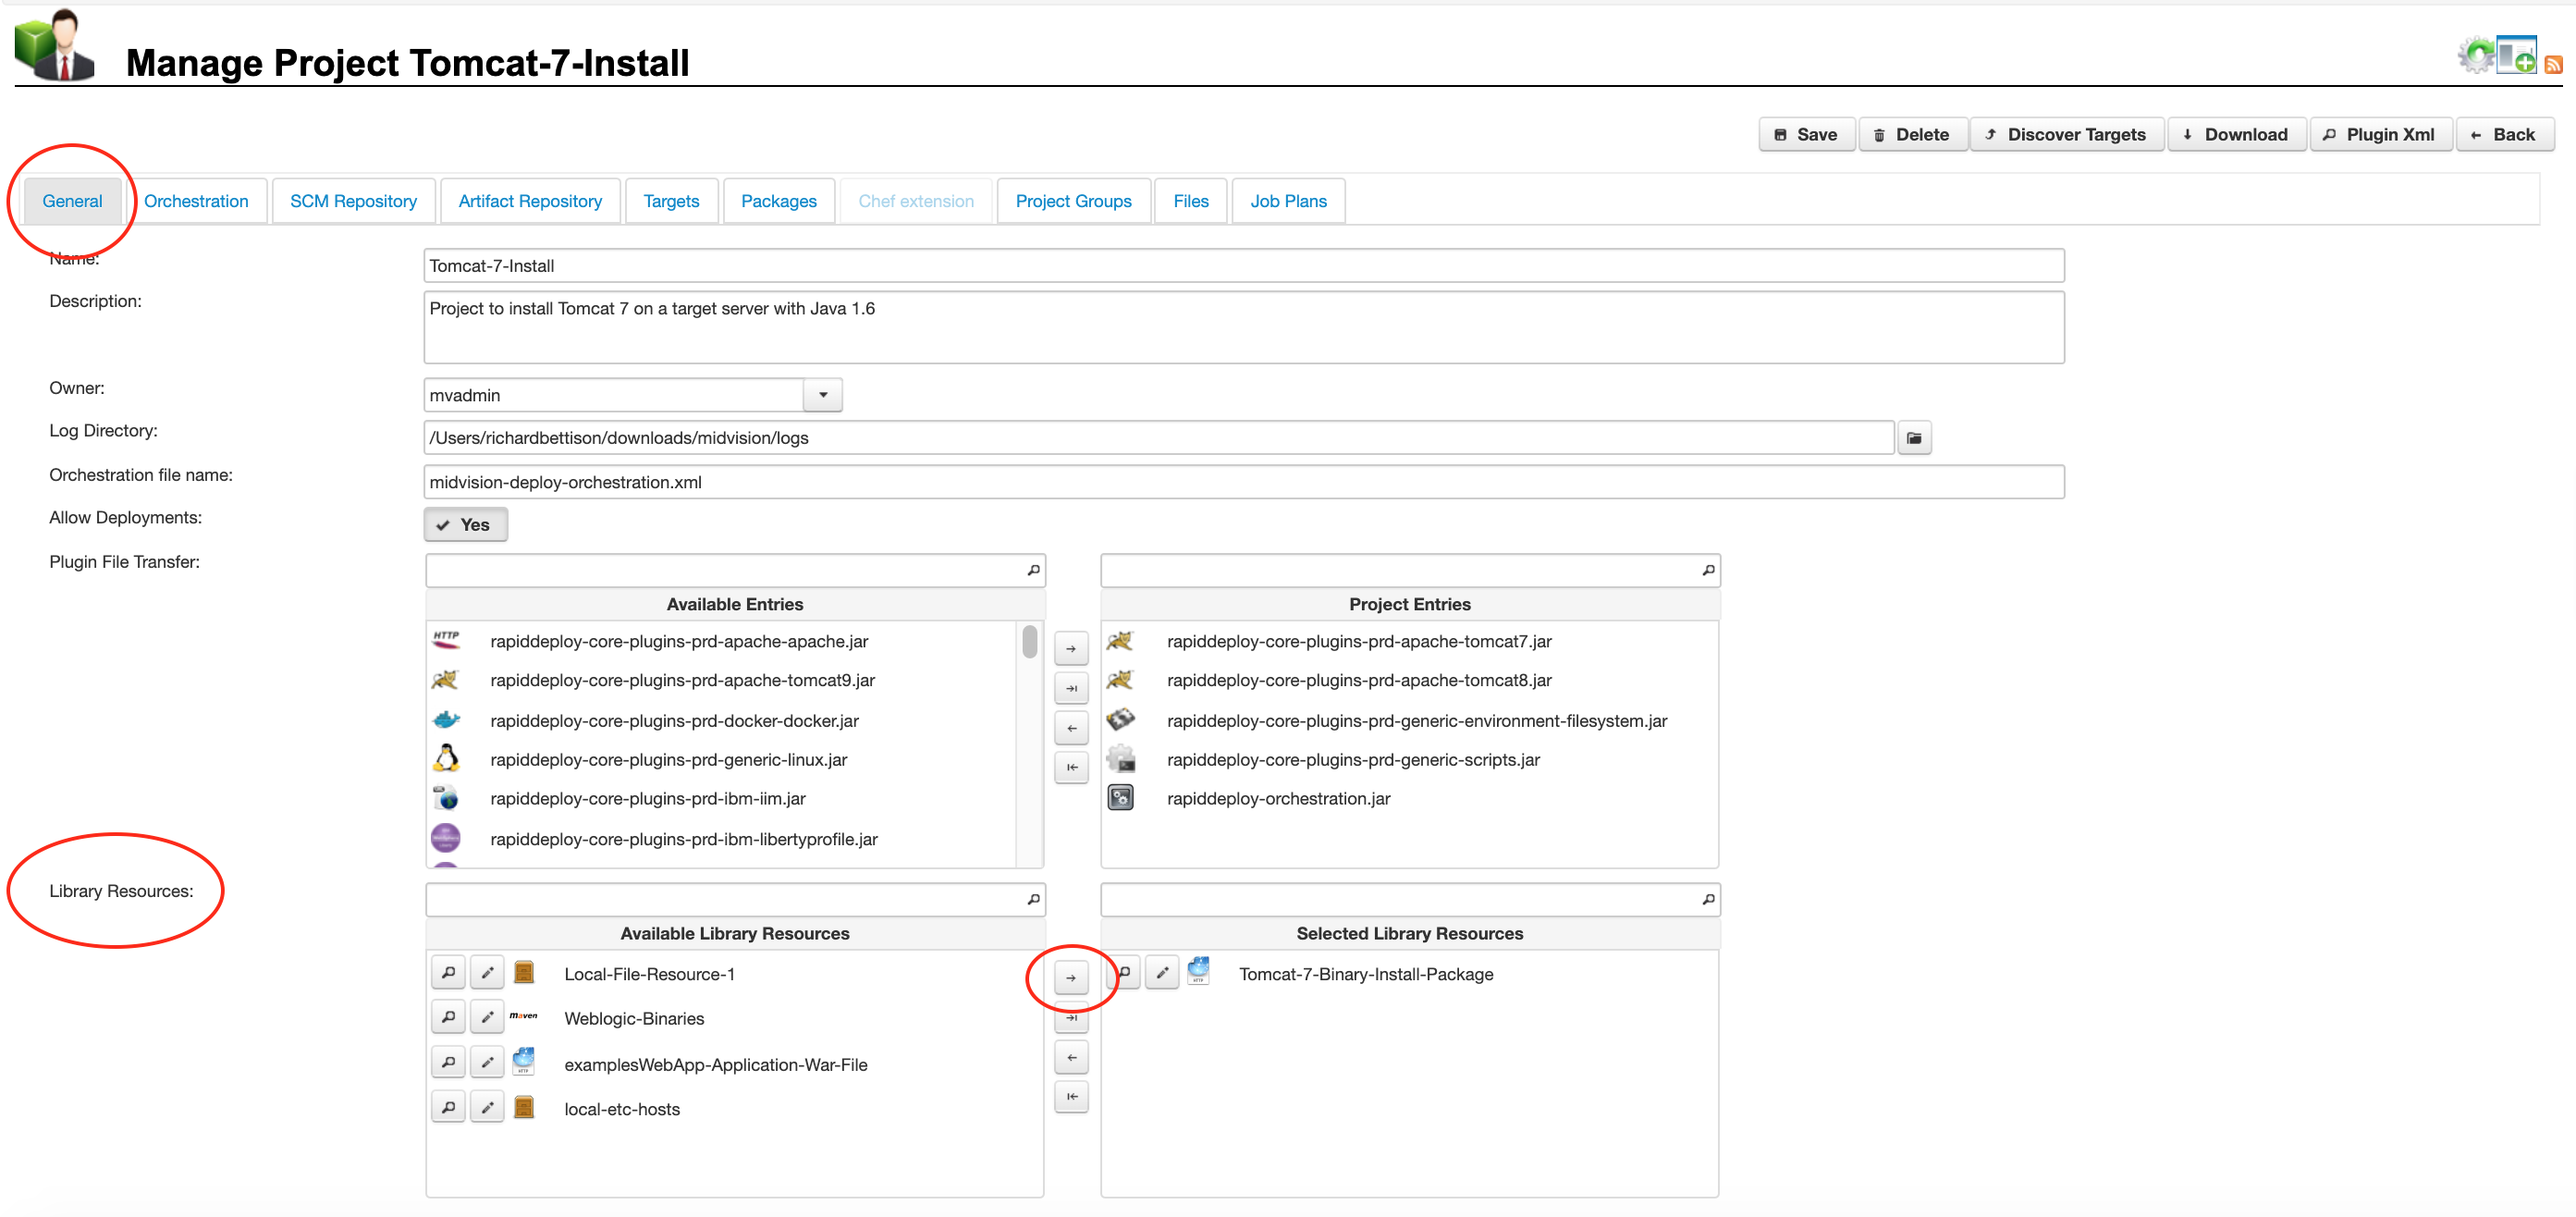
Fig. 12. Click to enlarge
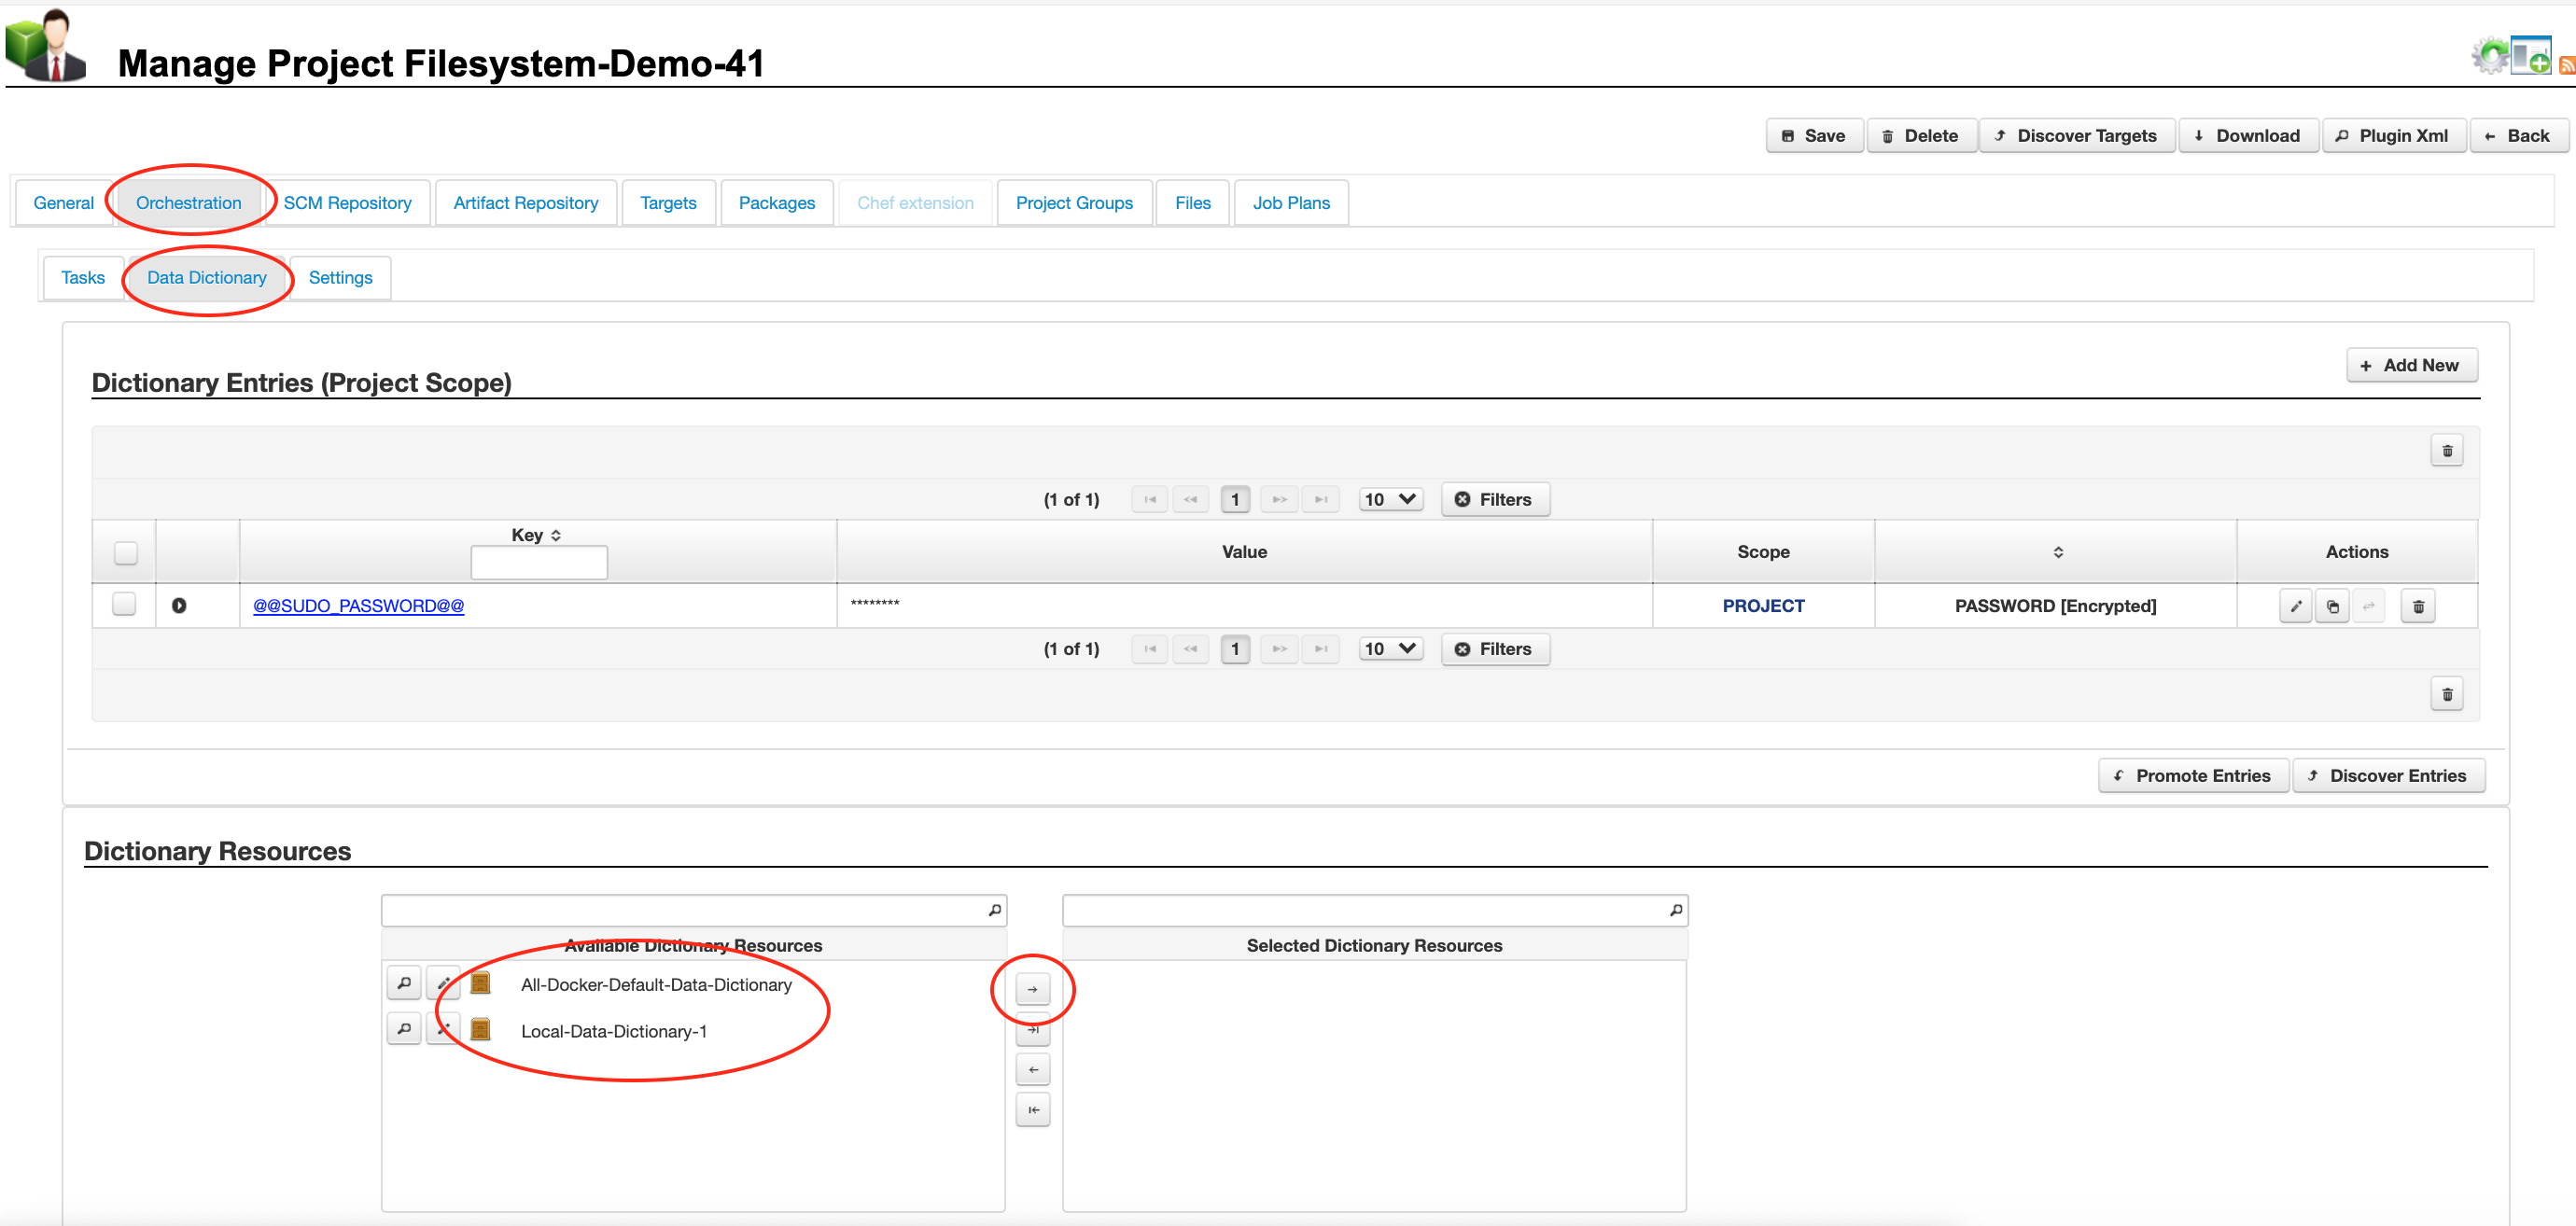
Fig. 13. Click to enlarge