RapidDeploy Blueprint for IBM MQ Install Binaries
Blueprint to configure a new Queue Manager on an existing MQ installation.
An IBM project to copy binaries to a target server and install MQ
Project overview.
This project is designed to install IBM WebSphere Message Queue using RapidDeploy. Here is a summary of what this project will achieve.
The server in the project is Windows. It can not be cloned to Linux as it will need different configuration (it is because IBM binaries for Linux and Windows are different)
The project is preconfigured with one target environment.
Specific application configuration items can be changed between environments, by use of Data Dictionary items.
On MidVision documentation you can find more information and step by step tutorial how to create this project.
Prerequisites
- A remote Windows server with firewall configuration that allow connection from the machine when RapidDeploy instance is installed (for testing purposes we suggest to turn the firewall off).
- RapidDeploy Agent should be downloaded and running on a remote Windows server
- You should have IBM MQ binaries downloaded (in this case for Windows)
- IBM MQ installation is based on task that is included in
rapiddeploy-core-plugins-prd-ibm-wmq.jar– so make sure this jar is in your RapidDeploy agent lib folder or it is added to your project classpath - Make sure you have correct values in your hosts file (http://www.rackspace.com/knowledge_center/article/how-do-i-modify-my-hosts-file).
- You will need the IBM MQ blueprint downloaded to your desktop:
What is preconfigured and demonstrated
The project demonstrates the following configurations:
- One target server for Windows. The user will need to configure the actual hostname for this logical server definition.
- Use of the RapidDeploy agent. If deploying to Linux then you’ll probably want to change this to use the SSH.
- Deployment package contains IBM MQ binaries and it is created by following this documentation.
MQBinaryInstallTasktask to perform installation of IBM MQ binaries to remote Windows server (see the task specification)listfile.txtthat contains the Installer command along with any required parameters (e.g response files)Response.inifile was edited to add license agreement parameter and specify the path where IBM MQ will be installed
How to use this project.
-
Download the project to your desktop by clicking on one of the links. The file will be saved as
WMQ_BIN_INSTALL_WINDOWS.zip -
Log into your RapidDeploy instance as
mvadmin. -
Navigate to
Resources -> Projects. -
In the top right hand corner click on the
Upload Projectbutton. -
Select the zip file you downloaded in step 1.
-
You are guided through a project import wizard. The important thing to check and change (if necessary) here is the path to the project storage directory (you will need to check it in SCM Repository tab, Artifact Repository tab and File System tab). Look at the example below:
For example you are running RapidDeploy on Windows and your
${MV_HOME}is set toC:/MV_HOME/midvision. Usually all RapidDeploy projects are stored in the${MV_HOME}\projectsdirectory. After importing our project, if you noticed that Project Root Directory path on the SCM Repository tab is/rd/projects/WMQ_BIN_INSTALL_WINDOWS, then in this case you will need to change the path toC:\mv_home\midvision\projects\WMQ_BIN_INSTALL_WINDOWSas it is shown here: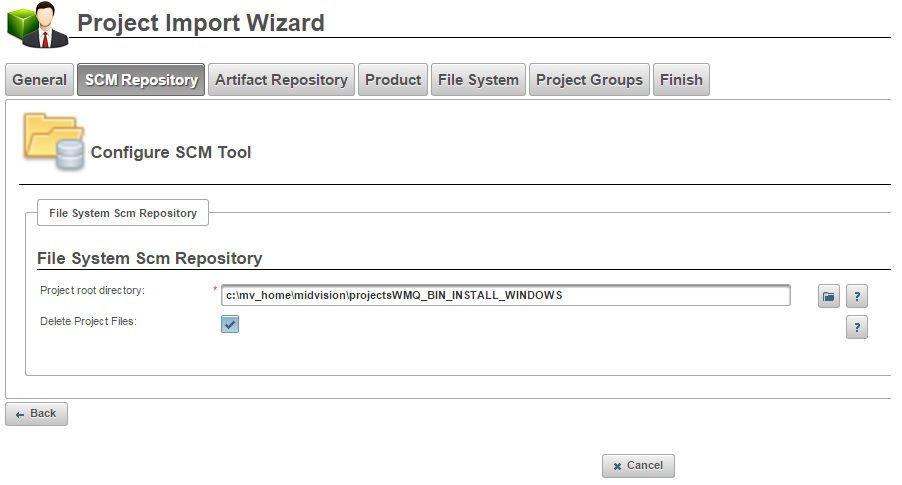
Change paths in Artifact Repository and File System in similar way
-
Once the project is imported, there are a couple of things you’ll need to do.
-
Firstly, you will need to change the server configuration. In order to do that navigate to
Resources -> Targets -> Serversand findwmqdemoserver(this is the name we used in our sample project). Edit this server – put correct Hostname then navigate toTransporttab and check if it is possible to connect to your remote Windows server by clicking Test Connection.
Note that Successful connection is mandatory to go further! -
Secondly, as we are not allowed to publish IBM binaries you need to have it downloaded. Please follow documentation and step by step turorial to create deployment package that contains IBM binaries
-
Make sure that the paths specified in
MQBinaryInstallTask, andResponse.iniare correct (if this is a place where you want to have IBM MQ installed) -
Navigate to
Project-> TargetsTab.- Select the
Playbutton next to the target. - Select the package you want to deploy from the droplist.
- Since there is only one package, it is preselected. The latest package will always be preselected by default.
- Click on the
Yesbutton in this dialog. - The deployment is started and you are taken to the running jobs panel where you see the tasks executed and job log in real time.
- Select the
-