Create a Deployment Model

How to create a deployment model in RapidDeploy

A Deployment Model in RapidDeploy consists of three main components. These are the project, where the server orchestration is defined, the resources that are to be deployed, and the target infrastructure (servers, filesystems etc) where the deployments will run.

In this guide we give an overview of how to create and use a deployment model. Each of the following sections will be covered in more detail in the subsequent pages.

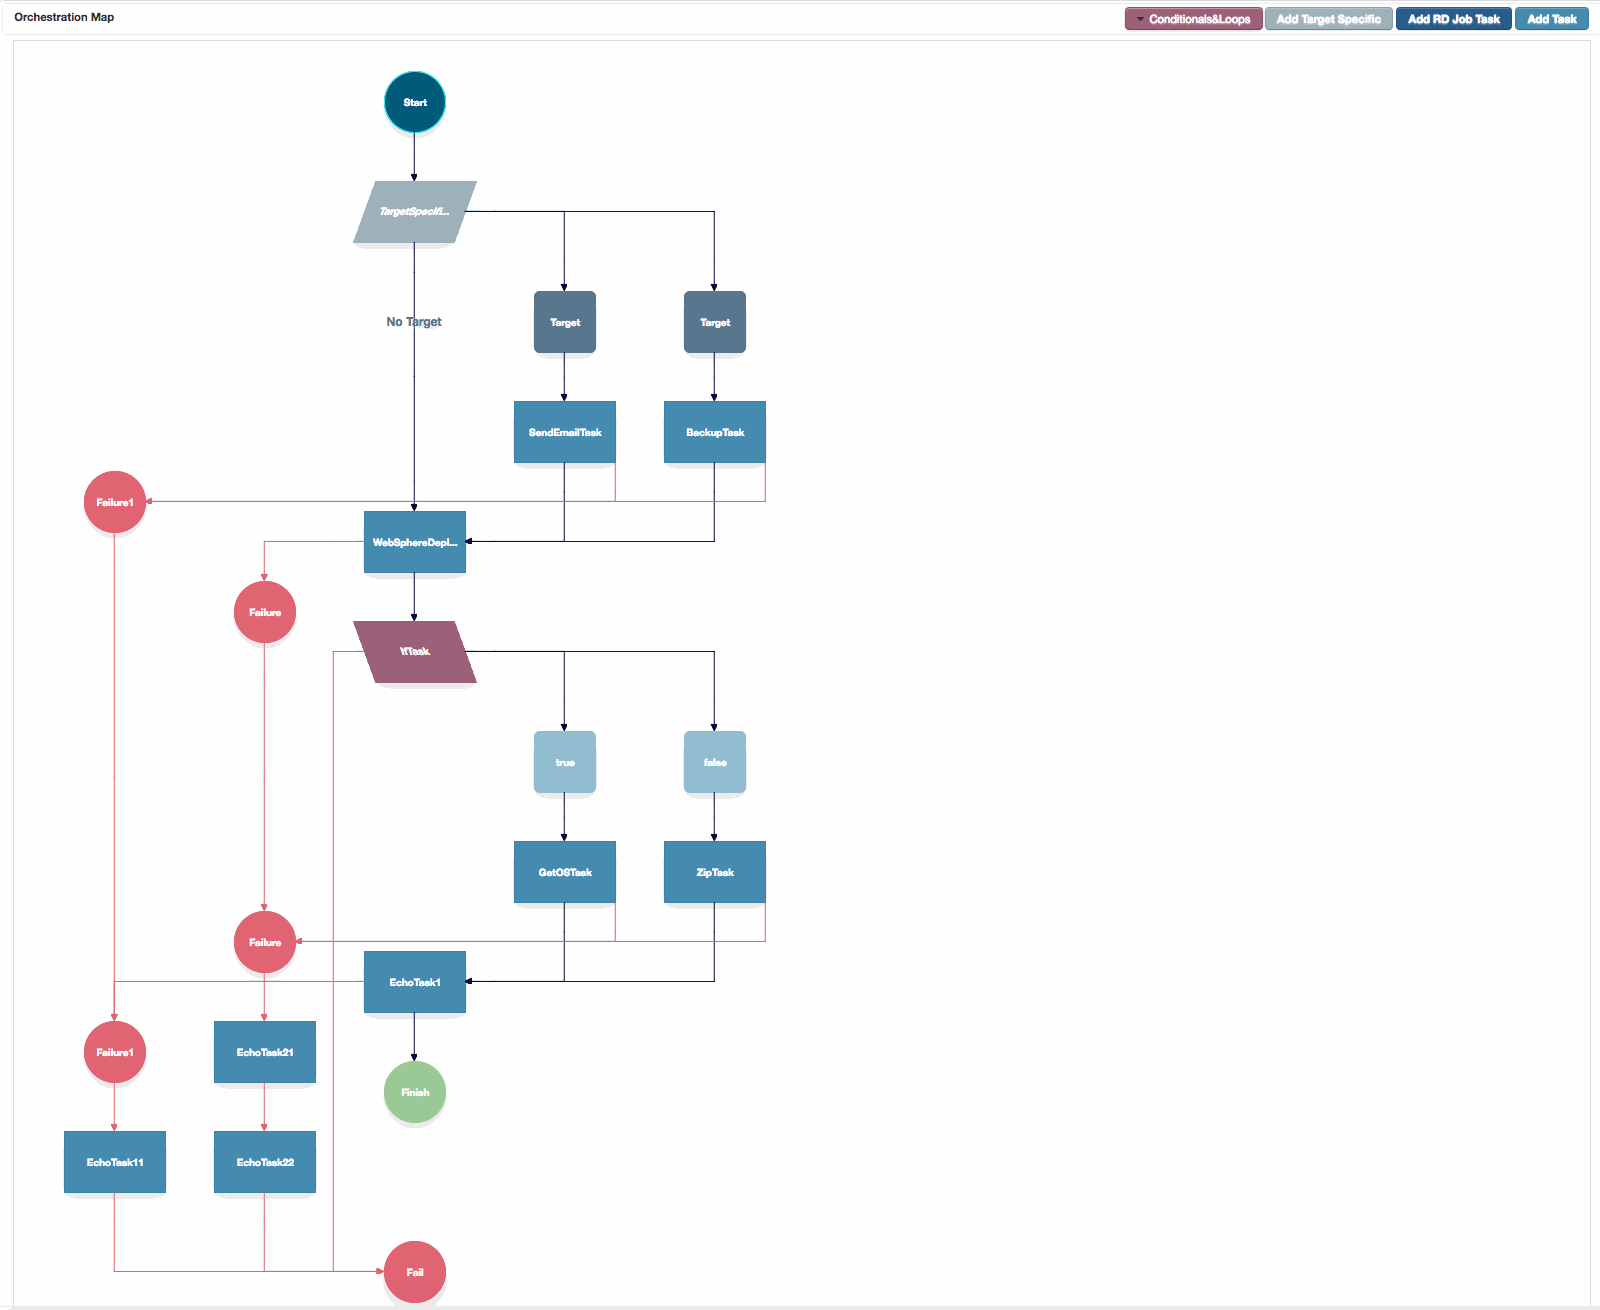
Orchestration Map Canvas

The Orchestration map canvas, showing configured failure branches, target specific tasks and a conditional.

1. The Project

The project is where we define our server orchestration and configure the target neutral tasks that will run on each deployment target. The orchestration canvas can be used to create the discrete task steps to deploy any resources and configure them. 

A project can consume internal (project located) or external (remote) resources to deploy, and can specify target infrastructure to run the deployments on.

You can access the ‘Manage Projects’ panel by clicking on the project icon highlighted in Fig. 1.

You can add a new project by clicking the ‘Add Project Wizard’ button highlighted in Fig. 1.

You can view or edit an existing project by clicking on the project name hyperlink.

Fig. 1. Click to enlarge

2. Resource Libraries

Project resources are any files or folders that RapidDeploy needs to access so that they can be deployed by a project. Internal resources may be uploaded directly to the project, and cannot be shared with other projects. Resources that exist outside the RapidDeploy folder structure, either locally on the filesystem or remotely on another server in the intranet or internet are called external resources. These can be configured in the resource library and once configured, can be shared by any project.

You can access the ‘Manage Resource Libraries’ panel by clicking on the libraries icon highlighted in Fig. 2.

You can add a new resource by clicking the ‘Add Resource’  button highlighted in Fig. 2.

You can view or edit an existing resource by clicking on the resource name hyperlink.

Fig. 2. Click to enlarge

3. Target Infrastructure

Deployment targets are where we run our project (server) orchestrations. Typically these targets will be a Server Host or Virtual Machine (VM) or cloud server instance running an operating system such as Linux or Windows.

You can access the ‘Infrastructure’ panel by clicking on the infrastructure icon highlighted in Fig. 3.

You can add a new server by clicking the ‘Add Server Wizard’ button highlighted in Fig. 3.

You can view or edit an existing server by clicking on the server name hyperlink.

Fig. 3. Click to enlarge

4. Deployment Packages

Once we have created a project, imported or referenced required deployable resources and configured our deployment targets, we are ready to perform our first deployment. In order to do this, we create a Deployment Package, which is a time stamped and versioned point in time copy of all of the project components and associated configurations to allow this package to be deployed to all current target environments.

You can access a projects versioned packages by selecting the project as described above, and then clicking on the ‘Packages’ tab  shown in Fig. 4.

Fig. 4. Click to enlarge