Versioning & Packaging Deployment Models
How to create and deploy packaged versions of deployment models
Once we have created a project, imported or referenced required deployable resources and configured our deployment targets, we are ready to perform our first deployment. In order to do this, we create a ‘Deployment Package’, which is a time stamped and versioned point in time copy of all of the project components and associated configurations to allow this package to be deployed to all current target environments.
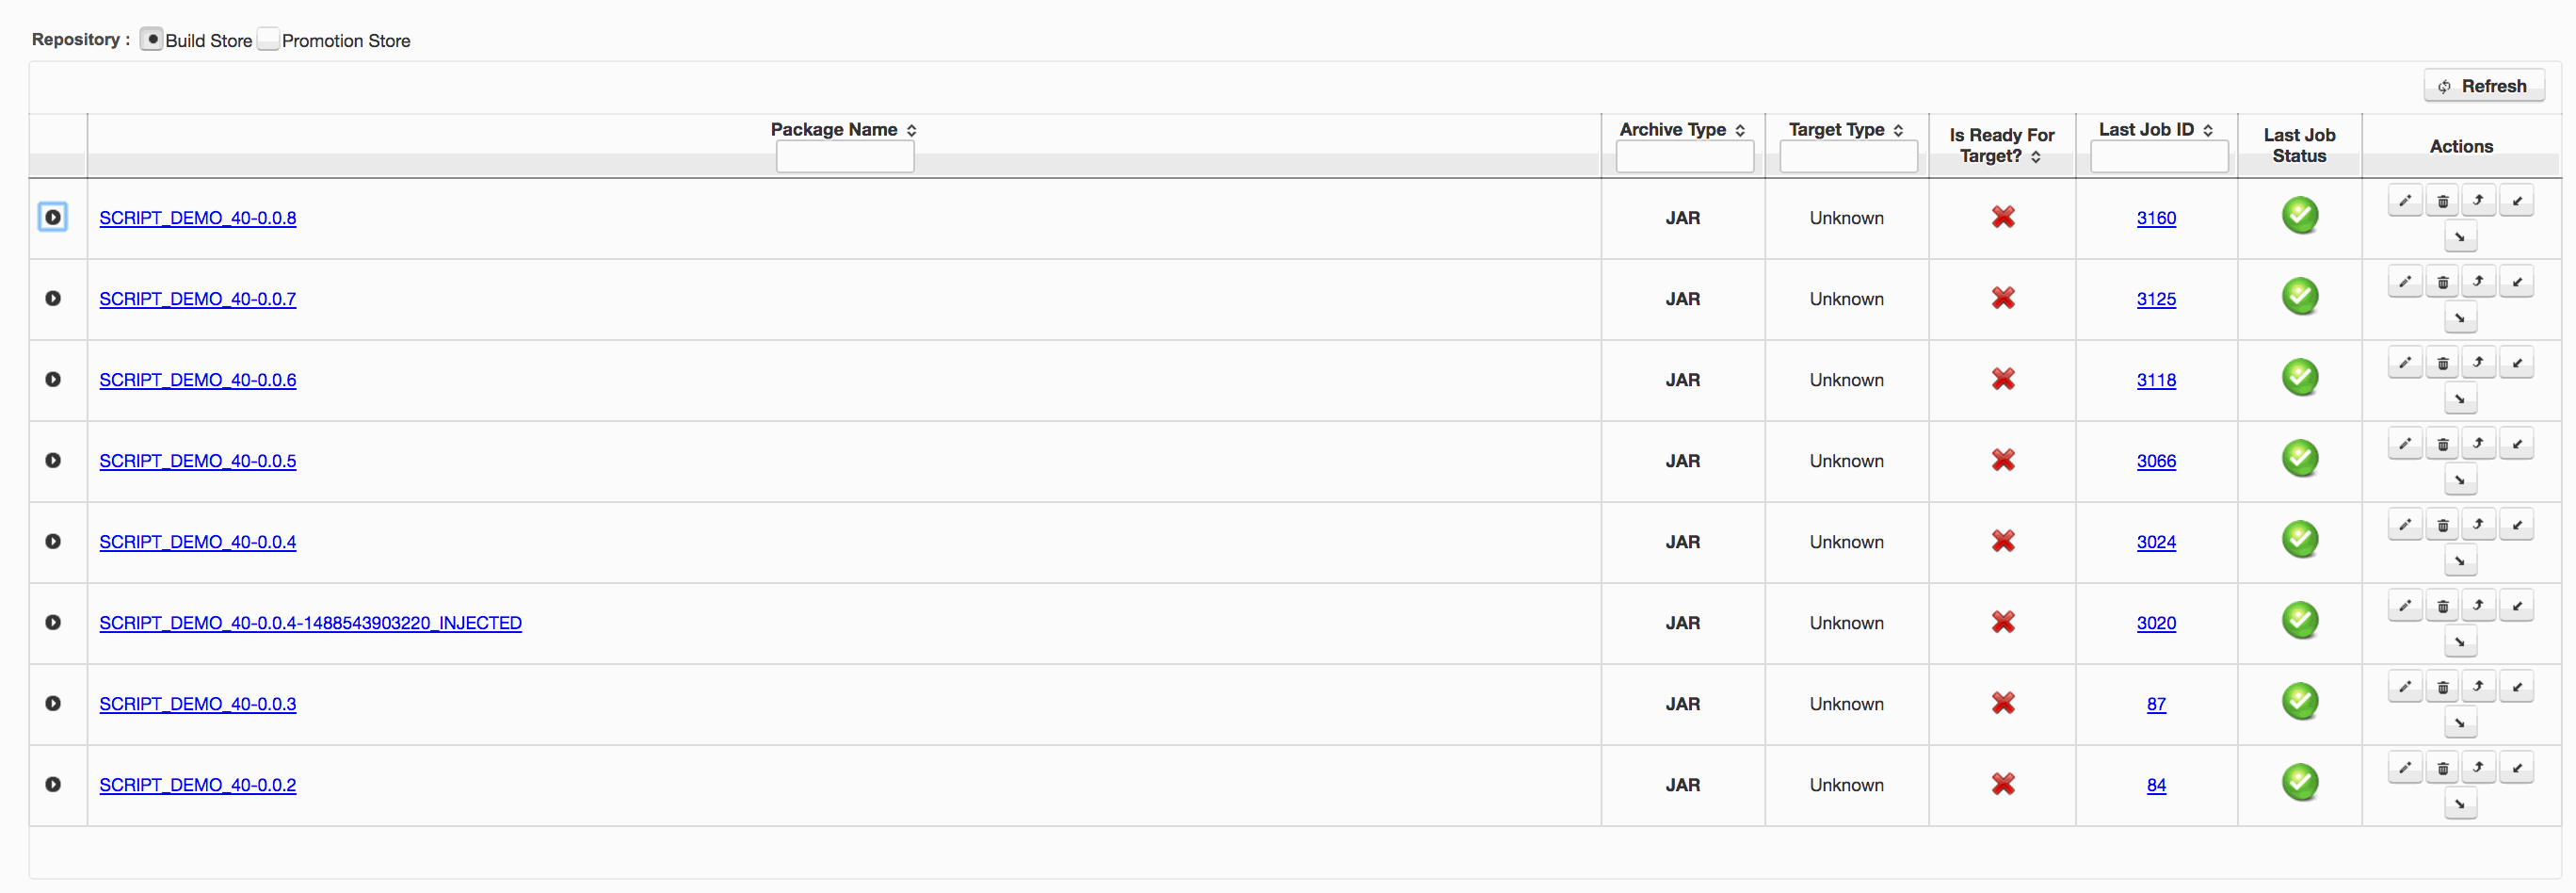
Example of a project packages panel
The Package versions panel is shown, with different versions of the deployment model.
1. Package creation
1.1 Overview
A RapidDeploy project (deployment model) may consist of one or more resources, task flows and associated configurations for multiple target environments. Over the lifetime of a project, these components are likely to undergo significant change. Whenever a deployment model is ready for deployment, we make a time-stamped, versioned zip file containing all of the resources (or pointers to them), task flows and configuration. These versions can be retained and built up over time. You may use them to compare how the project has changed over time, or redeploy older or newer versions to different target environments. In this guide we explain how this process works. The versioned deployment models are called Deployment Packages.
1.2 Initial Package Creation
When you create a new project, it will not initially have any versions (deployment packages). When your project is at a point where you want to test your first deployment, you first need to create a time-stamped, versioned deployment package.
You can create new deployment packages as follows.
- First, navigate to the project from ‘Resources’ -> ‘Projects’ or by clicking the ‘Projects‘ icon at the top of any page.
- Select the desired project and click on the project hyperlink in the list, or on the pencil icon in the ‘Actions’ panel.
- Select the ‘Packages’ tab as shown in Fig. 1.
- Click on the ‘Create Package’ button as shown in Fig. 1.
You will see the created package in the package list as shown in Fig. 2
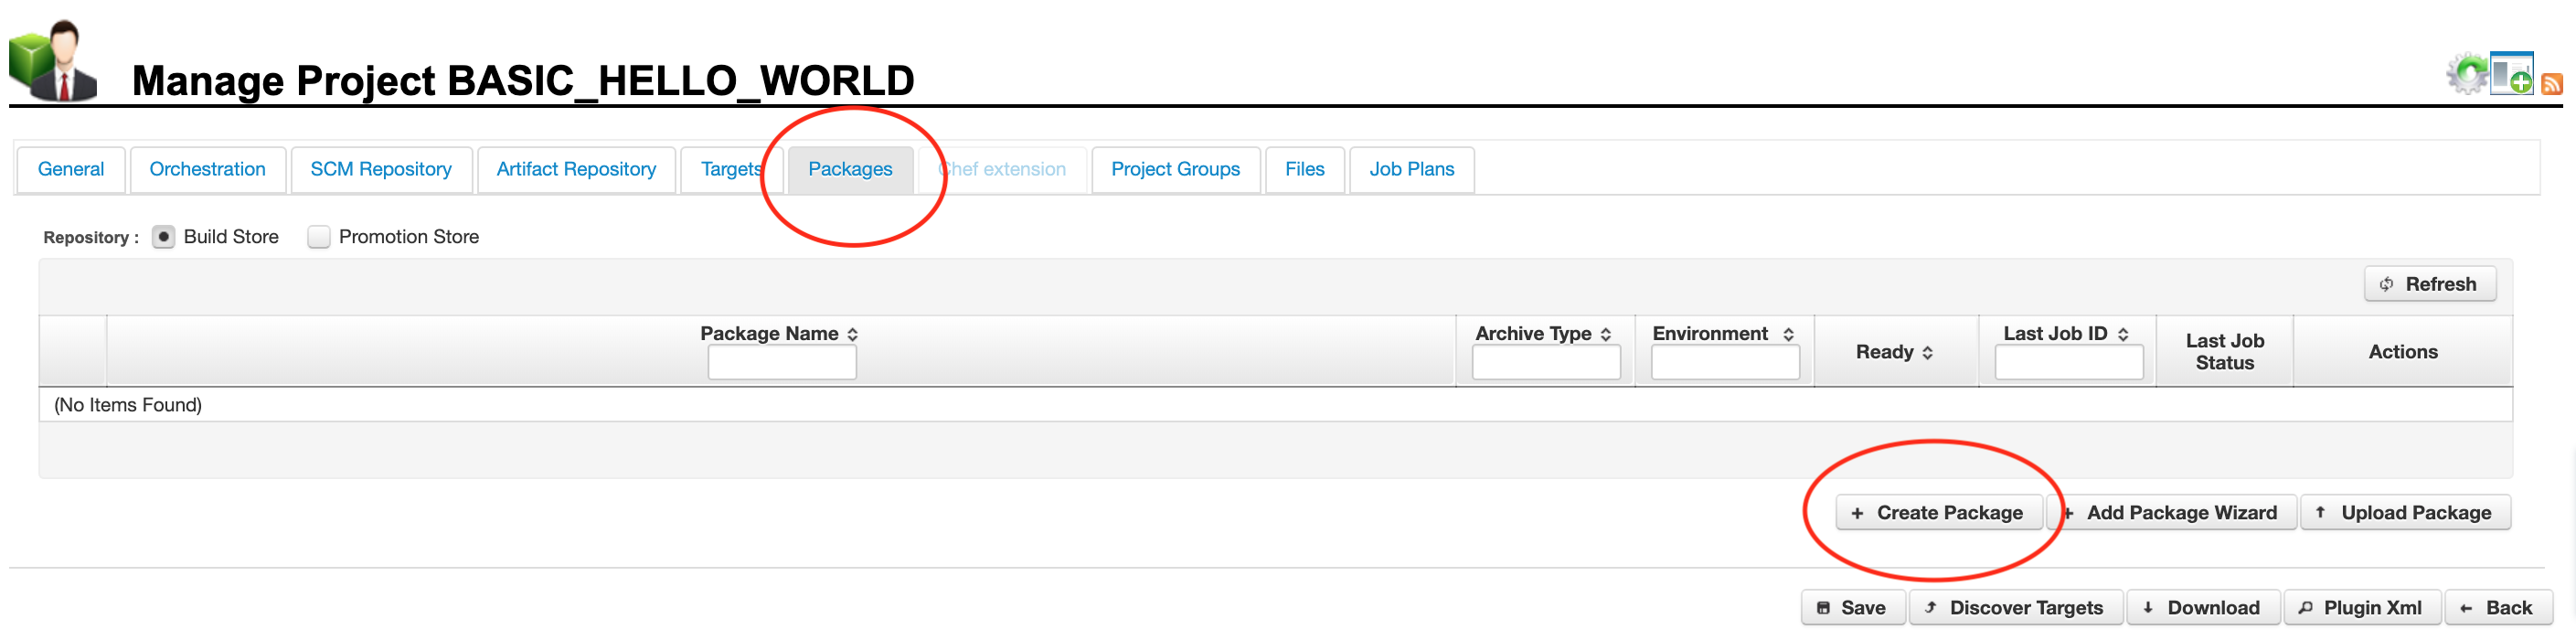
Fig. 1. Click to enlarge
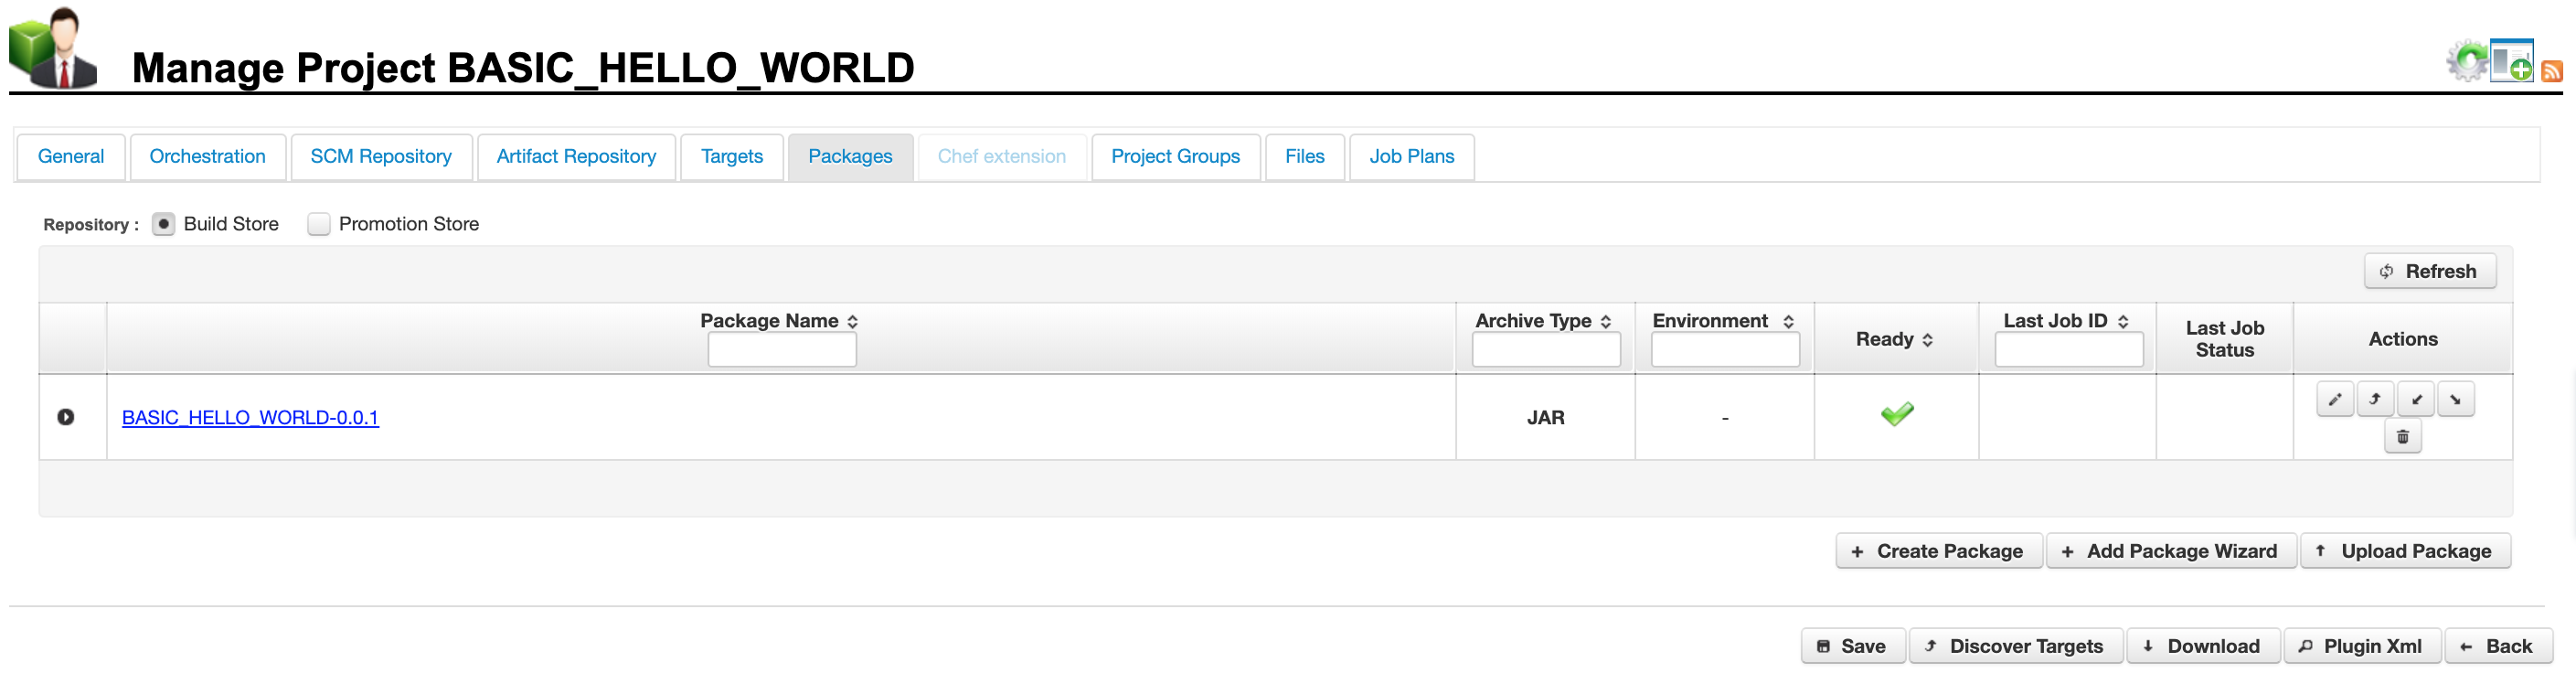
Fig. 2. Click to enlarge
1.3 View package details (version manifest)
View the details of any package (version manifest) as follows.
- Navigate to the ‘Packages’ tab as described above.
- Click on the blue highlighted hyperlink, or the icon, as shown in Fig. 3.
- Version manifest information about the package is displayed, as shown in Fig. 4.
- You can also click on the panel expansion button to the left of the row, which will show a quick view of the same information.
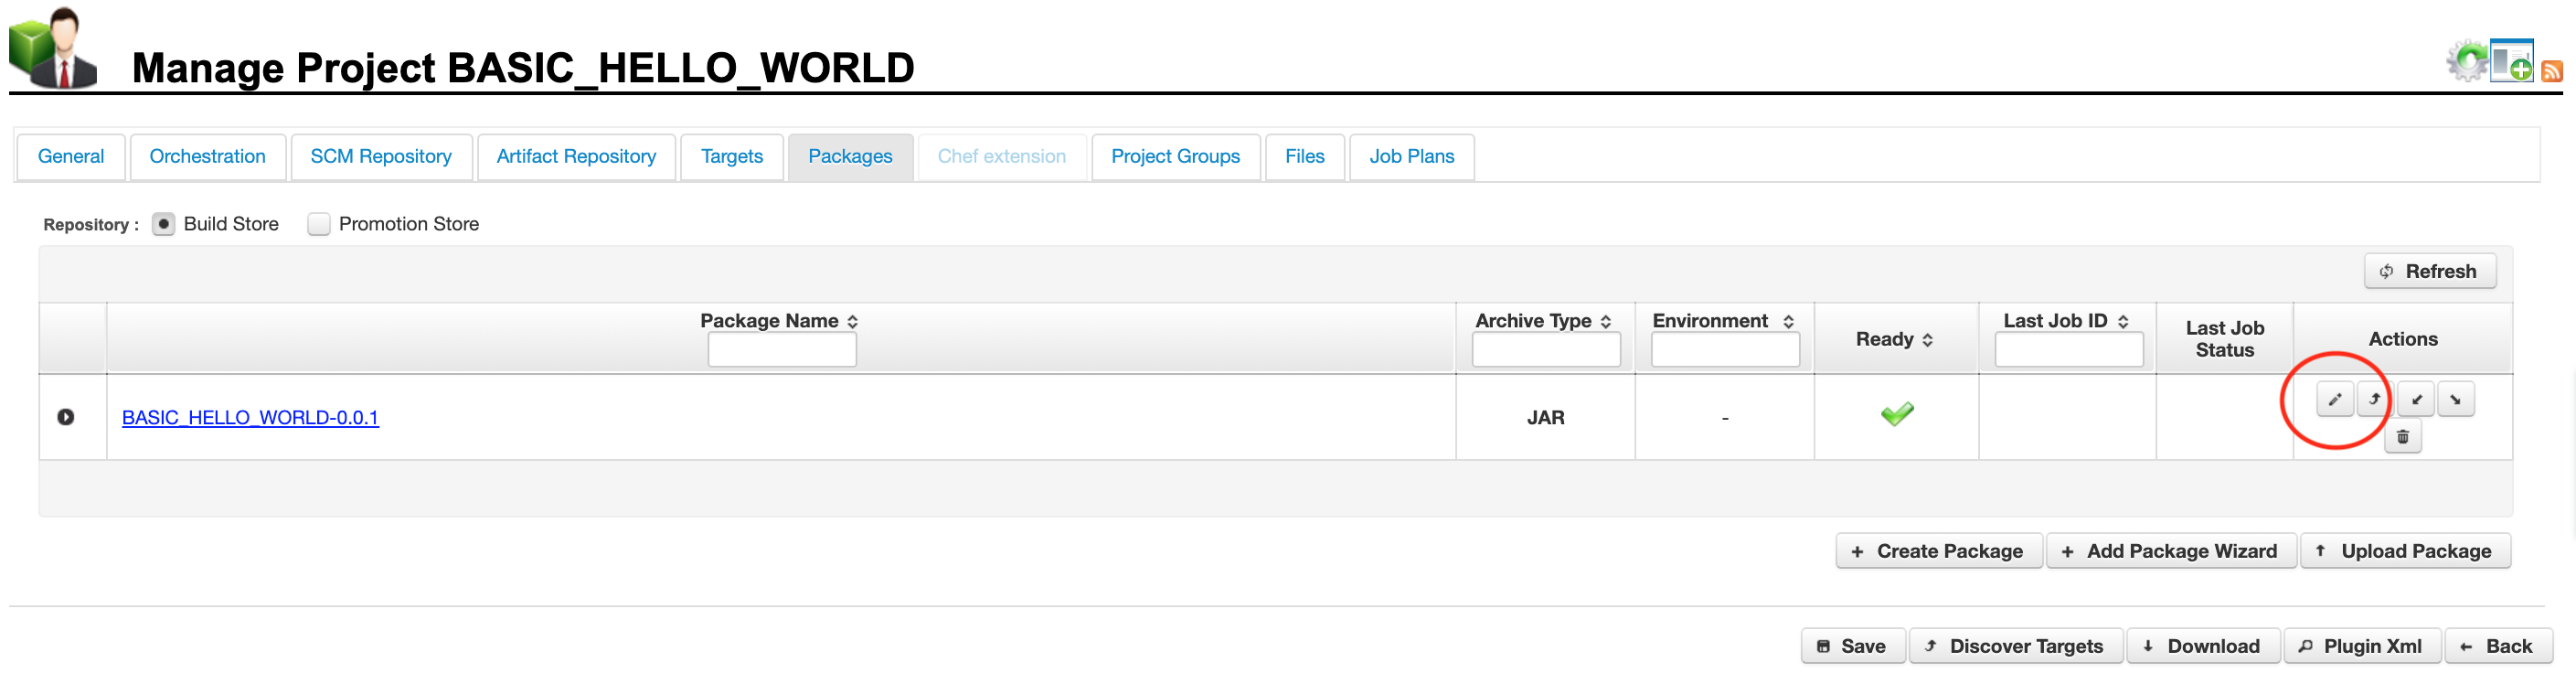
Fig. 3. Click to enlarge
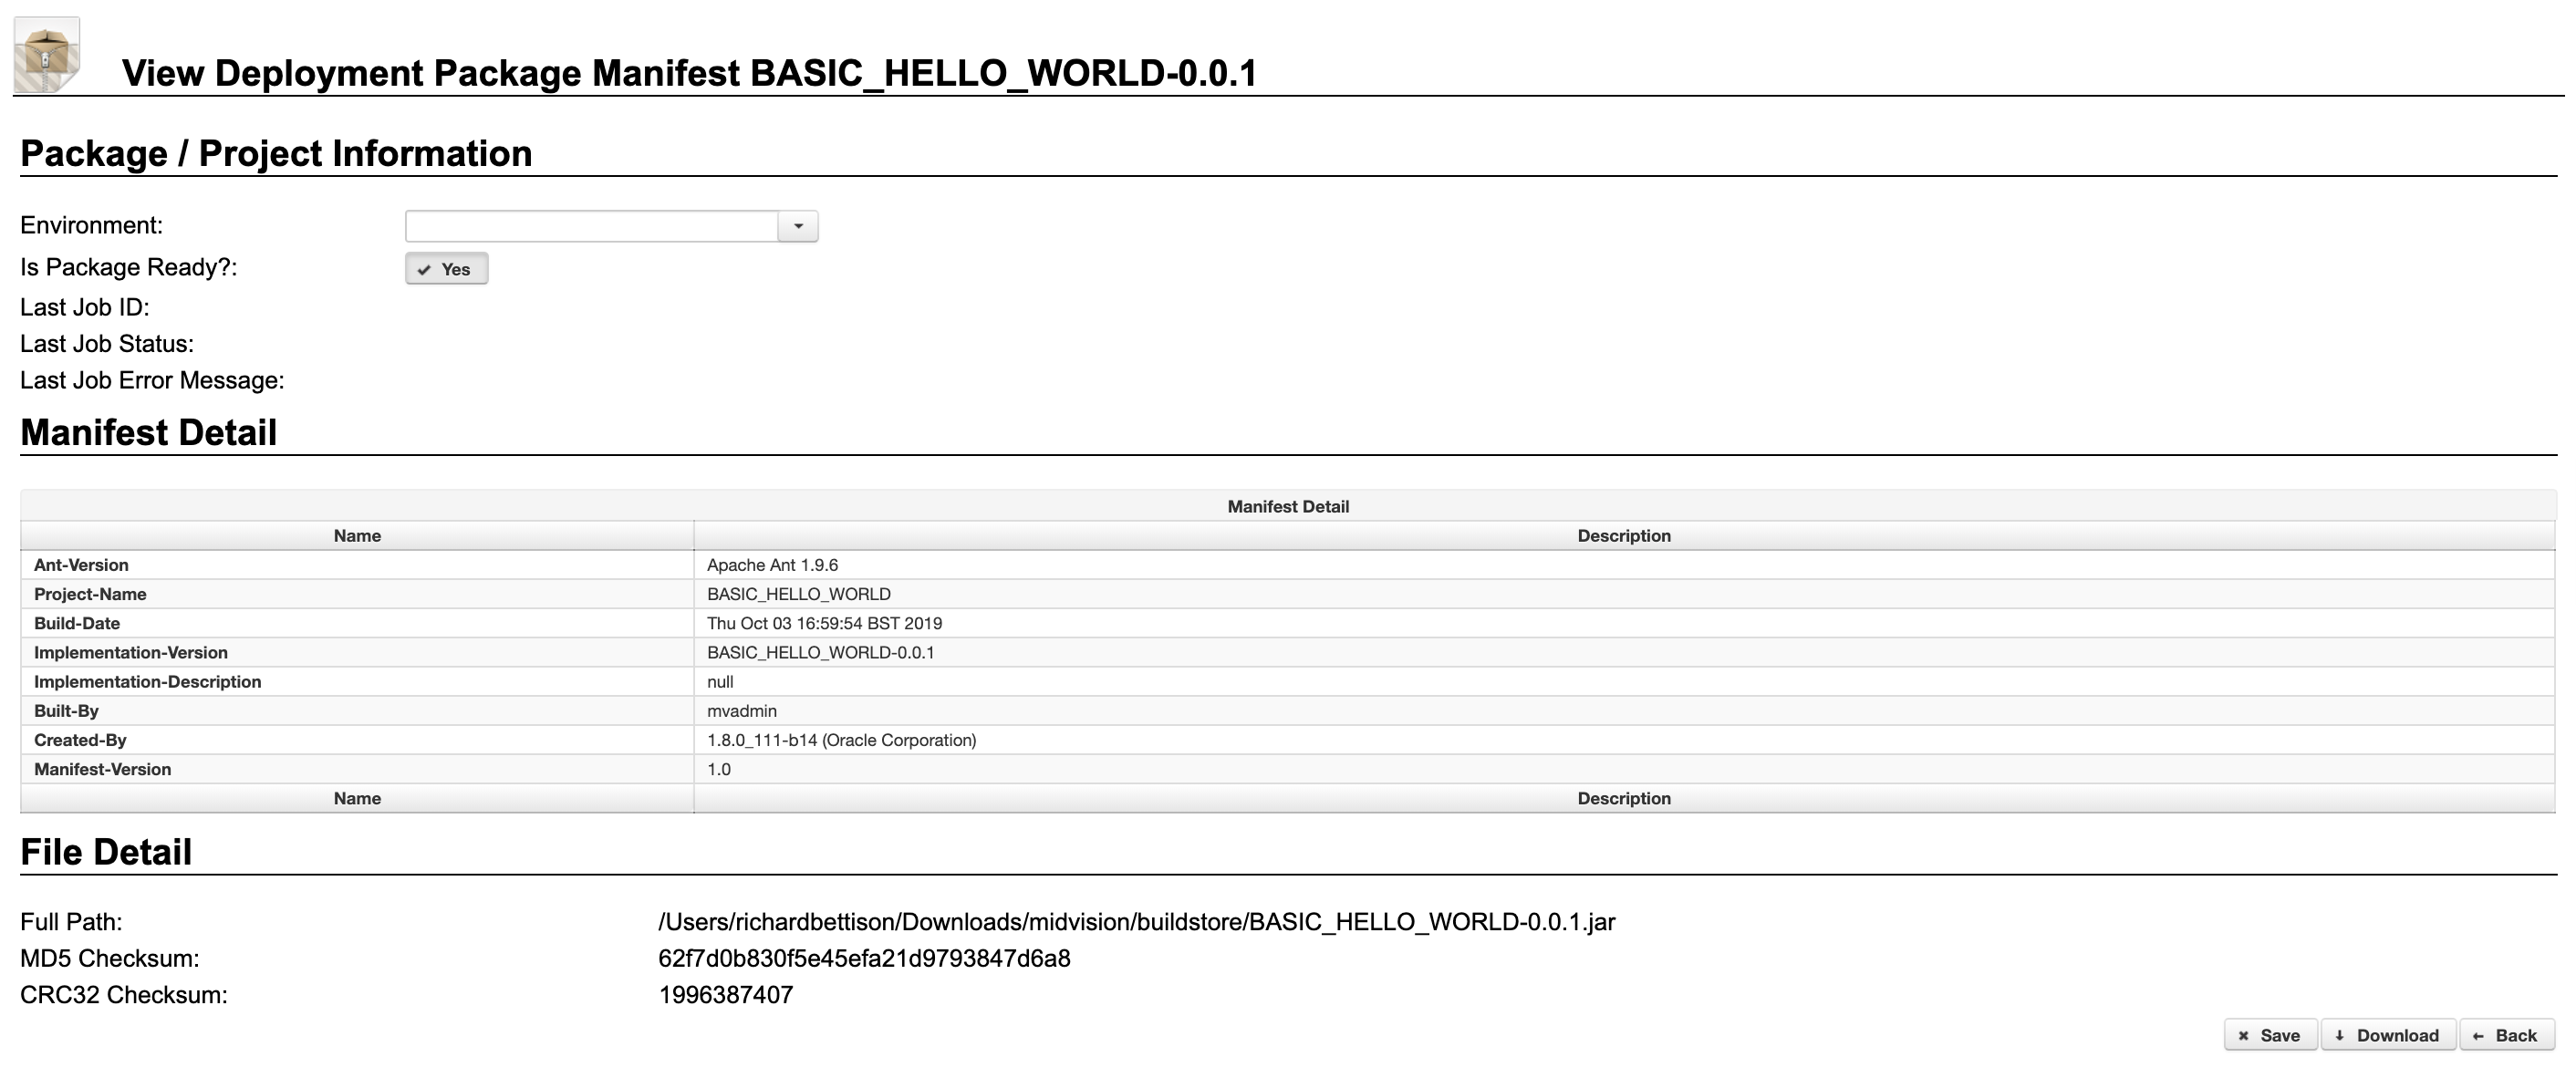
Fig. 4. Click to enlarge
2. Compare Packages
Once you have multiple packages stored in your project, you can compare any two versions. This is very useful, since a project may source resources from many different repositories, such as different SCM or artefact repositories. Therefore the project package comparison effectively allows comparison of all artefacts and configuration for the deployment, even if they are sourced from disparate repository systems.
2.1 Select the versions to compare
- Navigate to the ‘Packages’ tab as described above.
- Select the first version as the ‘Left’ side to compare as highlighted in Fig. 5.
- Select the second version as the ‘Right’ side to compare as highlighted in Fig. 5.
- Click on the ‘Compare’ button as highlighted in Fig.5.
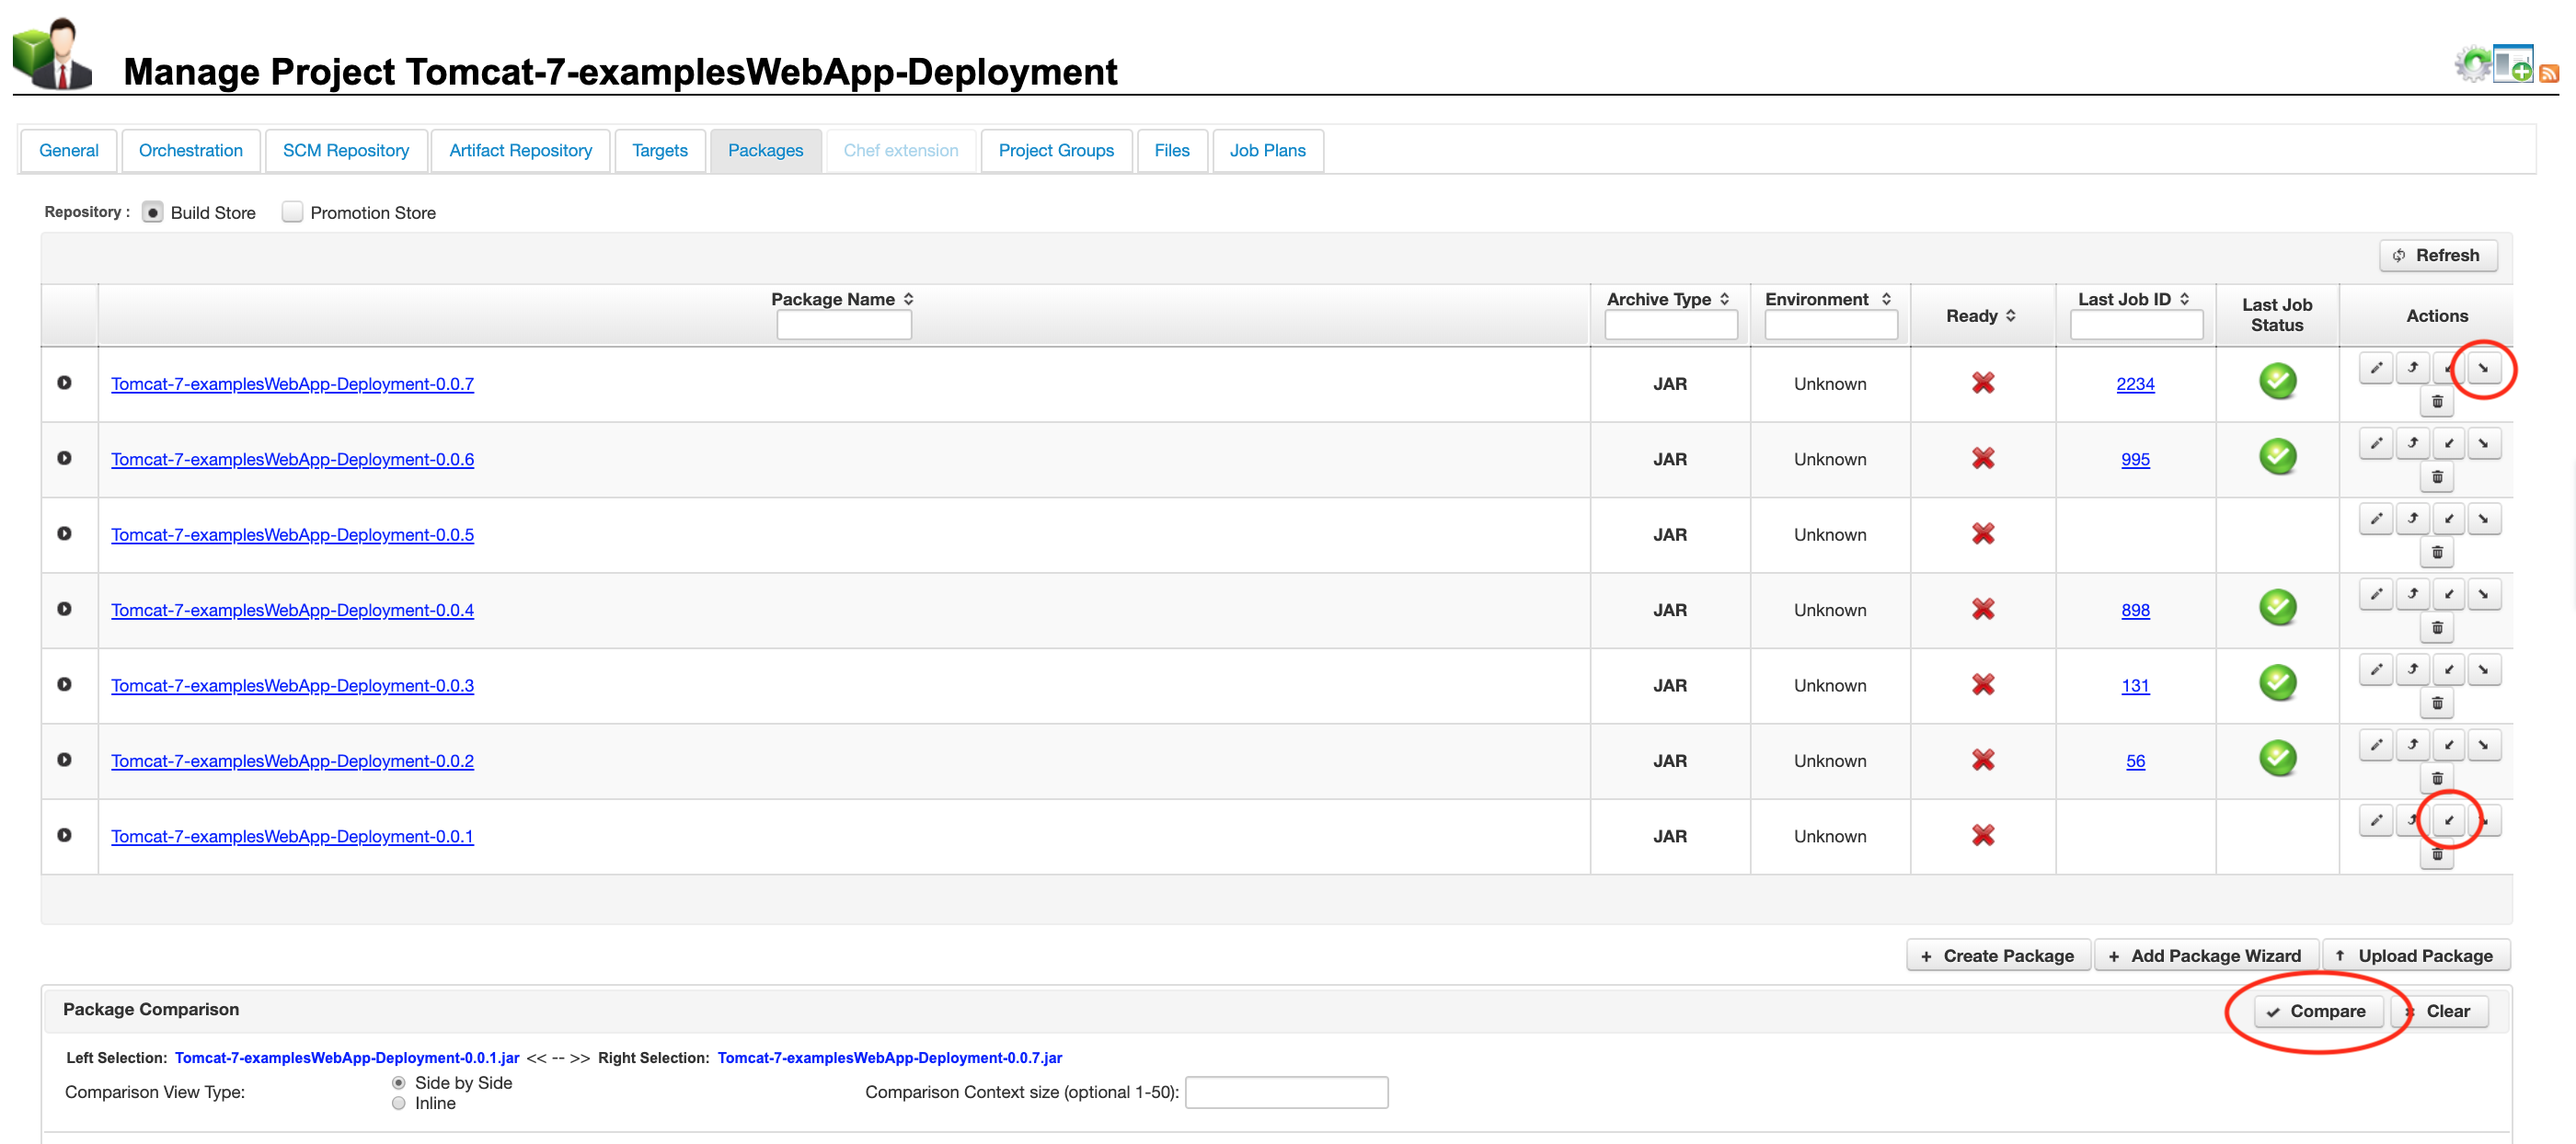
Fig. 5. Click to enlarge
2.2 Drill into the comparison
- Scroll down and you will see the comparison between the two zip files.
- Files have the following colour code:
- Grey – Unchanged between versions
- Amber – Amended between versions
- Red – Deleted between versions
- Green – Added between versions
- You can further drill down into any folders or any embedded zip files (e.g. Jar, War, Zip, Tar) files by clicking on the small black arrow to the left of the zip file or folder name (highlighted). In Fig. 6. we can see the META-INF folder opened and the examplesWebApp.war file opened.
- All files can be viewed using the magnifying glass icon as highlighted in Fig. 5. Unchanged
- Fig. 7. shows an example file differences view with line by line comparison. The line colour coding is the same as for the file comparison.
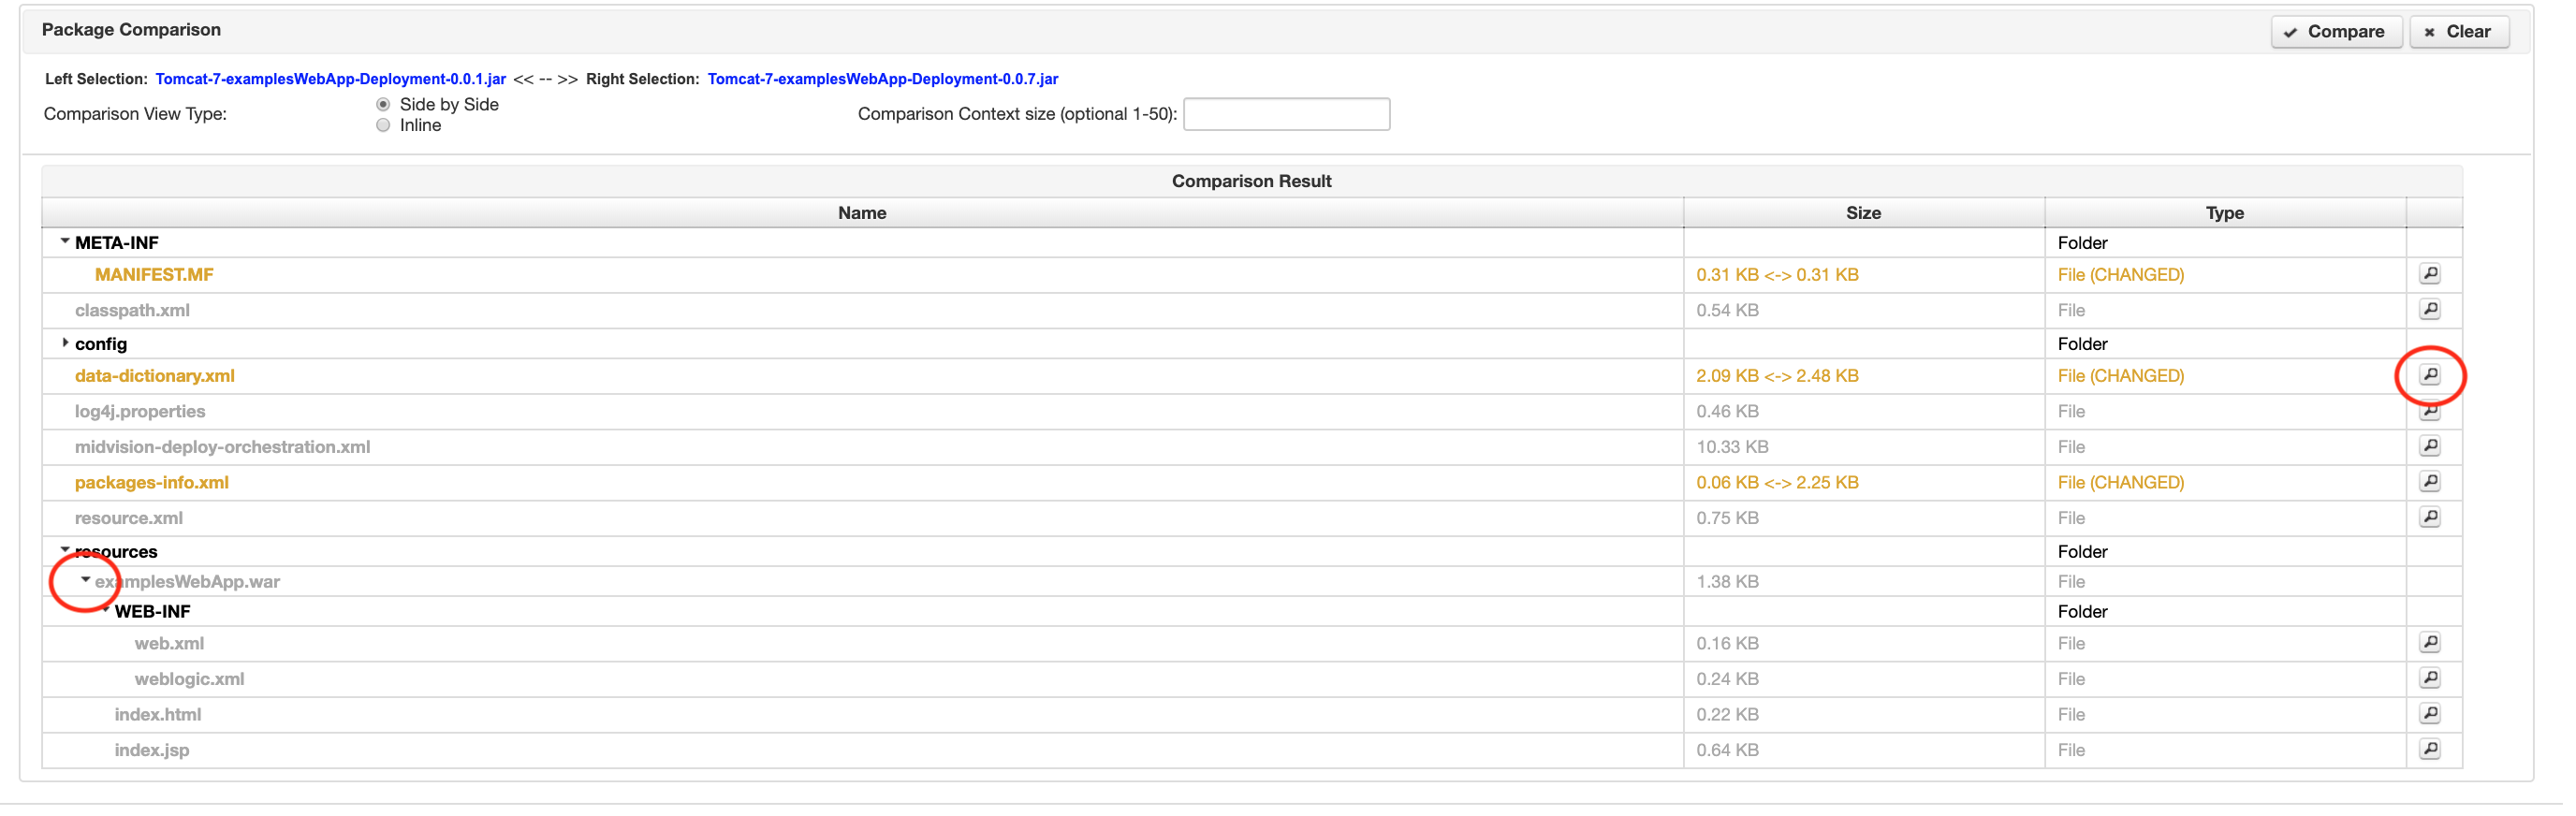
Fig. 6. Click to enlarge
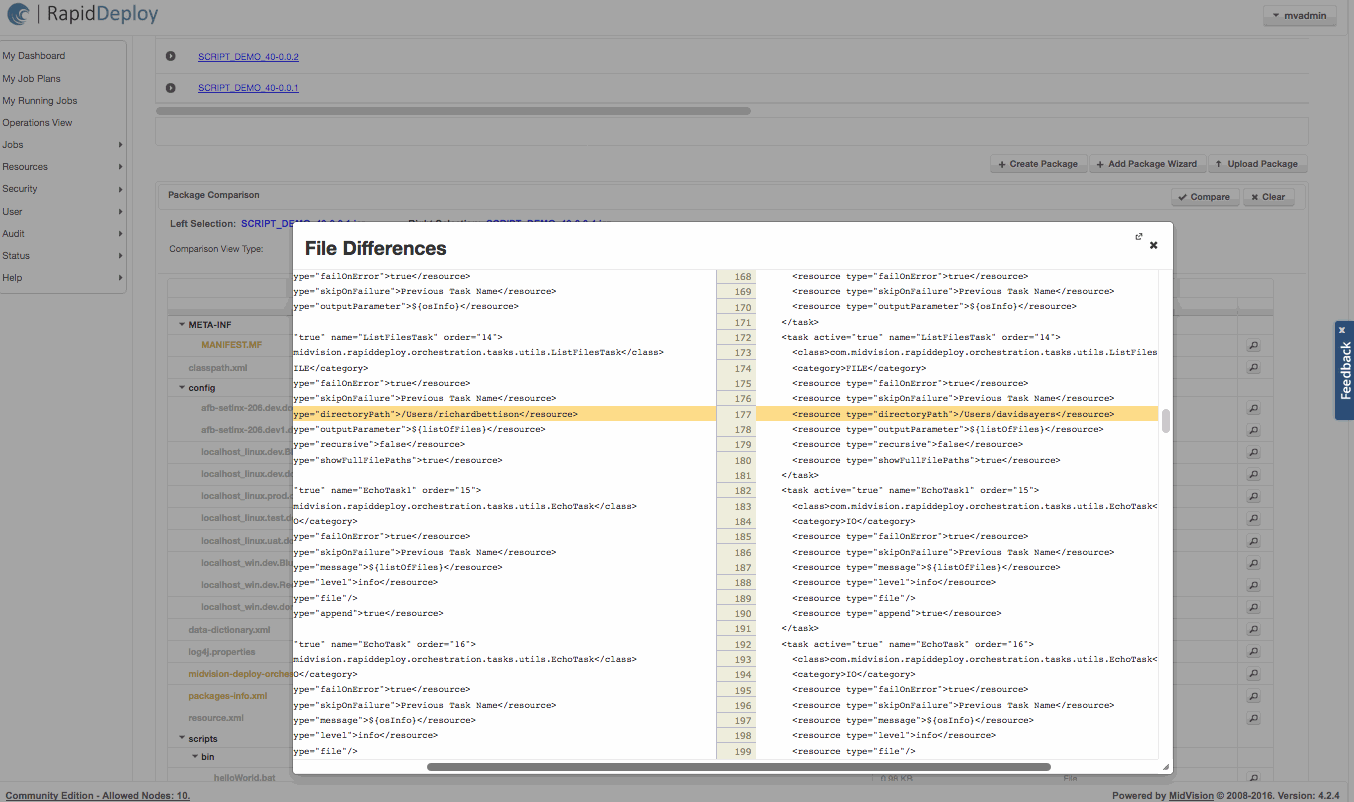
Fig. 7. Click to enlarge
3. Deploy Packages
Once you have a package stored in your project, you can deploy it to any of your configured targets.
3.1 Test deployment
- First, navigate to the project from ‘Resources’ -> ‘Projects’ or by clicking the ‘Projects‘ icon at the top of any page.
- Select the desired project and click on the project hyperlink in the list, or on the pencil icon in the ‘Actions’ panel.
- Select the ‘Targets’ tab as shown in Fig. 8.
- Select the deployment target, and click the ‘Play’ button, as highlighted in Fig. 8.
- From the ‘Confirm Target Job’ dialog, select the version to deploy, as highlighted in Fig. 9. You can deploy the latest version, any previous version or a new version. If you choose ‘NEW VERSION’, then a new deployment package is created and immediately deployed.
- Click on the ‘Yes’ button on the ‘Confirm Target Job’ to start the job running, as shown in Fig. 10..
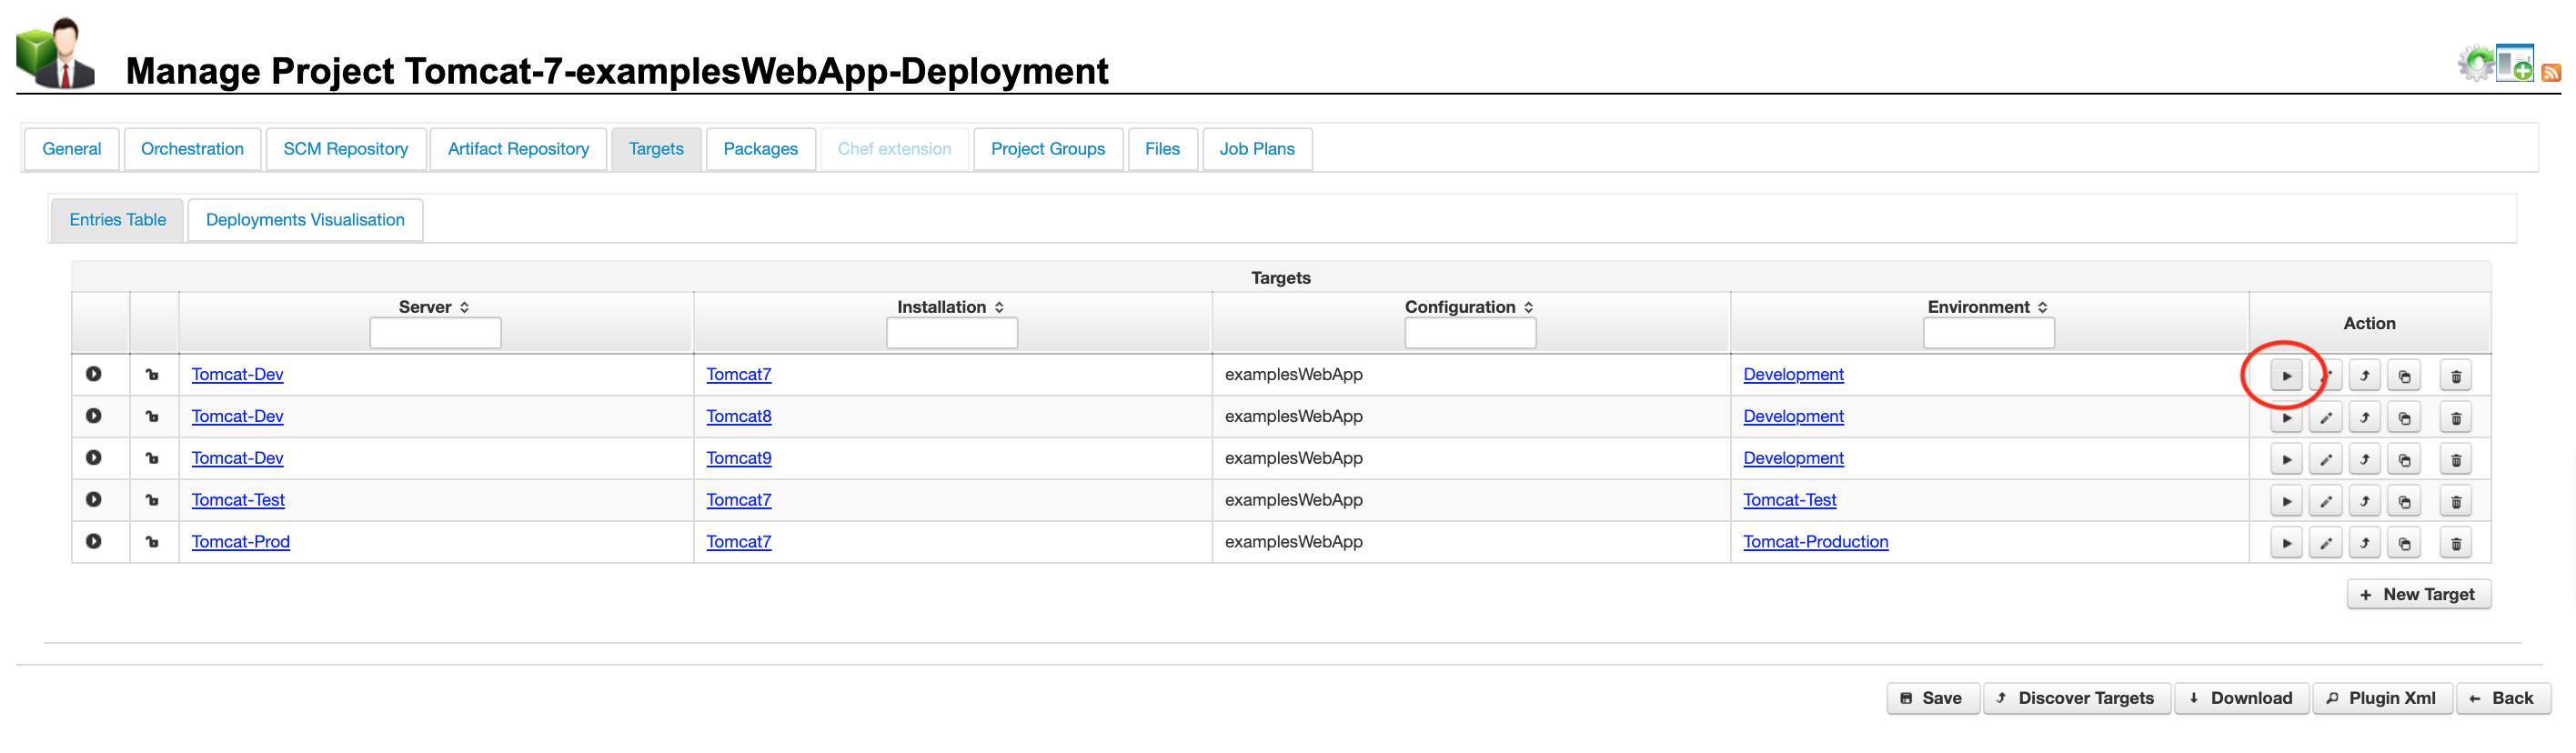
Fig. 8. Click to enlarge
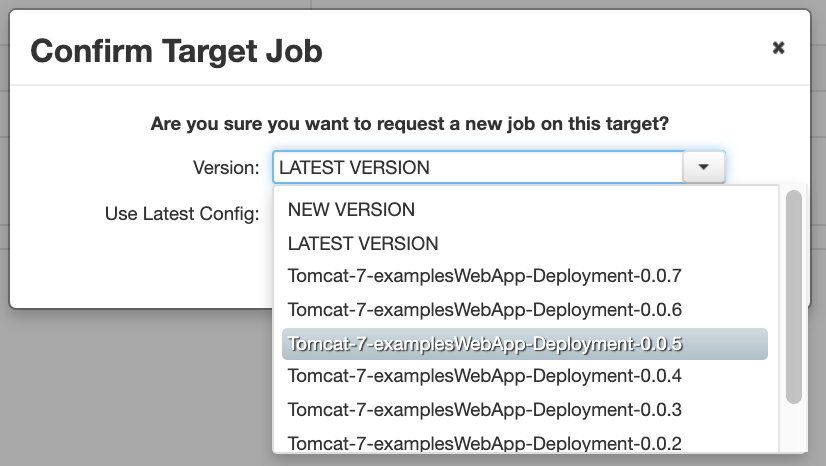
Fig. 9. Click to enlarge
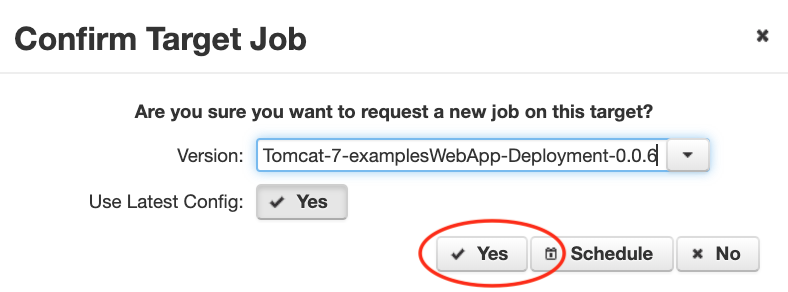
Fig. 10. Click to enlarge